Best Plant Tier List in Roblox: Grow a Garden
14.06.2025 - 19:43:01
Game Guides , Grow a Garden , Roblox

Grow a Garden might seem like a very straightforward game at glance but there are a lot of mechanics involved in it. If you need help choosing which plants to invest in, we're here for you.
Roblox's Grow a Garden isn't just about planting, it's about optimizing. With over 60 crops and constant updates, understanding which seeds to prioritize can be the difference between grinding pennies or making billions.
This guide ranks the best plants in Grow a Garden using up-to-date stats on growth speed, profit potential, renewability, mutation scaling, and strategic utility. Whether you're just starting or running a high-tech farm with gear and pets, this tier list will steer you right.
Before you check out the tier list below, make sure to check out our Grow a Garden store at RPG Stash as well. We've got excellent deals on Grow a Garden seeds, items, and more.
How We Ranked the Plants
This isn't just a random list of plants in a tier list. We went through each plant and scored them using five criteria:
Metric | Description |
Growth Speed | How fast a crop matures and yields |
Profit Potential | Base selling price and mutation multipliers |
Renewability | Whether it regrows or is one-time |
Mutation Potential | Frequency and reward value of mutations |
Utility | Works well with pets, gears, and space efficiency |
Roblox Grow a Garden Plant Tier List (Patch 1.08)
While we've got a detailed guide below for the tier list, we know that not everyone has the time to check it out. If you want the shortcut to the Grow a Garden best plants list, check out the table below.
Tier | Plants | Why They Matter |
S+ | Candy Blossom, Moon Blossom, Beanstalk, Hive Fruit, Mushroom, Sunflower, Cursed Fruit, Purple Dahlia | Best-in-class for passive and burst income. Excellent reharvestability or insane base prices. |
S | Moon Mango, Moon Melon, Lilac, Moonglow, Lotus, Nectarine, Chocolate Carrot, Starfruit, Venus Fly Trap | High base prices, often reharvestable, excellent for scaling late-game. |
A | Cacao, Pepper, Grape, Mango, Dragon Fruit, Rose, Celestiberry, Foxglove, Blood Banana, Red Lollipop | Still profitable but slightly outclassed in yield or space efficiency. |
B | Bamboo, Pumpkin, Pineapple, Apple, Peach, Raspberry, Cranberry, Papaya, Banana, Easter Egg | Situationally useful. Better when mutated. |
C | Tomato, Corn, Strawberry, Blueberry, Daffodil, Watermelon, Glowshroom | Easy access but low payoff. |
D | Carrot, Coconut, Lemon, Nightshade, Cherry Blossom | Low value, slow or single-use. Only useful early or with specific boosts. |
Top S+ Plants to Prioritize
These are the elite crops in Grow a Garden — plants that dominate due to a mix of high base value, reharvest potential, mutation compatibility, and synergy with pets or tools. If you're aiming for billions, build your farm around these.
Candy Blossom
- Base Price: 100,000+ Sheckles per fruit
- Harvest Type: One-time
- Obtainability: Limited-time; available only during Easter event
- Mutation Multipliers: Up to x50 with Rainbow mutation
Candy Blossom is the undisputed king of crop profit. Even with a single harvest, its base value is sky-high, and that's before factoring in its insane mutation scaling. A Gold or Rainbow Candy Blossom easily sells for hundreds of millions or even billions of Sheckles.
How to Use It:
- Don't harvest immediately. Wait for optimal gear + pet conditions to try for mutations.
- Stack mutations with gear effects like growth boosters and size multipliers.
- Save mutated versions for market or duplication if trading is an option.
This is best for late-game players with access to tools, weather control, and mutation-boosting pets. Think of it like your golden ticket — rare, explosive, and game-changing.
Moon Blossom
- Base Price: 45,000 Sheckles per flower
- Harvest Type: Reharvestable
- Obtainability: Available during Blood Moon update
- Unique Trait: Supports high-output passive income farming
Moon Blossom offers the perfect blend of high base value and renewability. Unlike Candy Blossom, it regrows — meaning you can collect profits continuously without replanting. With weather/pet boosts, a well-mutated Moon Blossom patch becomes a steady money printer.
How to Use It:
- Combine with Sprinkler System and Moonlight pets to automate and accelerate growth.
- Great for AFK farming setups where you log in to harvest periodically.
- Works well in night cycle builds focused on Celestial or Bloodlit mutations.
This is best for Mid-to-late game players building a high-efficiency passive income setup.
Beanstalk
- Base Price: 18,000 Sheckles per bean
- Harvest Type: Reharvestable (up to 11 beans per cycle)
- Obtainability: Regular shop (cost: 10 million Sheckles)
- Type: Only Prismatic plant in the game
Beanstalk is the best non-event plant, hands down. While its base value is lower than Moon Blossom or Candy Blossom, its reharvest power and volume make it king of sustainable income. The plant generates massive yield per plot, and its stacking potential is unmatched.
How to Use It:
- Run parallel rows of Beanstalk to scale quickly.
- Boost using gears that amplify quantity and size rather than mutation.
- Prioritize this plant for long-term economic growth without needing rare events or updates.
It's best for all players, especially those who don't want to rely on Robux or events. Ideal for consistent growth.
Mushroom
- Base Price: 136,000 Sheckles (highest in game)
- Harvest Type: One-time
- Obtainability: Divine seed; rare drop or shop-locked
- Mutation Potential: Extremely profitable
Even without a mutation, the Mushroom's base value tops every crop in the game. It's a divine seed, and while you only get one harvest per plant, that one harvest can be absolutely massive. A Gold or Rainbow Mushroom is absurdly valuable and relatively easier to mutate than Candy Blossom due to its lower mutation pool.
How to Use It:
- Stack with mutation gears and weather rods before harvest.
- Perfect for burst cash farming when you need a big currency jump (e.g., buying gear or pets).
- Use with Celestial night cycle triggers for advanced mutations.
This is best for late-game players who can afford divine seeds and want instant returns over time-based farming.
Sunflower
- Base Price: 135,000 Sheckles per flower
- Harvest Type: Single flower every ~30 minutes
- Obtainability: Shop-limited/event-dependent
- Special Mechanic: High-value, low-frequency output
The Sunflower may be slow, but each flower it yields is nearly equal to a Mushroom in value. Once planted, it's zero-maintenance — just wait for it to produce. This makes it ideal for hybrid setups where some crops run on automation while others cycle faster.
How to Use It:
- Keep in back rows or corner tiles — doesn't need much interaction.
- Combine with idle gameplay or AFK cycles.
- Stack several to passively produce while actively farming higher-frequency crops like Beanstalk or Moon Blossom.
The sunflower is good for players who want low-effort, high-value rewards over time. It's a fan favorite among all players of the game.
Hive Fruit
- Base Price: 45,000 Sheckles per fruit
- Harvest Type: Multiple fruits per cycle
- Obtainability: Bee Swarm Event crop
- Strength: Multi-fruit output + high base price
Think of Hive Fruit as the middle ground between Moon Blossom and Beanstalk — decent base price, multiple fruit per yield, and great synergy with gear. It doesn't top Candy Blossom in pure value, but its volume-based economy makes it excellent for scaling income across a large farm.
How to Use It:
- Pair with Sprinklers and Bee Pets for bonus synergy.
- Mass-produce Hive Fruits in event-limited windows.
- Keep harvesting regularly to stockpile for trading or bulk sales.
It's a good choice for mid-to-endgame players who want reliable volume farming with decent margins.
Cursed Fruit
- Base Price: 20,000 Sheckles per fruit
- Harvest Type: Reharvestable
- Obtainability: Event crop, currently vaulted
- Why It Matters: Scales similarly to Beanstalk with fewer beans
Though often overshadowed by flashier plants, Cursed Fruit delivers consistent value, especially when placed in a mutation-optimized environment. If you have access to one, don't remove it—it's still a money machine when managed well.

How to Use It:
- Use in alternating rows with Beanstalk or Moon Mango to vary cycles.
- Apply mutation-focused gear to extract more long-term value.
- Great for diversifying crop strategy in high-level farms.
It's best for veteran players who stocked up during the event or traded wisely. If you missed out on this, don't go out of your way to get the seeds as it will take a lot of money to do so.
Purple Dahlia
- Base Price: ~67,000 Sheckles per flower
- Harvest Type: Reharvestable
- Obtainability: Regular shop (may rotate in/out)
- Why It Matters: Excellent yield, good for flower-focused builds
One of the few multi-harvest flowers that can rival fruits in value. Each Dahlia is high-value, and the plant continues to yield without replanting. It's great for farms using tools that boost flower-specific traits like size and color.
How to Use It:
- Best in corner plots with color-boosting gear
- Use weather rods to force rare floral mutations
- Ideal for diversified farms targeting event and flower-based missions
It's a good choice for aesthetic builders, gear collectors, and players running multi-type farms. It's one of the best looking fruits in the game.
Best Early Game Plants
When you're starting out in Grow a Garden, you're limited by seed cost, gear, pets, and weather tools. Your early game strategy should be about speed, efficiency, and value per sheckel. The goal is to build momentum, unlocking better gear and accumulating enough currency to start investing in higher-tier crops.
The following crops are your foundation — fast growers, cheap to plant, and capable of creating a snowball effect with the right planning.
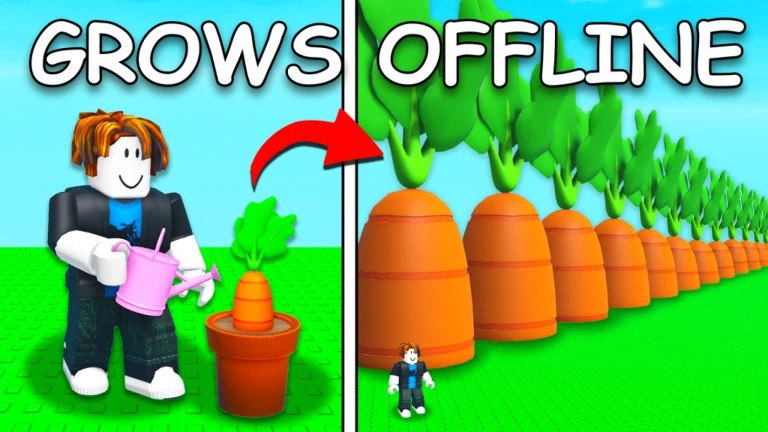
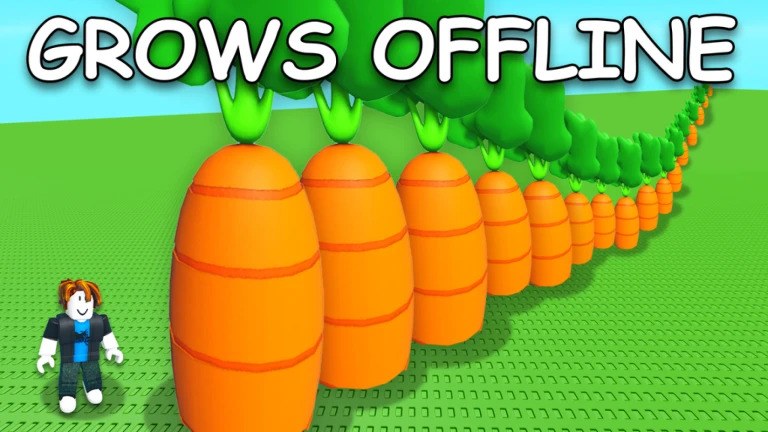
Carrot
- Cost: Extremely cheap
- Base Price: Very low (under 1,000 sheckels)
- Harvest Type: Single-use
- Growth Speed: Fastest crop in the game
Carrots grow lightning fast. They're the best crop for learning the loop of planting, growing, and selling. While their profit is low, the quick turnover rate lets you stack early-game currency, unlock garden slots, and complete beginner quests efficiently.
Pro Tips:
- Focus on volume over value. Plant full rows and harvest every few minutes.
- Great for completing mission tasks that require multiple harvests.
- Stack with growth-speed pets or gear for even faster cycles.
Strawberry
- Cost: Low
- Base Price: Low (~1,000-2,000 sheckels)
- Harvest Type: Reharvestable
- Growth Speed: Moderate
Strawberries are your first introduction to renewable crops. Once planted, they continue producing fruit without needing to be replanted. This saves seeds and time, helping you ease into passive income mechanics without needing Robux or high-end gear.
Pro Tips:
- Use Strawberry rows as your passive background income while you actively harvest carrots or corn.
- Start watching for wet or gold mutations even in early game — they can surprise you.
- Pairs well with sprinklers when you unlock them.
Corn
- Cost: Affordable
- Base Price: Around 1,000-1,500 sheckels
- Harvest Type: Reharvestable
- Growth Speed: Medium-fast
Corn strikes a balance between value and growth speed. It produces more per tile than carrots, and being reharvestable, it starts paying for itself after just a couple of harvests. It's not as profitable as mid-game crops, but it gives you breathing room while upgrading.
Pro Tips:
- Use Corn when you're AFK or semi-active — its reharvest saves time.
- Stack Corn near Sprinklers once you get them for hands-free harvesting.
- Focus on size-boosting tools to increase yield per harvest.
Mango
- Cost: 100,000 Sheckles (Mythical seed tier)
- Base Price: ~5,866 Sheckles
- Harvest Type: Single-use
- Growth Speed: Slow
While Mango isn't "early-game cheap," it becomes accessible fairly early due to its availability in the regular shop. It's your first real profit spike when you're done with crops like Carrot or Corn. It doesn't reharvest, but its base value and mutation potential make it a solid transitional crop.
Pro Tips:
- Only plant Mangos when you can afford to experiment with mutations.
- Use mutation-boosting weather or tools to try for early Gold Mango flips.
- Space them out between faster, lower-cost crops for balance.
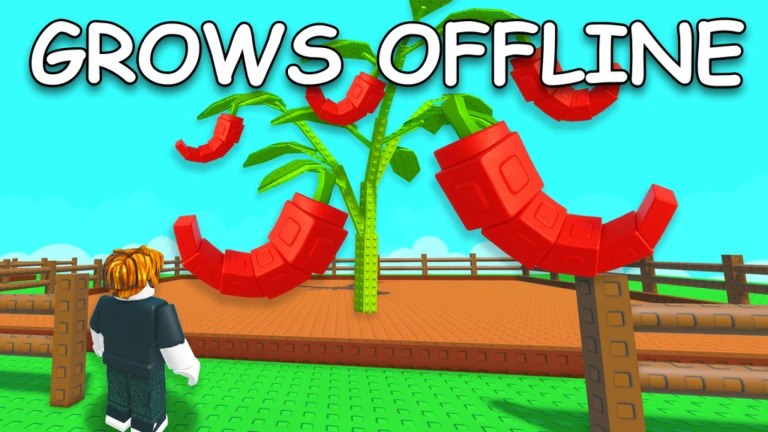
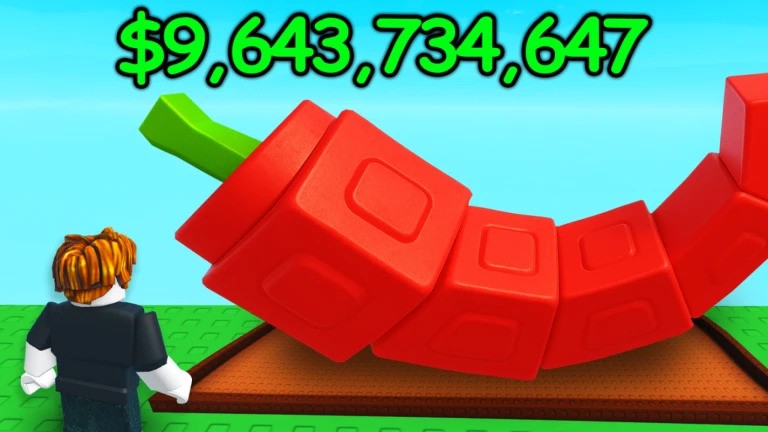
Pepper
- Cost: 1 million Sheckles (Divine tier)
- Base Price: ~7,220 Sheckles per pepper
- Harvest Type: Reharvestable (4-6 peppers per cycle)
- Growth Speed: Moderate
The Pepper plant is where your garden turns professional. It gives you multiple fruits per plant, reharvests, and has solid base value — making it one of the most cost-efficient divine crops. If you get lucky with a mutation early on, you can skip straight into high-end farming.
Pro Tips:
- Place Peppers in areas with good sprinkler or gear coverage to multiply yield.
- Prioritize pepper upgrades before moving to rarer seeds like Moon Melon or Cacao.
- Sell most peppers for profit, but keep a few mutated ones for collection or events.
Early Game Crop Strategy
Now, don't be trigger-happy when it comes to your crops. It's going to take some smart planning to turn these into something that's profitable. Here's how to use these plants to build your base:
Phase | Goal | Crops to Focus On |
Starter (0-50K sheckels) | Learn cycle, farm quick sheckels | Carrot, Strawberry |
Early Growth (50K-300K) | Unlock garden slots, save for tools | Corn, Strawberry, Blueberry |
Prep for Expansion (300K-1M) | Scale income, get sprinklers | Mango, Pepper |
Transition (1M-5M) | Save for divine seeds | Pepper, Mango, Celestiberry |
Early Game Tips for Faster Progress
Focus on stacking narrow plants like Strawberries or Peppers to maximize space
In Grow a Garden, space is your most limited and valuable resource in the early game. Narrow plants like Strawberries, Peppers, and Corn take up less horizontal and vertical space than wide crops like Watermelon or Pumpkin.
How to Apply It:
- Place narrow crops in tight rows, leaving minimal gaps between.
- Try a checkerboard pattern with Sprinklers in between for max efficiency.
- Reserve your limited wide-tile areas for future use with divine or event crops.
You can fit more crops per tile, increase harvest cycles, and farm more money per minute with minimal seed cost.
Avoid one-time plants unless you're experimenting with mutations or completing missions
Plants like Carrot and Pumpkin are one-and-done. While fast-growing, they require constant replanting and cost more seeds in the long run.
But there are exemptions to this. Use one-time crops only when:
- You're trying for a mutation reward
- A mission or quest requires them
- You need quick harvests to complete early objectives
How to Apply It:
- Focus your main plots on reharvestable plants like Strawberries, Peppers, and Corn.
- Use side plots or test rows for one-time crops.
You'll avoid wasting seeds and time on low-efficiency planting loops.
Invest in tools, not aesthetics — weather rods, growth boosters, and gear slots accelerate income more than decorations
It's tempting to decorate your garden early on, but cosmetics don't affect your sheckel count. Functional upgrades directly impact crop growth, mutation rates, and passive income potential.
Essential Early Tools:
- Sprinklers: Automate watering and growth for multiple crops
- Weather Rods: Force mutation-friendly conditions (e.g., rain for Wet, night for Celestial)
- Gear Slots: Equip items that boost size, value, or mutation chance
How to Apply It:
- Save your first few hundred thousand sheckels for Sprinklers and Mutation Gear, not statues or fences.
- Use tools to create mutation farms that pay off big when RNG hits.
Faster growth, more mutations, higher yield — all leading to exponential income instead of linear gains.
Sell everything fast at first — don't hoard unless it's a mutated or divine crop
In the early game, cash flow is everything. Hoarding crops you can't mutate or replant just clogs inventory space and slows your climb toward high-tier seeds.
What to Keep vs. Sell:
- Sell: Regular Corn, Strawberries, Carrots, etc.
- Keep: Any crop with a mutation tag (Gold, Rainbow, Wet, etc.)
- Keep: Any Divine, Prismatic, or Event-exclusive crop for trading or cloning later.
How to Apply It:
- After each harvest, do a quick scan: if it's not mutated or rare, sell it immediately.
- Use proceeds to upgrade your plot, gear, or seed tiers.
With this, you build a self-sustaining cycle of planting → harvesting → upgrading without stalling your progress on deadweight crops.
Ready To Max Out Your Crops?
Some crops are simply better than others in Grow a Garden, and choosing the right ones can make or break your profit in the future. Hopefully, you don't make bad choices when it comes to seeds. If you're running out of money in the game, come check out this money-making guide for Grow a Garden next.
FAQs
1. What's the difference between S+, S, and A-tier crops?
- S+ Tier crops are the absolute best in the game, offering either sky-high base value (like Candy Blossom), massive reharvest yield (like Beanstalk), or both. They're often event-limited or divine/prismatic-tier.
- S Tier crops are still top-tier, but usually miss a single factor like being one-time harvests or slightly lower base values.
- A Tier crops are efficient but more common, great for scaling income and mutations but not quite endgame.
Think of S+ as billionaire crops, S as consistent millionaires, and A as your reliable workhorses.
Is Candy Blossom really the best crop in the game?
Yes — and it's not even close.
Candy Blossom has:
- A base value over 100,000
- The potential to mutate into Rainbow variants worth billions
- A limited-time availability, making it a rare economic weapon
If you have one, build your farm strategy around it. If not, target events or trading opportunities to get one.
What are the best crops if I don't spend Robux or get event plants?
Focus on these non-event, high-efficiency crops:
- Beanstalk (Prismatic): Reharvestable with 18,000 base per bean
- Pepper (Divine): Grows multiple per plant, 7,220 base each
- Mango (Mythical): High base price for early-mid game farming
- Mushroom (Divine): Single-use but 136,000 base price
These are all available in the regular seed shop and can carry you to late game with smart planning.
Which crops should I avoid planting, even if I have them?
Avoid planting these unless:
- You're completing a mission
- You want to try for a rare mutation
- You literally have nothing else
Low-tier crops to skip:
- Carrot, Coconut, Corn (too low value, one-time)
- Glowshroom, Tomato, Daffodil (bad ROI)
- Blueberry, Strawberry (only useful early on or mutated)
Your space is limited. Don't waste it on crops that bring in pennies when you could be earning thousands per harvest.
How often does the crop tier list change with updates?
Pretty regularly. With every major patch — especially ones that introduce:
- New events (e.g., Bee Swarm, Blood Moon)
- New seeds or shops (e.g., Twilight Shop)
- Balance changes or buffs/nerfs
:the tier list shifts significantly. For example, Moon Mango was demoted after a nerf but will be buffed again soon, which might move it back into S+.
Pro Tip: Always check patch notes and the wiki to see which crops were updated. A "meh" plant today could be top-tier tomorrow.