


Horadric Strongrooms Guide – Diablo 4 Season 9 Loot & Strategy
04.07.2025 - 17:58:59
Diablo 4 , Game Guides , Gameplay Guides

Diablo IV’s Season 9, called Sins of the Horadrim, brings what might be the coolest feature we’ve gotten in a while: Horadric Strongrooms. Think of them as brutal obstacle courses packed with treasure—they’ll definitely put your skills to the test, but they’re also your ticket to some seriously impressive seasonal loot.
You know those creepy red portals you’ve been spotting in Nightmare Dungeons? The ones that practically scream "danger"? Well, here’s my advice: go for it. Trust me on this one—whatever’s waiting inside is worth the risk.
In this article, we will dive deeper into Horadric Strongrooms and why you should raid them as many times as you can. To ensure that you won’t get obliterated by enemies inside these mini-dungeons, deck your characters out by purchasing gear from our D4 Store. We offer items from Season 9 and more!
What Are Horadric Strongrooms?
Horadric Strongrooms are optional, timed combat challenge zones located within Nightmare Dungeons and Nightmare Escalation Dungeons. Think of them like elite side rooms with enhanced rewards, but where everything is trying to kill you faster.
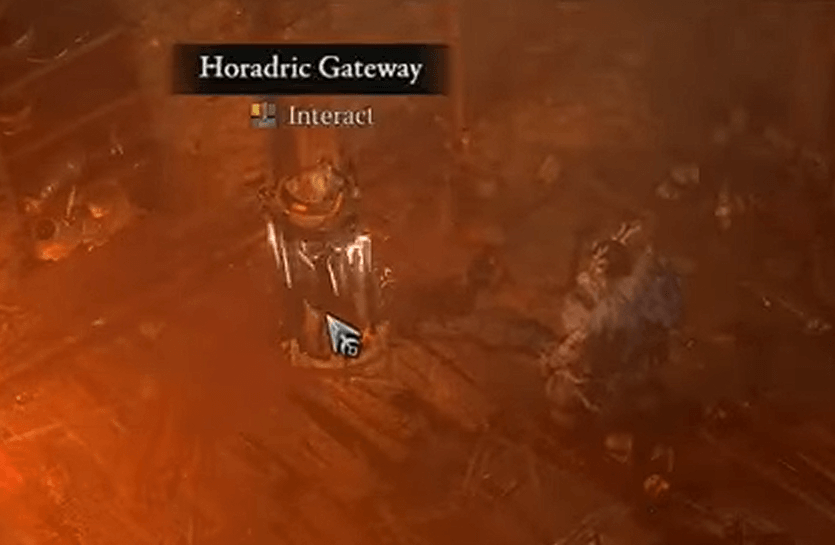
You’ll access these via Horadric Gateways—red-glowing braziers that appear either randomly or through specific sigil affixes. Once activated (after defeating a wave of enemies), the gateway transforms into a portal that leads directly into the strongroom arena.
How to Find The Horadric Strongrooms
Alright, so you’re sold on the idea. You’ve heard all the buzz about the amazing loot, the insane challenge, the bragging rights—but now you’re probably wondering how to actually find these Horadric Strongrooms. Even better, is there a way to make them appear when you’re actually in the mood to dive in, instead of just hoping the game decides to be generous? Here’s the thing: Season 9 actually gives you several different ways to either stumble into these things naturally or straight-up force them to spawn when you want them.
First off, the most common method is the random spawn. While running through Nightmare Dungeons or the new Nightmare Escalation Dungeons, you might notice a red-glowing brazier on your minimap—this is a Horadric Gateway. They’re hard to miss: they show up clearly on your map, and once you interact with one, it spawns a small wave of enemies. Defeat them, and the gateway will activate into a portal to the Strongroom itself. Easy, right? Well, sometimes.
The randomness can be frustrating for players farming specific rewards, which is why Blizzard introduced more deterministic ways to secure Strongroom access. Here’s how to take control:
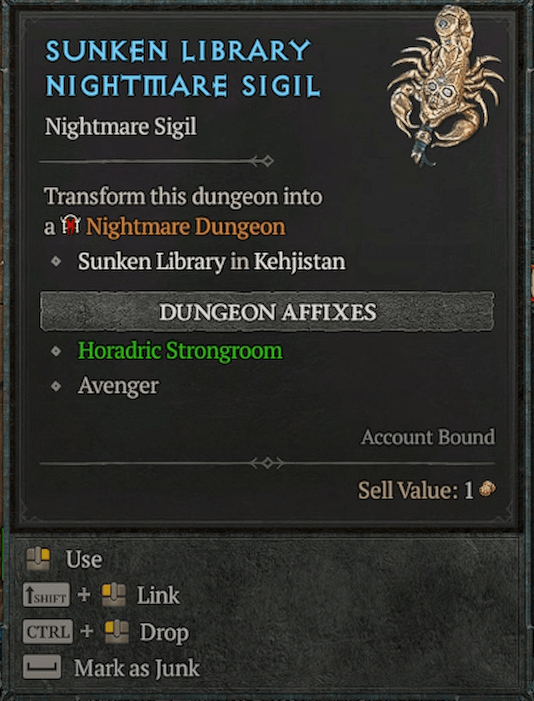
- Nightmare Sigil Affixes: Some dungeon keys now drop with a special affix that literally reads “Horadric Strongroom”. If your key has this affix, it’s a guarantee that your next dungeon will contain a Strongroom. These affixes are visible in the dungeon tooltip—just look for any mention of Strongroom content.
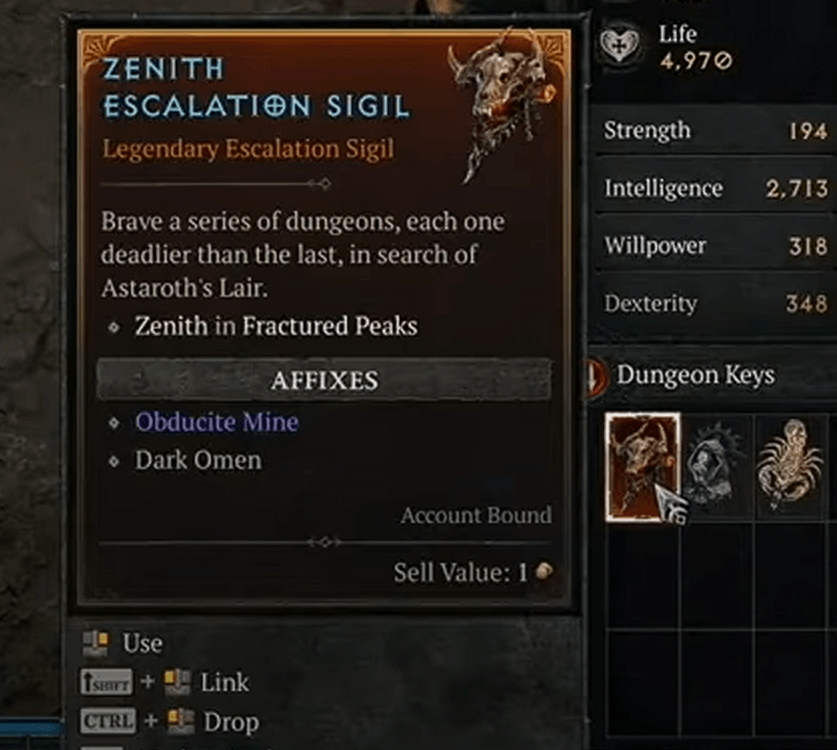
- Escalation Sigils: Introduced as part of the new dungeon tier system, Escalation Sigils often roll with Strongroom-related affixes. These are a great farming option, since running a Strongroom may even reward you with another Escalation Sigil, creating a feedback loop for more runs.
- Horadric Wayfinder: This isn’t a player-usable item but rather a narrative mechanic that helps “pull” you toward Strongroom locations when one is nearby. It’s part of the lore-meets-QoL design that Diablo IV is threading into its seasonal systems. In some cases, these might be tied to NPC objectives or map pings that indicate a nearby Horadric secret.
You should also know that Strongroom frequency is tied to World Tier. The higher the tier you’re playing in (especially Torment 3 and above), the better the odds that a Strongroom will appear naturally. So if you’re grinding World Tier 1 and haven’t seen one yet—it’s not you, it’s your difficulty level.
Time to Put You to the Test
The moment you step into a Horadric Strongroom, you get a quick breather—a chance to think before all hell breaks loose. Right there in the center, you’ll spot the Horadric Artifact Pillar, this mystical thing that’s the heart of the room and lets you tweak the challenge to come.
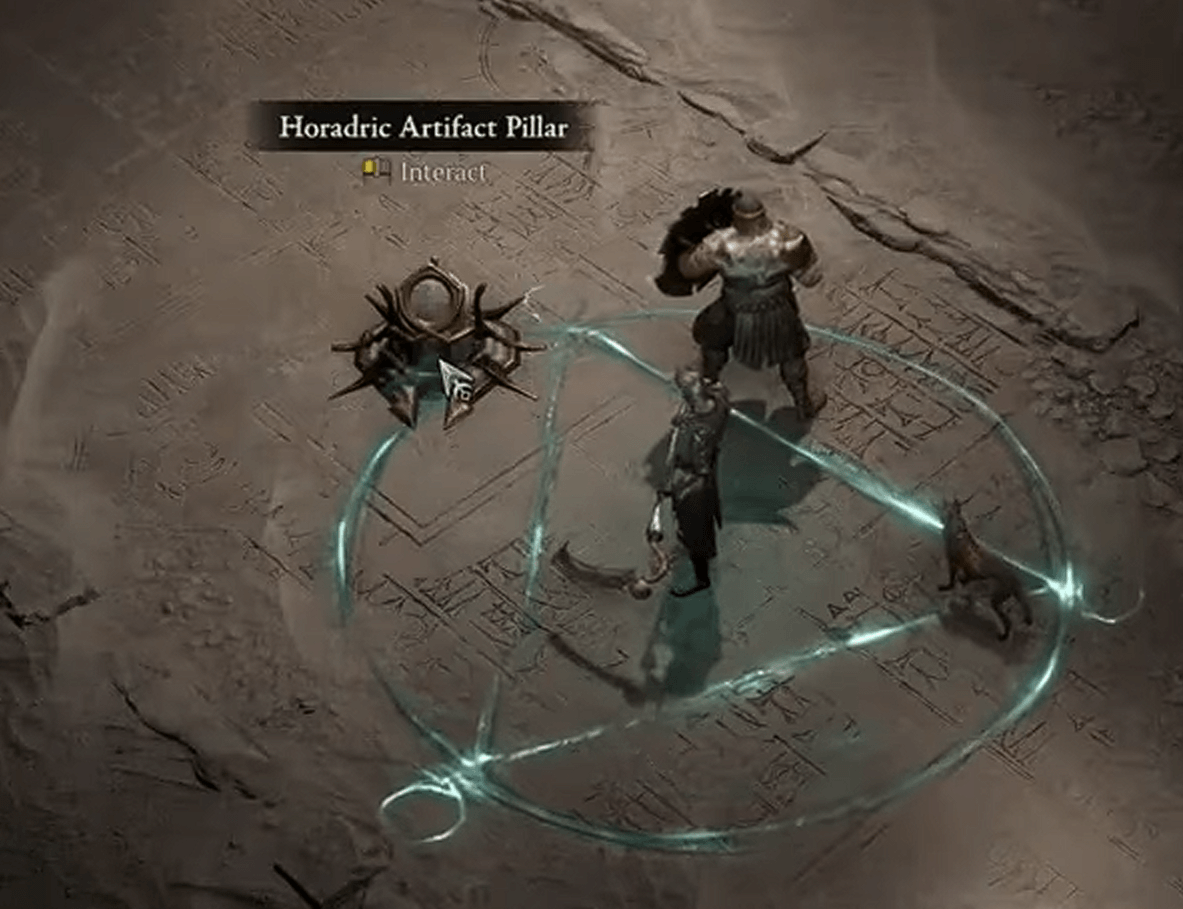
Interacting with this pillar triggers the Test selection phase, a strategic mini-draft where you’re shown five random Tests, also referred to in-game as Statue Modifiers or Shrine Blessings, depending on how they’re presented. Your task: pick any three.
Each Test you select modifies how the next phase of the Strongroom plays out. Some tests buff shrine or pillar interactions, others change enemy behavior, and some just straight-up make the run harder (and more rewarding). Each Test has a rarity, and typically, the higher the rarity, the more impactful the effect—and the more attunement it can potentially help you generate.
You can choose a maximum of three tests for the Horadric Strongroom. We recommend that you select the tests that are appropriate for your particular Diablo IV build.
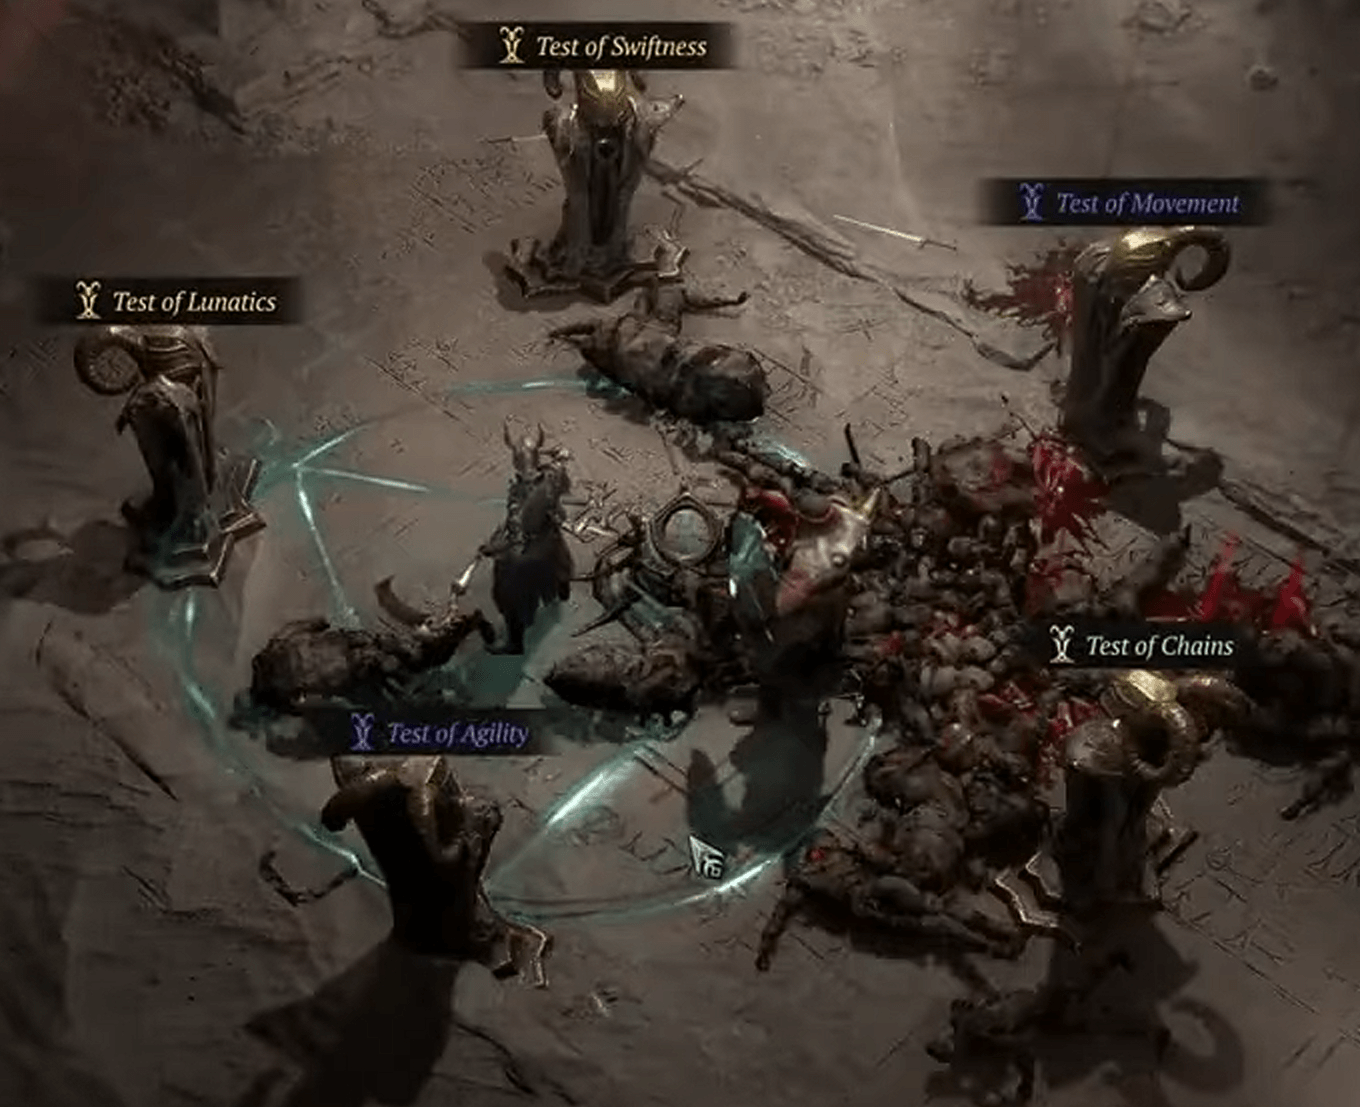
Here are a few examples of what these Tests might do:
- Enhanced Shrines: Causes activated shrines to grant additional effects, like movement speed boosts or AoE pulses.
- Extra Mob Waves: More enemies spawn from shrines and pillars—perfect for AOE builds aiming for high attunement.
- Demonic Summoning: Hit certain attunement thresholds and summon elite foes like The Butcher mid-run. Risky, but the rewards scale.
- Pillar Buffs: Grants additional time for the 10-second kill buff or improves attunement yield from circle-clears.
- Strange Afflictions: Some Tests introduce environmental hazards, curse effects, or enemy modifiers, dialing up the danger for a shot at rarer rewards.
It’s worth noting that the five offered Tests are semi-random, pulled from a pool that seems to scale in complexity and power with the World Tier and Dungeon Affix level. The more escalated the dungeon, the more powerful and exotic the modifiers you’ll see.
Also important: the choices you make here persist for the entire Strongroom encounter. You can’t undo or swap them midway. So it pays to understand your build’s strengths and limitations before selecting.
Are you running a screen-clearing Ball Lightning Sorcerer? Go heavy on mob spawn buffs. Running a single-target-heavy Poison Rogue? You might lean toward pillar-focused buffs that reward precision and pacing over chaos.
In short, the Test phase is your chance to shape the battlefield. Choose wisely, and you’ll walk away with a mountain of attunement and a glowing Grand Horadric Cache. Choose poorly and you might get a glowing resurrection timer instead!
Once your tests are chosen and the ritual is complete, the calm vanishes and the real fun begins. A countdown timer appears—100 seconds on the clock—and your job is crystal clear: kill everything, and kill it efficiently.
Your main objective during this phase is to gather as much Horadric Attunement as possible. Attunement is essentially your score in the Strongroom, and it directly impacts your final rewards. The more attunement you collect, the more powerful the Grand Horadric Cache becomes—and the stronger the boss you’ll have to face at the end.
The Strongroom rapidly fills with waves of enemies—more than you'd typically see in a dungeon room. This isn’t a casual skirmish; it’s a full-on bloodbath. The enemy types vary depending on dungeon themes, but expect constant spawns, tight combat windows, and pressure from all directions.
Scattered throughout the room are Shrines—small nodes you can activate to trigger effects. Without any Tests active, these shrines just summon additional waves of enemies. But if you picked shrine-enhancing Tests during the prep phase, they might:
- Drop temporary buffs
- Spawn stronger elites
- Chain-trigger other effects (e.g. shockwaves, explosions, etc.)
Shrines are crucial for spawning large groups quickly, which is especially valuable if your build thrives on area-of-effect (AOE) destruction.
Alongside shrines, you’ll find several Horadric Pillars. These are key to attunement min-maxing. Clicking a pillar creates a glowing circle on the ground. Your job? Kill a set number of enemies inside the circle before time runs out.
Successfully clearing a pillar grants you a 10-second attunement buff. During this window, every enemy you kill drops bonus attunement energy. These “attunement orbs” are automatically absorbed, and they stack up fast if you time your buffs right.
Your total attunement score is tracked in a UI element at the top right of the screen. The bar is divided into six levels—each one representing a higher tier of reward scaling. As you gather more attunement, the UI bar will glow, flash, or pulse when you cross thresholds. It’s incredibly satisfying.
Some specific tests may even unlock bonus events if you cross attunement thresholds. For example:
- Reaching 2,000+ attunement might summon The Butcher, a terrifying elite demon who drops bonus loot when defeated.
- Other thresholds may cause shrine or pillar behavior to evolve mid-run.
Here Comes the Boss
As soon as the 100-second timer hits zero—or in some cases, once you reach a particularly high attunement threshold—a portal flares open, and your final challenge emerges: the Strongroom boss fight.
This phase is your last test. The Horadrim aren’t just impressed by body counts—they want proof of your resilience, precision, and ability to survive under pressure. So naturally, they drop a boss right on top of you while you’re still wiping blood off your gloves.
The boss you encounter can come from one of two categories. Standard bosses are drawn from the regular Nightmare Dungeon pool—think The Blood Bishop, Tomb Lord, or Spider Host. These fights are familiar but still deadly, especially when stacked with any dungeon affixes and environmental effects from earlier.
Special bosses are also summoned if you have selected certain tests during the preparation phase, such as one that rewards you for racing 2,000+ Horadric Attunement. The bosses that can come out of this may include The Butcher.
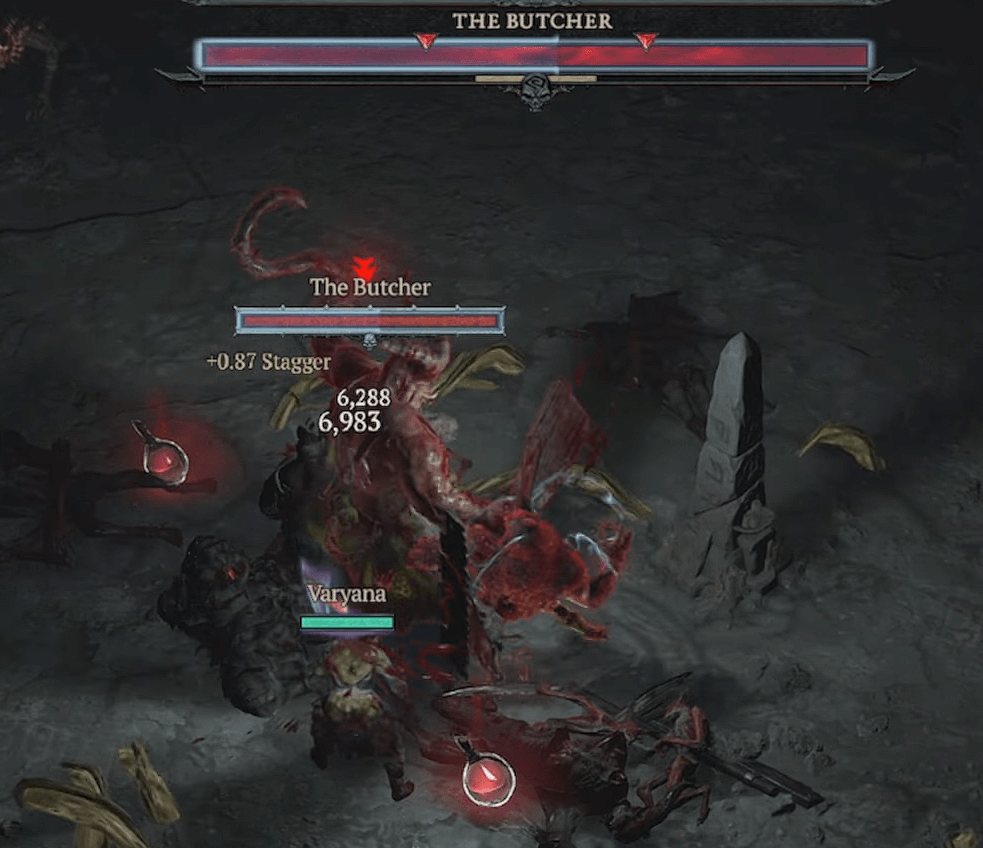
Keep in mind that Strongroom bosses pack a punch. Here’s what you can expect:
- They scale with dungeon level and world tier difficulty
- May inherit affixes from the Strongroom modifiers (increased health, movement speed, etc.)
- Spawn immediately without any prep time and portal animation
- Often accompanied by mobs
Defeating the boss rewards you with the Grand Horadric Cache—a beautifully ornate treasure chest and your final scorecard. Its contents are directly scaled based on your total Horadric Attunement.
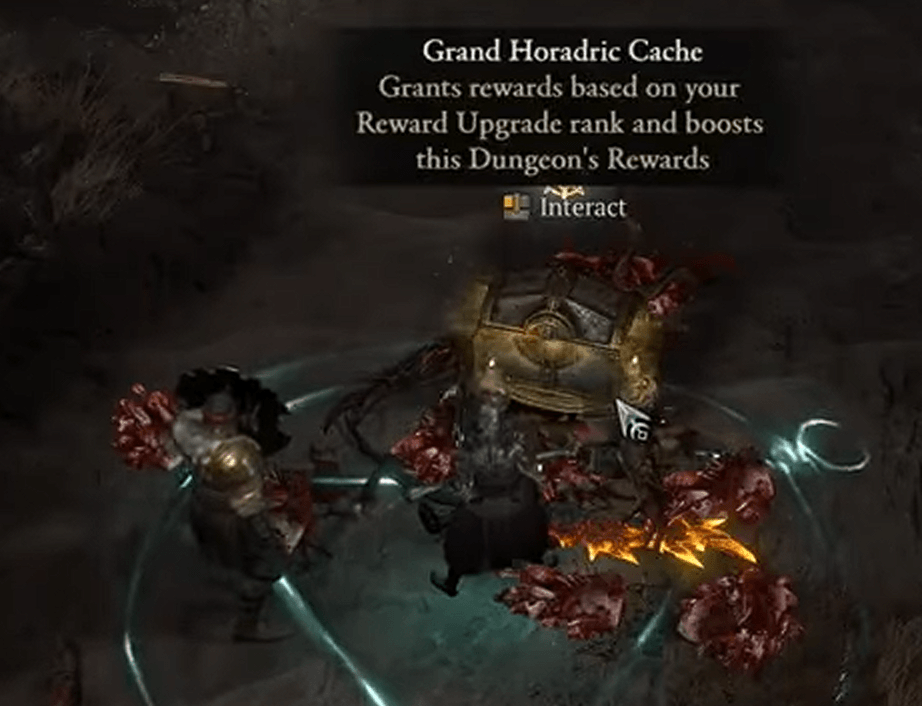
The things that you can get from the Grand Horadric Cache includes:
- Multiple Legendary or Ancestral items
- Horadric Tomes and Phials, which are needed to craft Horadric Jewels
- Rare crafting materials and upgrade fragments
- A possible Escalation Sigil to open higher-tier dungeons
What Are Horadric Jewels?
You just popped open a Grand Horadric Cache and found some mysterious Tomes and Phials. Now you're probably asking yourself, "What are these Horadric Jewels everyone's hyped about?"
Well, great question! Horadric Jewels are a big deal in Diablo IV Season 9. Basically, they're like special, customizable power-ups you can craft. You get the rare ingredients to make them mostly from Horadric Strongrooms. These Jewels are awesome because they let you fine-tune your character's build in ways that regular gear or skill points just can't.
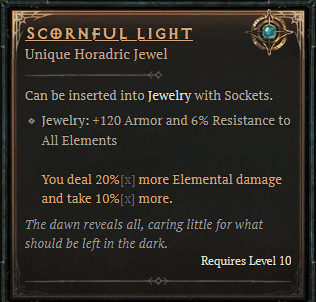
To craft a Horadric Jewel, you will need two things: Horadric Tomes and Horadric Phials. The former are scrolls that act as blueprints for the jewels, while the latter is the currency needed to actually forge them.
These resources are account-bound, and designed to be season-specific, meaning they won’t carry over to future content (unless Blizzard decides to make Jewels a permanent addition later).
You should know that Horadric Jewels provide you with a huge boost in power. That is because they are essentially socketable items that grant certain bonuses, such as:
- Offensive Boosts:
- +% crit damage against burning enemies
- +% attack speed while under a shrine effect
- Chance to trigger explosions on kill
- Defensive Buffs:
- Damage reduction when near a Horadric Pillar
- Increased resistances while below 50% life
- Barrier generation on elite kill
- Utility Enhancements:
- Cooldown reduction during Strongroom timer phase
- Movement speed when shrine buffs are active
- Increased XP gain from Strongroom events
Should You Farm Horadric Strongrooms in Diablo 4 Season 9?
Horadric Strongrooms take what you love about Diablo IV—killing monsters and getting awesome loot—and make it even more intense! You'll need to plan carefully, deal with time limits, and you'll get some fantastic rewards. Whether you're trying to get Escalation Sigils, hunt down Horadric Jewels, or just want to show off how strong your character is, Strongrooms are a super fun part of Season 9's endgame.
So, what can you say about Season 9: Sins of the Horadrim’s seasonal mechanic? Do you see the Horadric Strongrooms as something you’d like to farm constantly or not? Let us know in the comments!