


OSRS Deep Sea Trawling Guide
11.12.2025 - 05:47:58
Game Guides , OSRS Guides , Runescape

Deep Sea Trawling is one of the most rewarding Fishing activities introduced alongside Sailing, offering a fast-paced and highly profitable alternative to the classic “stand still and fish” methods. With the right ship setup, proper net management, and smart route selection, you can haul in thousands of high-value fish per hour while racking up impressive Sailing and Fishing experience. In this guide, we’ll walk you through the optimal boat builds, the best shoals to follow, how to avoid dangerous sea creatures, and everything else you need to know before you set out to trawl the open waters.
Boat Setup
Before you can engage in deep-sea trawling, you will need an appropriate boat for it. Using a sloop is your best option since it can house all the facilities that are necessary for maximum efficiency deep sea trawling, and talking about efficiency, you would want to have the following requirements to take advantage of everything this activity has to offer:
Minimum Level | Recommended Level | |
Sailing Level | 84 | 93 |
Construction Level | 78 | 84 |
Fishing Level | 86 | 91 |
If you do not have the required levels to access this content, you can use our skill boosting services to boost your levels to where they need to be!
Once you have the requirements, here is what your boat is going to look like:
- Boat type: Ironwood/Rosewood Sloop
- Cargo hold: Ironwood/Rosewood
- Helm: Adamant/Rune/Dragon
- Mast and Sails: Ironwood/Rosewood Cotton Sails
- Keel: Rune/Dragon
- Brazier: Eternal brazier
- Front facilities: Inoculation station alongside 2 cotton trawling nets
- Middle facilities: Fathom stone to locate shoals, chum spreader to catch more fish per hour, crystal extractor if you want more Sailing experience, range if you want to cook your food.
- Back facilities: 2 keg barrels for Trawler’s Trust and Horizon’s lure/Whirlpool surprise, an advanced/normal teleport focus, wind/gale catcher
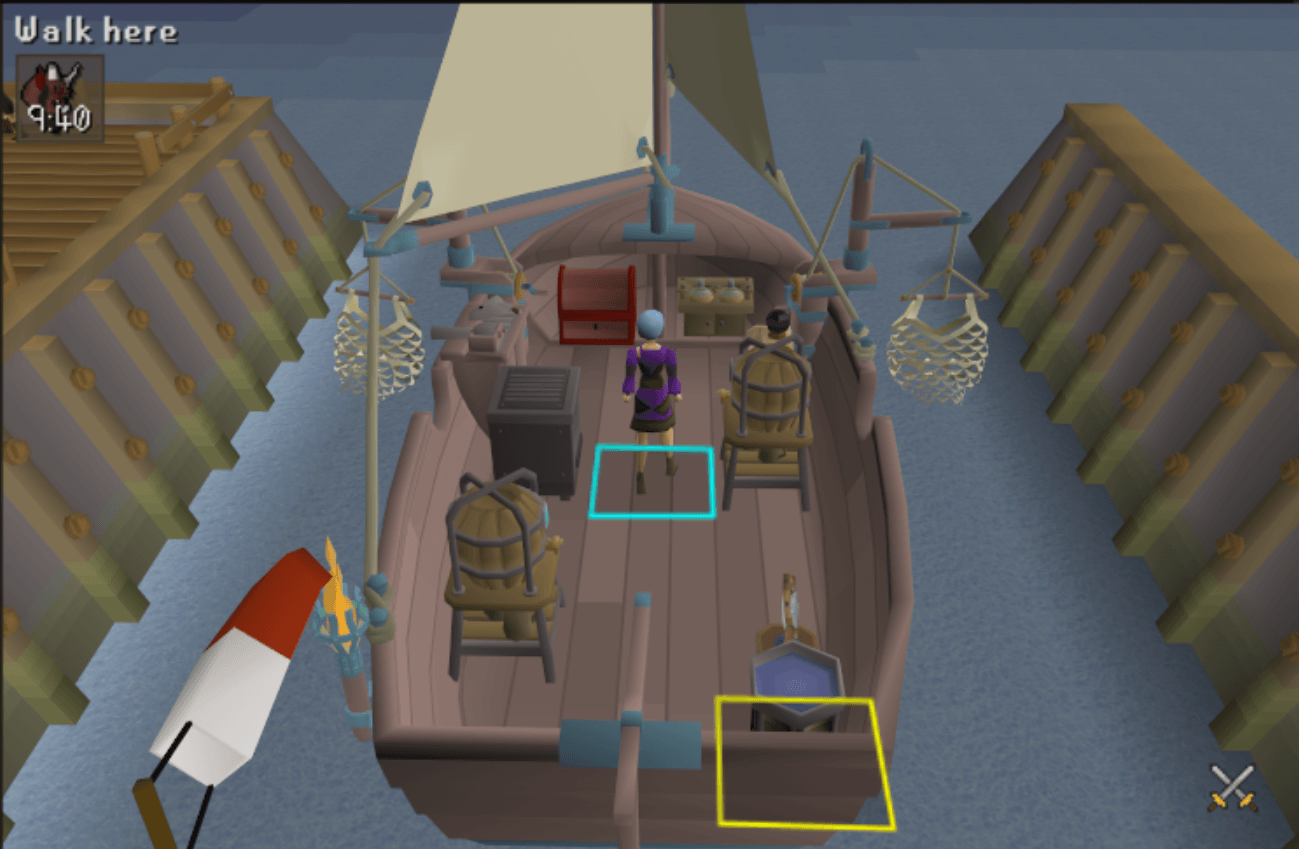
This setup is optimised for getting the best experience and fish per hour. Having a better cargo storage will allow you to have longer trips, and a chum spreader will allow you to catch more fish, double keg barrels will allow you to gain more experience and fish, and the rest of the ship allows you to enter any dangerous water with ease and speed.
If you lack funds to create such a ship, feel free to use our fast and secure OSRS gold service to get anything you desire in the game!
Deep Sea Trawling
Before you set sail to catch some profitable fish, you must make sure that you are equipping your angler’s outfit for maximum experience. It is also recommended that you bring along fine fish off-cuts and empty crates. Fine fish off-cuts will allow you to catch more fish per hour, and empty fish crates will allow you to prolong your trips, as each crate can hold 10 fish inside.
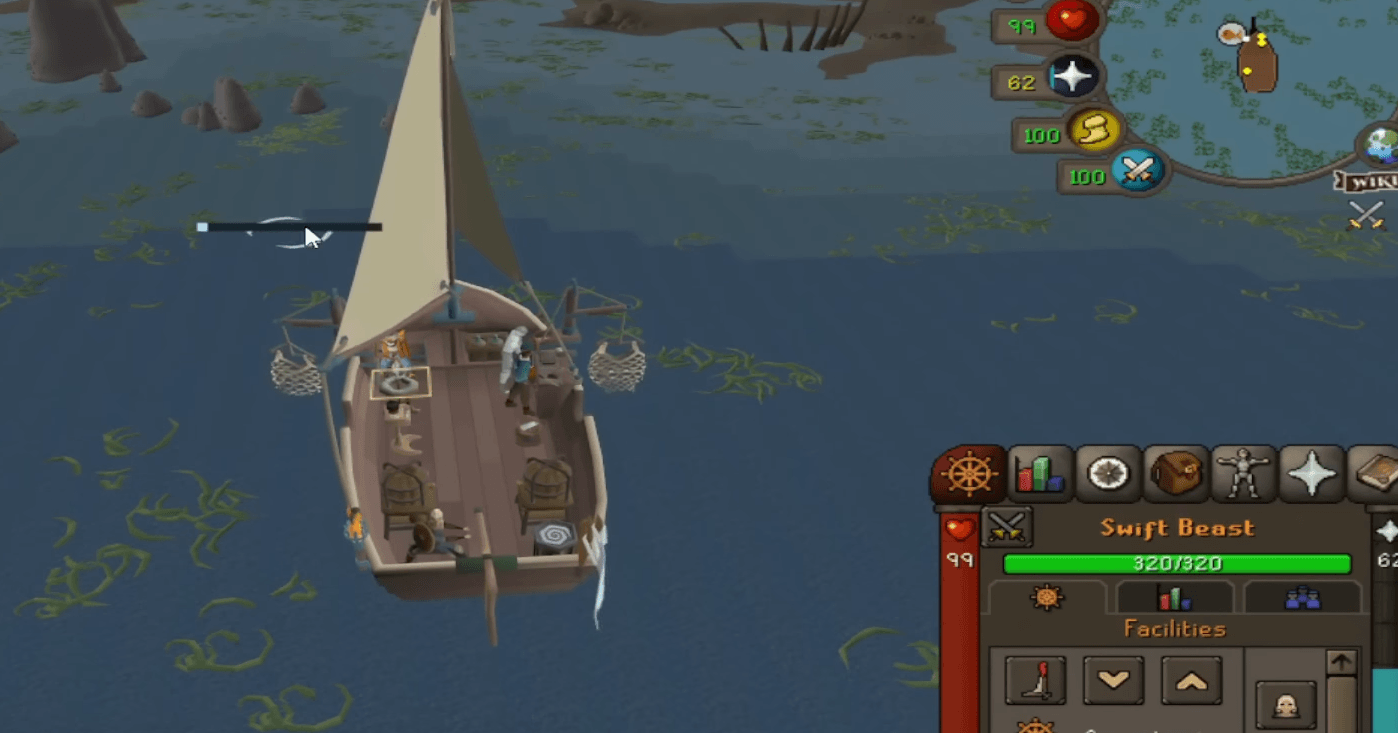
To trawl some fish, your ship must be sitting on top of a shoal, and your nets must be at the correct height to effectively catch fish. Low-level shoals will only require your nets to be at shallow depth, while mid-level ones will require shallow and moderate depth, and high-level fish will require shallow, moderate, and deep depths.
The changes in depth are pre-determined; the depth a shoal requires will change halfway through fishing (indicated by the bar above it), and every time the shoal stops at a new location. Example: if you are catching halibuts at shallow depth, it will change to moderate halfway, and it will go back to shallow when it arrives at its next location.
You can also identify this change by looking at your chatbox. It will tell you when the fish swim upward or downward. It will also alert you with red text if your nets are at the wrong height. There are also visual indicators to tell the depth. If the shoal has two pulsating waves and fish visible, it is at shallow depth; for medium depth, this becomes a single pulsating wave with no fish visible; and for deep depth, there is a thinner single pulsating wave.
To easily control your nets, you must use your Sailing interface. Simply click the arrows pointing up or down to control the depth of your and your crewmates' nets.
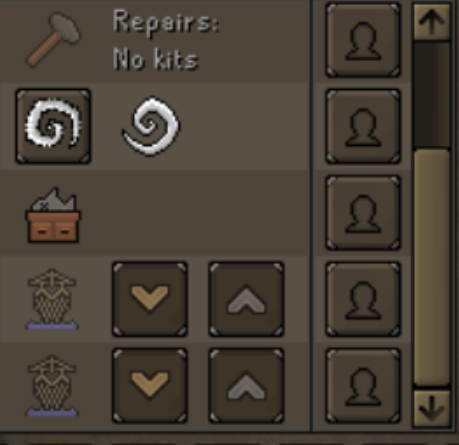
As a rule of thumb, empty your nets every time the shoal starts to move. When you empty the net, it empties both nets into your cargo hold, and if you have fish crates in your cargo hold, it automatically fills them up.
Important: Always fish at the shoals that are close to a dock to have the ability to have your crewmates bank your cargo.
Crewmates
Your crewmates should be:
- Cabin boy Jenkins
- Jolly Jim
- Spotter Virginia
- Ex-captain Siad
You will be using one of the trawling nets while Cabin Boy Jenkins will use the other. Have Jolly Jim on the chum spreader facility and have Spotter Virginia helm the ship. Siad will be an extra that you can use if you want to repair your ship, as some shoals move past aggressive sea creatures.
Giant Krill Shoal
This shoal is the lowest level one, requiring level 69 Fishing to catch. From this shoal, you can catch raw giant krills, which can be cooked to get a food that heals 17 hitpoints and 177.5 Cooking experience or you can cut them with a knife to create fish offcuts. This shoal only operates at shallow depths, so you will only need to worry about moving your boat and collecting from your net.
There are 4 locations that you can use to catch this fish:
- Sunset bay
- The Simian Sea
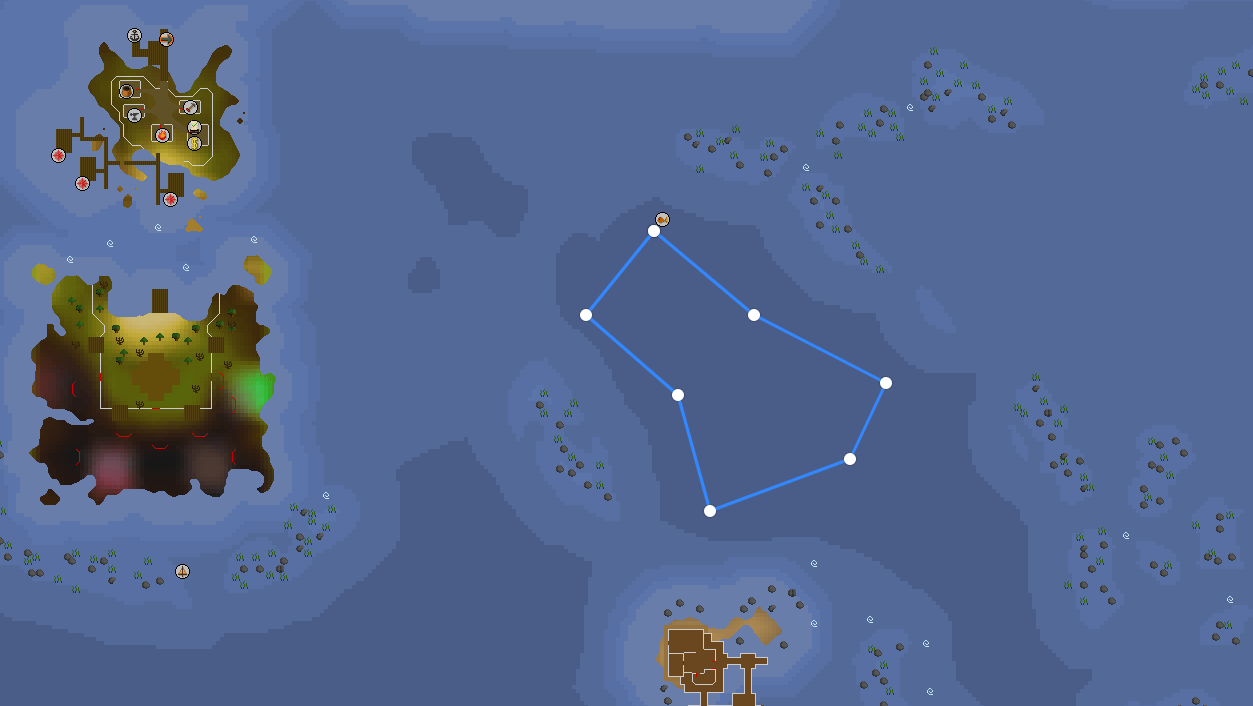
- Turtle belt
- Great Sound

You shouldn’t use Sunset Bay since the shoal passes through sharks that will damage your ship. The two best locations to catch this fish are the Simian Sea, since it is close to Void Knights’ Outpost and you can easily bank your cargo, or the Great Sound, since it is also close to a dock.
Haddock Shoal
This shoal requires level 73 Fishing to fish from. From this shoal, you can catch raw haddocks, which can be cooked to get a food that heals 18 hitpoints and gives 180.5 Cooking experience, or you can cut them with a knife to create fish offcuts and get a haddock eye, which is an ingredient for creating a super fishing potion, which requires level 62 Herblore. This shoal only operates at shallow depths, so you will only need to worry about moving your boat and collecting from your net.
There are three locations you can go to fish for some haddock:
- Anglerfish’s Light: Stops and passes through tiger sharks.
- Misty Sea: Passes near pygmy krakens and great white sharks, but they can be avoided if you are following the shoal closely.
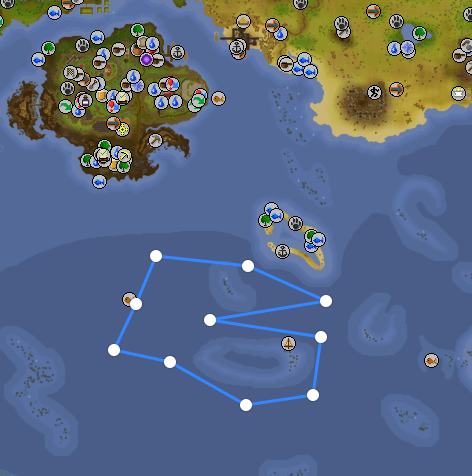
- Onyx Crest: Stops and passes through spined krakens.
Misty Sea is the best option out of the three, without any contest, since you can avoid aggressive creatures, and it is relatively close to two docks for banking purposes.
Yellowfin Shoal
This shoal requires level 79 Fishing to fish from. From this shoal, you can catch raw yellowfins, which can be cooked to get a food that heals 19 hitpoints and gives 200 Cooking experience, or you can cut them with a knife to create fine fish offcuts and get yellow fins, which are an ingredient for creating extreme energy potions, which require level 66 Herblore. This shoal operates at shallow and moderate depths.
There are three locations you can go to fish for some yellowfin:
- Deepfin Point: This route passes pygmy krakens
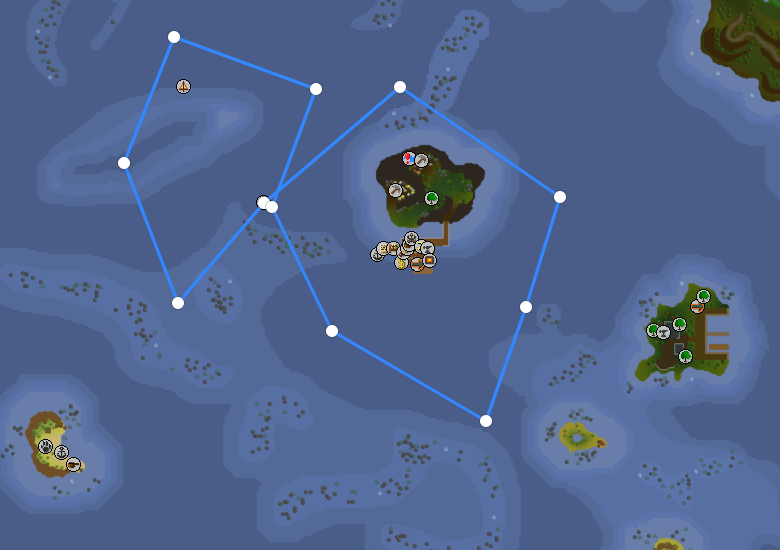
- The Crown Jewel: This route stops in two places where there are tiger sharks.
- Sea of Souls: This shoal stops in two places where there are tiger sharks.
Deepfin Point is our best option here as it only passes through hostile mobs at one point. Make sure to bring 10-20 mahogany repair kits for your ship. Even if you take too much damage or forget to bring your repair kits, the Deepfin point is right next to the shoal, so you can easily bank for supplies.
Halibut Shoal
This shoal requires level 83 Fishing to fish from. From this shoal, you can catch raw halibuts, which can be cooked to get a food that heals 20 hitpoints and gives 200 Cooking experience. Furthermore, this food can be used as a combo food, making it highly valuable. You can cut them with a knife to create fine fish offcuts. This shoal operates at shallow and moderate depths.
There are two locations you can go to fish for some halibut:
- Port Roberts: This is right next to Port Roberts, which is a huge advantage. However, during the route, the shoal passes near pygmy and armored krakens, which can be avoided with careful navigation.
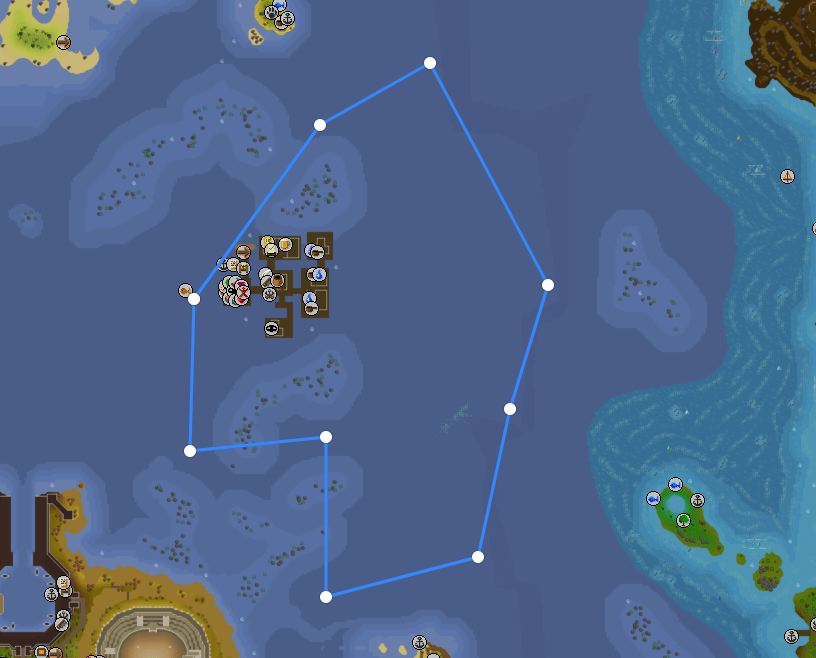
- Southern Expanse: This route requires an adamant helm or a better helm to sail through the tangled kelp. This route has no hostile mobs, but the closest dock is really far away.
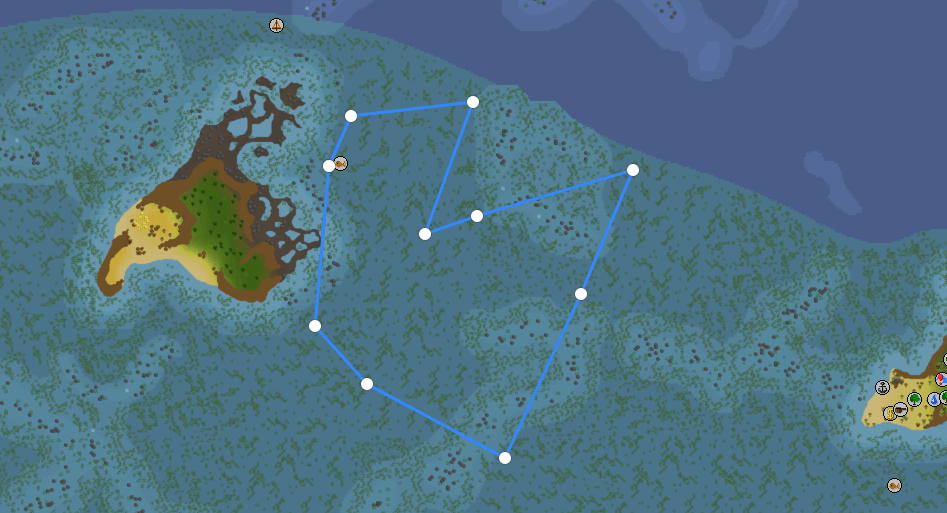
Port Roberts is the best option here due to how close it is to a dock, but make sure to learn how to park your ship to avoid hostile sea creatures.
Bluefin Shoal
This shoal requires level 87 Fishing to fish from. From this shoal, you can catch raw bluefins, which can be cooked to get a food that heals 22 hitpoints and gives 215 Cooking experience. You can also cut this fish with a knife to create fine fish offcuts. This shoal operates at shallow, moderate, and deep depths.
There are two locations you can go to fish for some bluefin:
- Rainbow Reef: This route requires at minimum an adamant helm to navigate through tangled kelps. There are no enemies in this route, but it is not close to any dock.
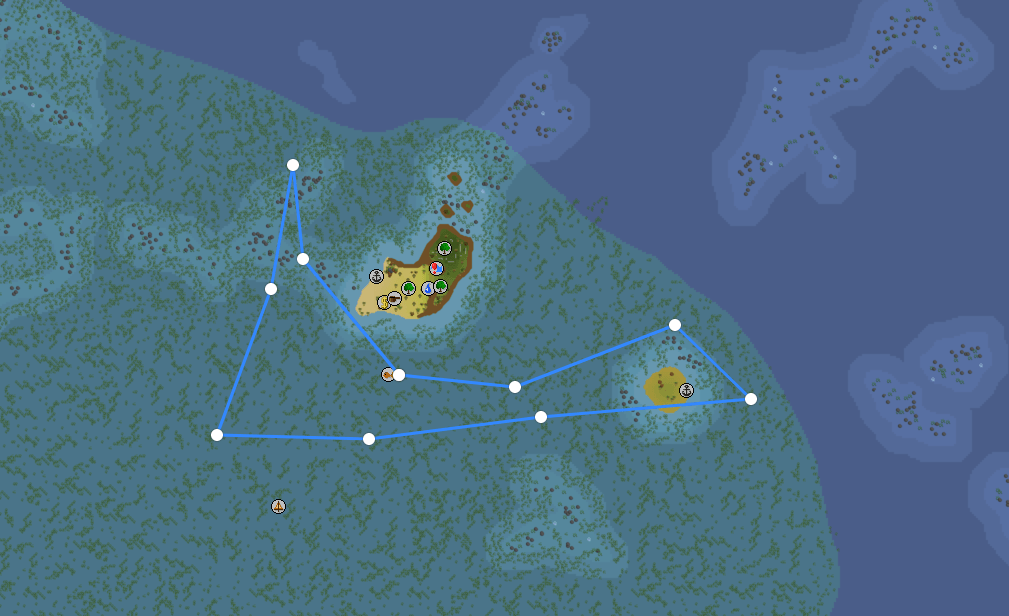
- Buccaneers Haven: This route is close to some docks, but it also stops at pygmy krakens, armoured krakens, and tiger sharks.
The best option here is the Rainbow Reef. You can use the Deepfin Point dock to bank your fish, or you can build a bank chest on the island nearby to manually bank the fish that you have caught.
Marlin Shoal
This shoal requires level 91 Fishing to fish from. From this shoal, you can catch raw marlins, which can be cooked into marlin that heals 24 hitpoints, currently the highest healing food in the game, and grants 225 Cooking experience. You can also cut this fish with a knife to create fine fish offcuts and obtain marlin scales, which can be used to create extended stamina potions with level 85 Herblore. This shoal operates at shallow, moderate, and deep depths. This is the most profitable fish out of all the fish you can catch with deep-sea trawling.
There are two locations you can go to fish for some marlin:
- Weissmere: This route stops near armoured krakens.
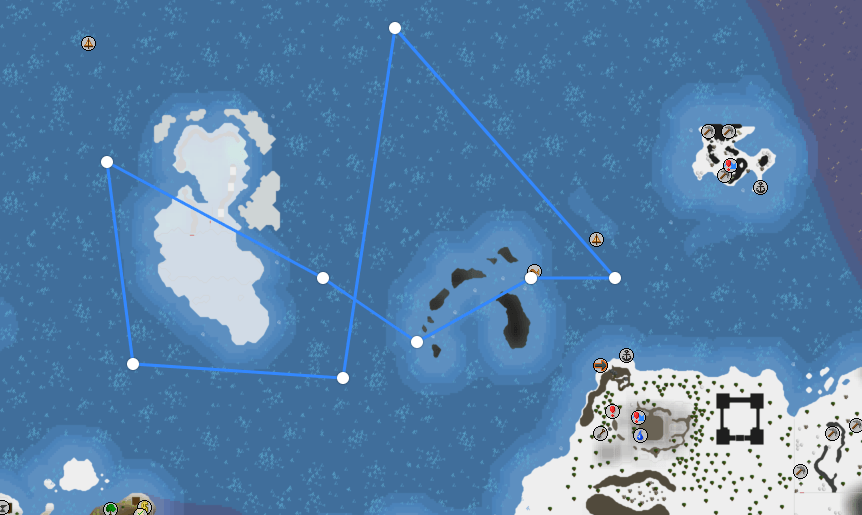
- Brittle Isle: This route is safe.
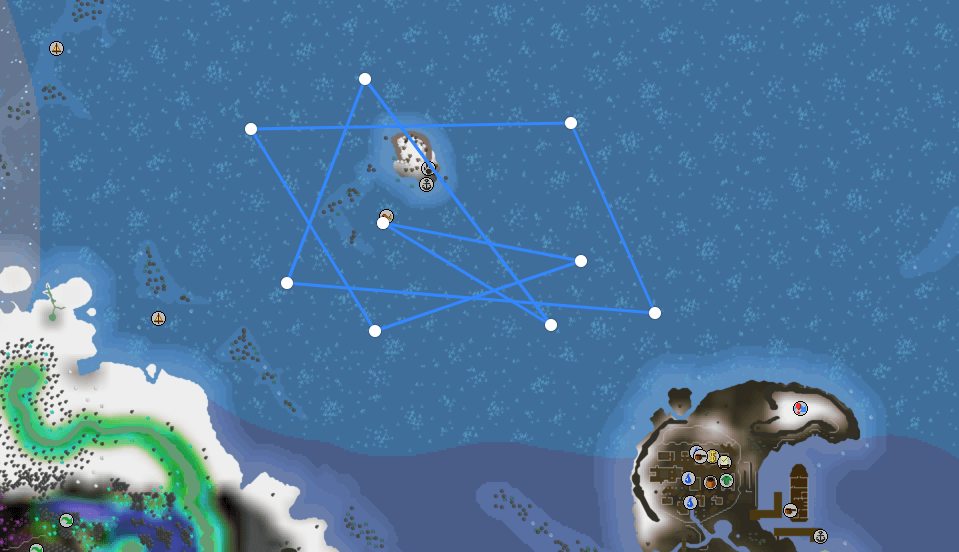
It is up to the player to decide which route is the best for them. If you don’t have access to a rosewood ship, however, you must use the Weissmere route, as it is much slower than the Brittle Isle one, which requires a fully decked out rosewood ship to effectively fish from.
The easiest way to get to the Weissmere route is by teleporting to Weiss and summoning your ship on the dock there. Make sure you bring along some repair kits to prolong your trips.
Shimmering, Glistening, and Vibrant Shoals
These shoals spawn randomly in place of regular shoals, and they contain mixed fish. It is easier to fish from them, and they have a higher chance of rewarding the player with an Angler’s paint.
- Shimmering Shoal: Requires level 69 Fishing. Spawns randomly in place of giant krill or haddock shoals. Yields: raw giant krill, raw haddock, raw yellowfin, raw halibut.
- Glistening Shoal: Requires level 76 Fishing. Spawns randomly in place of yellowfin or halibut shoals. Yields: raw yellowfin, raw halibut, raw bluefin, raw marlin.
- Vibrant Shoal: Requires level 86 Fishing. Spawns randomly in place of bluefin and marlin shoals. Yields: raw bluefin, raw marlin.
Enjoy making big profits with deep-sea trawling! If you want to see more useful guides on OSRS, make sure to check out our RS Guides blog page, where we cover everything related to OSRS!