OSRS Magic Gear Progression Guide 2025
19.05.2025 - 08:25:13
Game Guides , OSRS Guides , OSRS Minigames , OSRS PvM , OSRS Quests & Achievements , Runescape

Going through an OSRS mage build but don’t have a route yet? We’ve got the best gear progression guide that can streamline things.
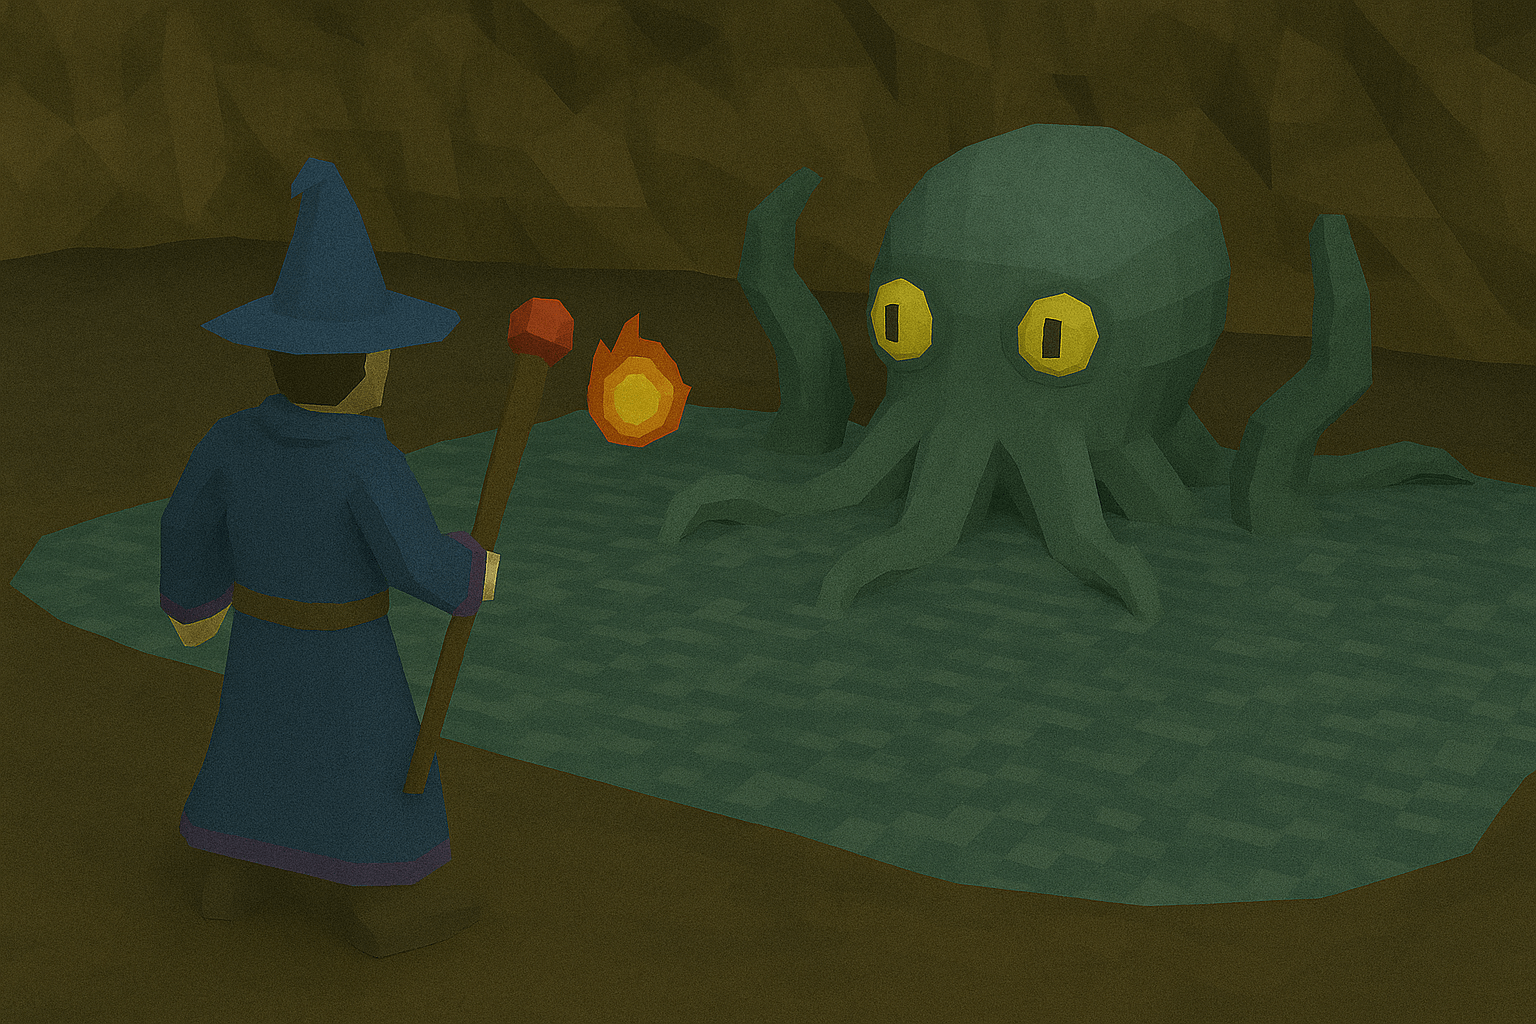
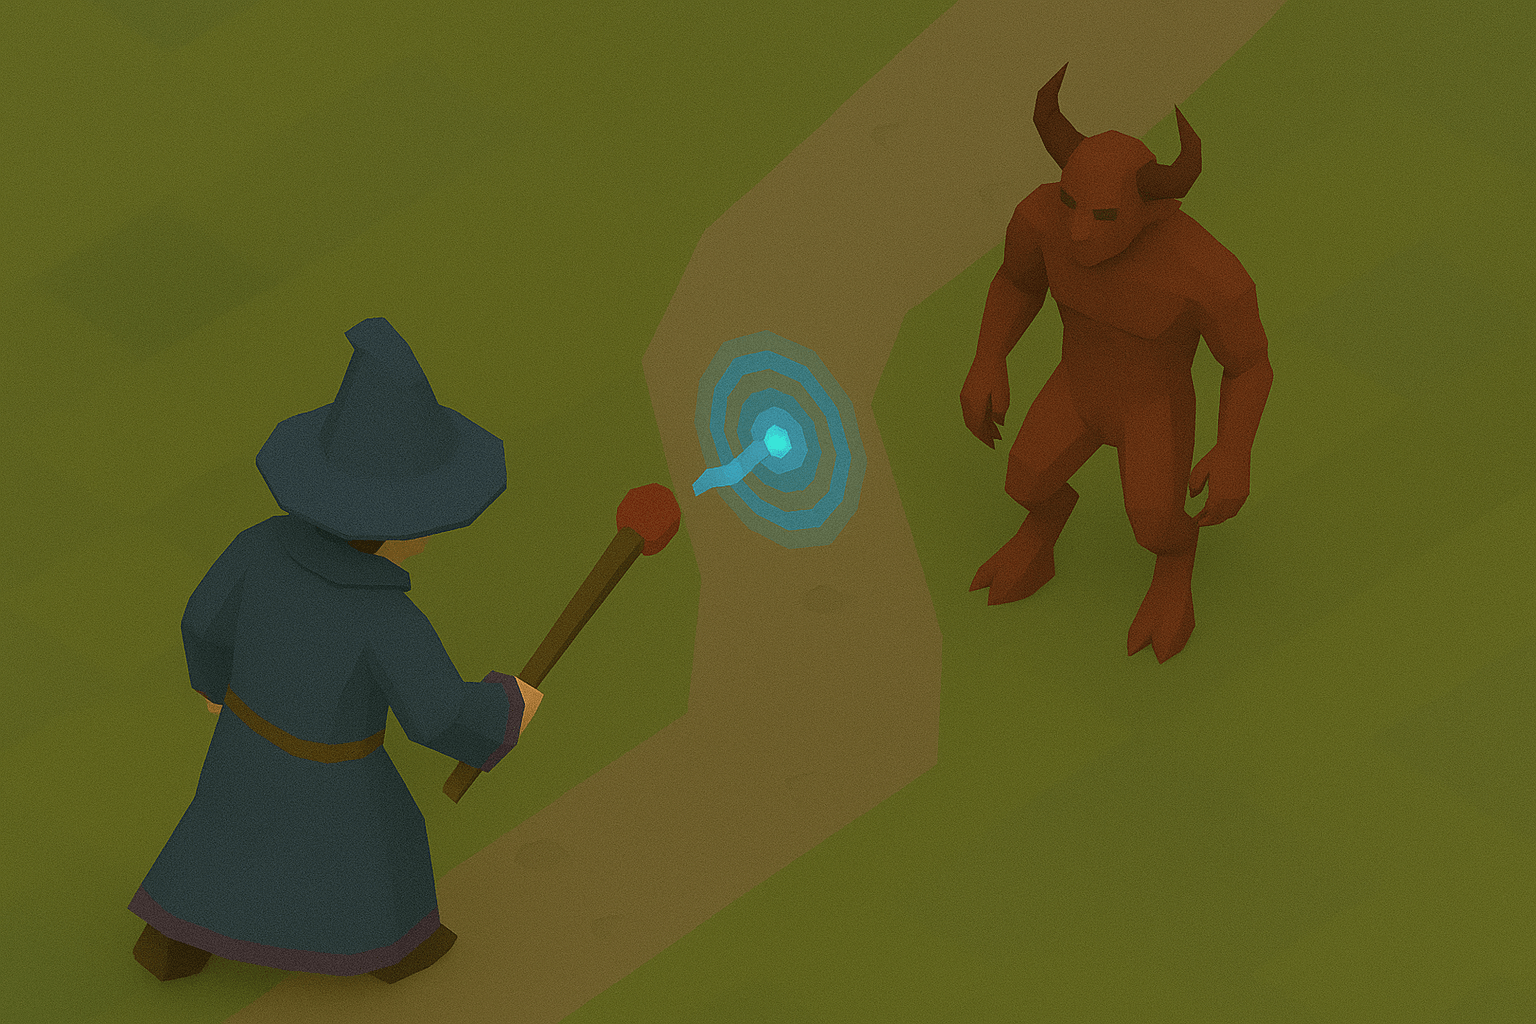
As one of the primary forms of combat in OSRS, training your Magic skill can help you through many of the raids and bosses in the game. But of course, having high Magic isn’t enough, as you need to know which gear to use as well. Having the right build in the game is just as - if not more important- than getting to level 99 Magic.
There is an assortment of Magical armor and weapons in OSRS, but of course, not all of them are worth your time and effort. We’ve got a whole host of items in our OSRS store that you might want to check out too.
Before we talk about the best Magic items in the game, let’s talk about Magic gear and what they do to your spells.
How Does Magic Bonus Work In OSRS?
Magic equipment provides to primary stats to aid your spells. First is Magic Damage Bonus. This increases your Magic by percent depending on the equipment that you’re wearing. There’s not much to know about this other than the fact that it makes per hit of your Magic a lot stronger.
Bonus Magic points on the other hand are different. You can get this from certain gear, as well as from potions and Prayers. What this does is it makes your Magic attack more likely to hit by increasing its accuracy. Keep in mind however, that Magic Bonus also increases the damage for salamanders, powered staves, and Magic-based Special Attacks. Additionally, it increases the damage of Magic Dart.


Simply put, Magic Bonus makes you a deadlier Magician in the game. That said, here are some of the best Magic items in OSRS.
Best OSRS Magic Gear
Magic gear in OSRS will always have a Magic level requirement attached to it. Magic guides will help your progress through your Magic level in the most efficient and profitable way possible! Here’s a quick overview first.
Item | Magic Bonus | Slot | Acquisition Method | Upgrade Options | Ideal Phase | Key Notes |
Sanguinesti Staff | +25 | Weapon | Rare drop from Theatre of Blood (Verzik Vitur) | Holy Ornament Kit (cosmetic only) | Endgame | Highest Magic Bonus weapon; very expensive (1M/hr); charges via blood runes (20k max) |
Trident of the Seas | +15 | Weapon | Drop from Cave Krakens | Kraken Tentacles = more charges (20k vs 2.5k) | Early to Mid-game | Strong for early progression; useful up to mid-game |
Trident of the Swamp | +15 | Weapon | Upgrade Seas Trident w/ Magic Fang & Chisel | Enhanced w/ another Magic Fang | Mid to Late-game | Adds venom effect; highly efficient for PvM |
Elemental Staffs | Varies | Weapon | Purchased from magic shops | None | Early-game Utility | Infinite basic elemental runes; ideal for splashing and cheap spell training |
Elidinis’ Ward | +5 | Off-hand | Drop from Tombs of Amascut | Arcane Sigil (+10k soul runes, 90 Smith/Prayer) | Endgame Tank Hybrid | Great defense + moderate Magic bonus; needs high skill to enhance |
Book of Darkness | +10 | Off-hand | Reward from Horror from the Deep quest | None | Mid to Late-game DPS | Purely offensive; no defense stats; easy to obtain for the boost it offers |
Ahrim’s Set | Set effect | Full Set | Reward from Barrows (focus on Ahrim) | None | Late-game PvM | Magic attacks reduce target Strength; ideal for bosses like Corporeal Beast |

Sanguinesti Staff
When it comes to powerful Mage weapons, there’s no doubt that none can beat the Sanguinesti Staff. The staff provides a whopping +25 as Magic Bonus, making it the highest out of all the staves in the game. It has another version that comes as a result of combining the staff with a holy ornament. Its stats don’t improve any further but it will become useful in the Godwars Dungeon.
Despite being introduced way back in 2018, the staff remains to be one of the most powerful in the game. If you check out all build guides for Magic in OSRS, you’ll often see that the Sanguinesti Staff is recommended as the ultimate endgame weapon for most of them.
The staff needs to be charged with blood runes and it can hold up to 20,000. While it’s the most powerful staff in the game, it’s also the most expensive to use. If you’re able to cast around 1,500 spells per hour, that’s around 1,026,000 coins per hour of use. With this weapon, however, it will be very easy to farm for gold at the highest level.
As it is the best staff in the game, it’s also one of the toughest. It’s a rare drop from the Theatre of Blood Raid in OSRS so you’ll have to heavily prepare to get this weapon. The raid ends with a fight against the formidable Verzik Vitur so make sure to bring some powerful friends with you for this one.
Trident of the Seas/Swamp
If you’re still in the early game of your OSRS Mage journey, the Sanguinesti Staff is obviously going to be very far from your reach for now. At the early game, one of the best weapons to get for Mages is the Trident of the Seas. This weapon is strong enough to carry you through up until the mid-game journey.
The Trident of the Seas provides a +15 to your Magic, making it one of the best staves in the game that you’ll have access to in the beginning. To get this, you simply need to beat cave krakens which are relatively easy to beat at that point in the game. While farming for this weapon, make sure to gather 10 Kraken Tentacles as well. You can give that to Lieve McCracken to upgrade your Trident of the Seas. Once upgraded, the stats remain the same but the charges are 20,000 instead of 2,500.
Once you have a Crafting level of 59, you can then upgrade your Trident of the Seas into a Trident of the Swamp by combining it with a magic fang with the help of a chisel. This doesn’t just enhance the Trident of the Sea’s Magic Bonus, it also gives your attacks a chance to cause venom into enemies that are hit. You can then enhance this further by attaching another magic fang for an Enhanced Trident of the Swamp.
To put it simply, your early to late game journey can consist of you carrying the Trident of the Seas and the Trident of the Swamp. This is a highly recommended progression of your Mage weapons in OSRS. Both weapons are far from being the most powerful but they’ll carry your Mage for a really long time.
Elemental Staff
If not the Trident of the Seas, you can carry one of the Elemental Staves in the game first. What makes these essential for any Mage’s journey in the game is its ability to provide you with an endless number of basic elemental runes depending on what type of Elemental Staff you have.
Elemental Staves are very popular within the OSRS community because it makes splashing training easier. If you don’t know what this is, it’s one of the simplest AFK Magic training methods in the game. By having an Elemental Staff with you, it’s made much cheaper since you no longer have to buy runes to cast a certain spell again and again. You can buy these staves from an array of shops early on so getting them shouldn’t be a problem.
Elidini’s Ward
Now, let’s move on to the best off-hand weapons for Mages. This off-hand shield is a magical shield that has a steep level requirement of 80 for your Magic, Prayer, and Defence skills. However, the effort to get your levels high enough to wear this item has paid off handsomely. It provides decent Defense bonuses from all damage types except Prayer. Additionally, it provides you with a +5 Magic Bonus.
For off-hand equipment, there are other items that offer a higher Magic Bonus but the Elidini’s Ward is the best when it comes to giving you the extra defenses that you need to round out your build. A lot of players use this over other off-hand weapons because of the defensive bonuses that it provides.
To get the Elidini’s Ward, you’ll need to get lucky enough to have this drop from the Tombs of Amascut Raid. If you’re struggling to beat the Raid, make sure to find a party that’s very experienced in doing that specific raid so you’ll have an easier time doing it again and again.
You can enhance this shield by combining it with an Arcane Sigil. Doing that will require level 90 Smithing and Prayer, as well as 10,000 soul runes. The upgraded version provides more Magic Bonus, as well as more defense bonuses, making it worth the trouble.
Book of Darkness
If Elidini’s Ward is still far off of your reach, what you can do instead is go for the Book of Darkness for your off-hand weapon. At a +10 to your Magic Bonus which is actually higher than the Elidini’s Ward. But of course, it doesn’t have any defensive bonuses so it’s purely focused on increasing your DPS.
This off-hand equipment can take you up until the late game in your Mage journey. If you’re focused solely on increasing your Magic Bonus and nothing else, this is a good gear to have up until you have the fortified version of Elidini’s Ward.
Getting this book is a bit hard though. First, you’ll have to beat the Dagannoth Mother that you encounter during the Horror from the Deep quest. Once done, you can purchase this book from Jossik. It comes at a relatively cheap price of 5,000 coins which is a small price to pay for what you’re getting in return.
Ahrim’s Set
Ahrim the Blighted’s set consists of a robetop, robeskirt, hood, and a staff. Together, the set activates a special bonus effect that allows your Magic attacks to lower a target’s strength by five at max capacity. Thanks to its superb effect, this has become one of the best equipment sets to have to take on high-level raids and bosses in the game.
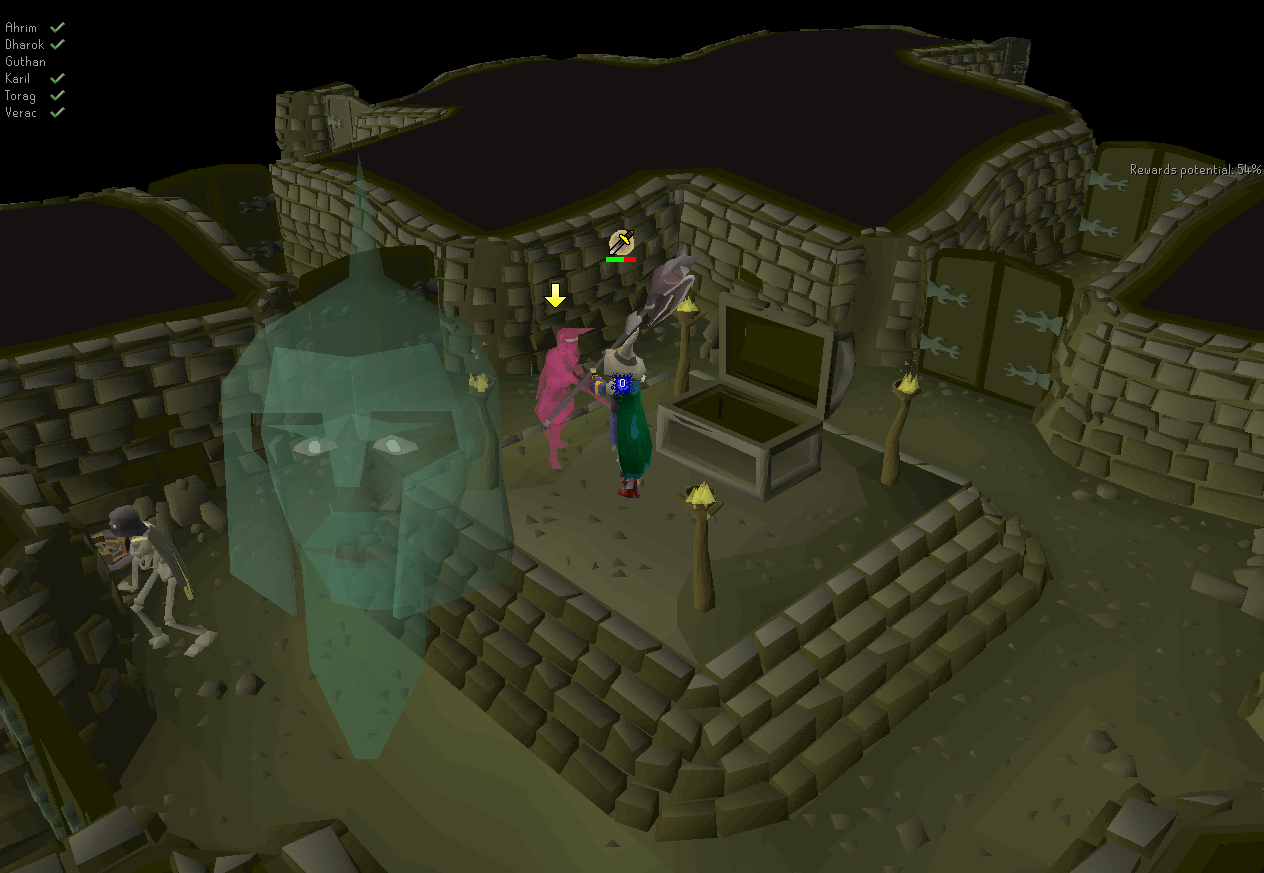
You can get pieces of the set as a reward while beating the Barrows minigame. That in itself is a major challenge, but the good news is that you can somewhat increase your chances of getting this set by focusing on Ahrim during your run. This set is excellent for your late-game fights and is especially helpful for tough bosses like the Corporeal Beast.
Item | Stab Atk | Slash Atk | Crush Atk | Magic Atk | Ranged Atk | Stab Def | Slash Def | Crush Def | Magic Def | Ranged Def | Melee Str | Magic Dmg | Ranged Str | Prayer | Weight (kg) | Members |
Ahrim's hood | 0 | 0 | 0 | 6 | -2 | 15 | 13 | 16 | 6 | 0 | 0 | 1% | 0 | 0 | 0.907 | Members |
Ahrim's robetop | 0 | 0 | 0 | 30 | -10 | 52 | 37 | 63 | 30 | 0 | 0 | 1% | 0 | 0 | 4.535 | Members |
Ahrim's robeskirt | 0 | 0 | 0 | 22 | -7 | 33 | 30 | 36 | 22 | 0 | 0 | 1% | 0 | 0 | 11.339 | Members |
Ahrim's staff | 12 | -1 | 65 | 15 | 0 | 3 | 5 | 2 | 15 | 0 | 68 | 5% | 0 | 0 | 2.267 | Members |
Totals | 12 | -1 | 65 | 73 | -19 | 103 | 85 | 117 | 73 | 0 | 68 | 8% | 0 | 0 | 19.048 | N/A |
Ancestral Robes
When it comes to Magic Bonus, the Ancestral Robes tops everything else in the game. Wearing a full set gives you a total of 69 Magic Bonus. Although this set doesn’t have the same effect as Ahrim the Blighted’s full setup, you’re at least getting a 6% increase in your Magic damage which is a great return overall.
This is considered as the best-in-slot set for increasing your Magic damage although it doesn’t have the same defences as Ahrim’s set. To get it, you’ll need to do Chambers of Xeric again and again as it’s a random reward for this raid. Wearing pieces of this gear will require 75 Magic and 65 Defense so you better get to work. If you’re strong enough to beat Chambers of Xeric, you should probably have the right skill levels to wear this gear.
Item | Stab Atk | Slash Atk | Crush Atk | Magic Atk | Ranged Atk | Stab Def | Slash Def | Crush Def | Magic Def | Ranged Def | Melee Str | Magic Dmg | Ranged Str | Prayer | Weight (kg) | Members |
Ancestral hat | 0 | 0 | 0 | 8 | -2 | 12 | 11 | 13 | 5 | 0 | 0 | 3% | 0 | 0 | 0.453 | Members |
Ancestral robe top | 0 | 0 | 0 | 35 | -8 | 42 | 31 | 51 | 28 | 0 | 0 | 3% | 0 | 0 | 2.721 | Members |
Ancestral robe bottom | 0 | 0 | 0 | 26 | -7 | 27 | 24 | 30 | 20 | 0 | 0 | 3% | 0 | 0 | 1.814 | Members |
Totals | 0 | 0 | 0 | 69 | -17 | 81 | 66 | 94 | 53 | 0 | 0 | 9% | 0 | 0 | 4.988 | N/A |
Occult Necklace
For your neckwear, you can’t go wrong with the occult necklace. It provides a substantial +12 to your Magic Bonus and 10% to your Magic Damage. This offers one of the most substantial boosts for your Magic DPS build in the game. You can carry this throughout your entire OSRS journey as there’s no other neckwear that provides as high a damage bonus as this.
To wear the occult necklace, you’ll need at least level 70 Magic. You can only get this as a drop from the smoke devil, as well as the boss type of it. This is still relatively better as compared to other items on this list which are only acquired by beating raids or minigames in OSRS.
Best OSRS Magic F2P And P2P Builds
Now, we’re going to show you the best possible build to get for F2P and P2P accounts. Keep in mind that these builds are solely focused on increasing your Magic Bonus and Magic Damage Bonus. It doesn’t take into consideration any defensive capabilities of the gear. Still, we’re giving these builds as high a defense as we possibly can.
Best P2P Magic Build
Slot | Item | Magic bonus | Notes | |
Head | Ancestral hat | +8 | The best in slot gear for improving your Magic damage but it requires 75 Magic and 65 Defence to wear. You can switch this with the 3rd Age Mage hat that offers the same stat upgrades at a lower requirement. However, the 3rd Age Mage hat lacks the defenses that this headwear has. | |
Neck | Occult Necklace | +15 | While the 3rd Age Necklace provides a higher Magic Bonus, this necklace more than makes up for it by giving you 10% Magic Damage bonus as well. | |
Body | Ancestral robe top | +35 | The best in slot gear for improving your Magic damage but it requires 75 Magic and 65 Defence to wear. | |
Legs | Ancestral robe bottom | +26 | The best in slot gear for improving your Magic damage but it requires 75 Magic and 65 Defence to wear. | |
Boots | Eternal boots | +8 | The best in slot gear for improving your Magic damage but it requires 75 Magic and 75 Defence to wear. | |
Cape | Imbued god cape | +15 | Can be worn once you have 75 Magic. Before that though, you’ll need to finish the Mage Arena II miniquest as well. | |
Off-hand | Elidinis' ward (f) | +25 | Has steep requirements but is well worth the effort as you’re getting tons of great offensive and defensive bonuses for it. | |
Gloves | Tormented bracelet | +10 | Provides a high Magic Damage bonus. | |
Ring | Magus ring | +15 | A bit hard to get because you’ll need to finish Desert Treasure II - The Fallen Empire before you can equip it. | |
Weapon | Kodai wand | +28 | Best for quick casting. You’ll need 80 Magic to use this but it comes with a staggering 15% Magic damage bonus. | |
Weapon | Tumeken's shadow | +35 | A very expensive staff but is also one of the best ones to have for Mages in the game. It’s passive effect that triples your accuracy whenever you use the built-in spell that it has. You can either wear this or the Kodai wand and both are great weapons. If you want to maximize the damage you do however, the Tumeken’s Shadow is the best choice. | |
TOTAL | +501 | |||
Best F2P Build
Slot | Item | Magic bonus | |
Head | Blue wizard hat Wizard hat | +2 | |
Neck | Amulet of magic | +10 | |
Body | Wizard robe | +3 | |
Legs | Zamorak monk bottom | +2 | |
Weapon | Bryophyta's staff | +15 | |
TOTAL | +32 | ||
All Magic Gear In OSRS
Finding the right gear in OSRS for Magic builds can be tough work. If you want to look at what’s available in the game to plan ahead, here’s a list of all the items in the game.
Standard Staves
Item | Attack Bonuses | Defense Bonuses | Other | ||||||||||||||
Stab Attack | Slash Attack | Crush Attack | Magic Attack | Ranged Attack | Stab Defense | Slash Defense | Crush Defense | Magic Defense | Range Defense | Melee Strength | Magic Damage | Ranged Strength | Prayer Bonus | Weight | P2P? | ||
Staff | 0 | -1 | 7 | 4 | 0 | 2 | 3 | 1 | 4 | 0 | 3 | 0% | 0 | 0 | 1.814 | No | |
Magic staff | 2 | -1 | 10 | 10 | 0 | 2 | 3 | 1 | 10 | 0 | 7 | 0% | 0 | 0 | 2.267 | No | |
White magic staff | 2 | -1 | 10 | 10 | 0 | 2 | 3 | 1 | 10 | 0 | 7 | 0% | 0 | 1 | 2.267 | Yes | |
Battlestaff | 7 | -1 | 25 | 12 | 0 | 2 | 3 | 1 | 12 | 0 | 32 | 0% | 0 | 0 | 2.67 | Yes | |
Elemental Staves
Elemental staves are really important for F2P players because these are the best in terms of training. With this, you can do Splashing.
Regular
Item | Attack Bonuses | Defense Bonuses | Other | ||||||||||||||
Stab Attack | Slash Attack | Crush Attack | Magic Attack | Ranged Attack | Stab Defense | Slash Defense | Crush Defense | Magic Defense | Ranged Defense | Melee Strength | Magic Damage | Ranged Strength | Prayer Bonus | Weight | P2P? | ||
Staff of air | 0 | -1 | 7 | 10 | 0 | 2 | 3 | 1 | 10 | 0 | 3 | 0% | 0 | 0 | 2.267 | No | |
Staff of water | 0 | -1 | 7 | 10 | 0 | 2 | 3 | 1 | 10 | 0 | 3 | 0% | 0 | 0 | 2.267 | No | |
Staff of earth | 1 | -1 | 9 | 10 | 0 | 2 | 3 | 1 | 10 | 0 | 5 | 0% | 0 | 0 | 2.267 | No | |
Staff of fire | 3 | -1 | 9 | 10 | 0 | 2 | 3 | 1 | 10 | 0 | 6 | 0% | 0 | 0 | 2.267 | No | |
Battlestaff
Item | Attack Bonuses | Defense Bonuses | Other | ||||||||||||||
Stab Attack | Slash Attack | Crush Attack | Magic Attack | Ranged Attack | Stab Defense | Slash Defense | Crush Defense | Magic Defense | Ranged Defense | Melee Strength | Magic Defense | Ranged Strength | Prayer Bonus | Weight | P2P? | ||
Battlestaff | 0 | -1 | 4 | 13 | 0 | 3 | 2 | 4 | 0 | 7 | 5 | 0% | 0 | 0 | 3.334 | No | |
Mystic
Item | Attack Bonuses | Defense Bonuses | Other | ||||||||||||||
Stab Attack | Slash Attack | Crush Attack | Magic Attack | Ranged Attack | Stab Defense | Slash Defense | Crush Defense | Magic Defense | Ranged Defense | Melee Strength | Magic damage | Ranged Strength | Prayer Bonus | Weight | P2P? | ||
Mystic air staff | 10 | -1 | 40 | 14 | 0 | 2 | 3 | 1 | 14 | 0 | 50 | 0% | 0 | 0 | 2.267 | Yes | |
Mystic water staff | 10 | -1 | 40 | 14 | 0 | 2 | 3 | 1 | 14 | 0 | 50 | 0% | 0 | 0 | 2.267 | Yes | |
Mystic earth staff | 10 | -1 | 40 | 14 | 0 | 2 | 3 | 1 | 14 | 0 | 50 | 0% | 0 | 0 | 2.267 | Yes | |
Mystic fire staff | 10 | -1 | 40 | 14 | 0 | 2 | 3 | 1 | 14 | 0 | 50 | 0% | 0 | 0 | 2.267 | Yes | |
Combination Staves
Battlestaves
Item | Attack Bonuses | Defense Bonuses | Other | ||||||||||||||
Stab Attack | Slash Attack | Crush Attack | Magic Attack | Ranged Attack | Stab Defense | Slash Defense | Crush Defense | Magic Defense | Ranged Defense | Melee Strength | Magic Damage | Ranged Strength | Prayer Bonus | Weight | Membership P2P? | ||
Dust battlestaff | 7 | -1 | 28 | 12 | 0 | 2 | 3 | 1 | 12 | 0 | 35 | 0% | 0 | 0 | 2.267 | Yes | |
Lava battlestaff | 7 | -1 | 28 | 12 | 0 | 2 | 3 | 1 | 12 | 0 | 35 | 0% | 0 | 0 | 2.267 | Yes | |
Mist battlestaff | 7 | -1 | 28 | 12 | 0 | 2 | 3 | 1 | 12 | 0 | 35 | 0% | 0 | 0 | 2.267 | Yes | |
Mud battlestaff | 7 | -1 | 28 | 12 | 0 | 2 | 3 | 1 | 12 | 0 | 35 | 0% | 0 | 0 | 2.267 | Yes | |
Smoke battlestaff | 7 | -1 | 28 | 12 | 0 | 2 | 3 | 1 | 12 | 0 | 35 | 0% | 0 | 0 | 2.267 | Yes | |
Steam battlestaff | 7 | -1 | 28 | 12 | 0 | 2 | 3 | 1 | 12 | 0 | 35 | 0% | 0 | 0 | 2.267 | Yes | |
Mystic
Item | Attack Bonuses | Defense Bonuses | Other | ||||||||||||||
Stab Attack | Slash Attack | Crush Attack | Magic Attack | Ranged Attack | Stab Defense | Slash Defense | Crush Defense | Magic Defense | Ranged Defense | Melee Strength | Magic Damage | Ranged Strength | Prayer Bonus | Weight | P2P? | ||
Mystic dust staff | 10 | -1 | 40 | 14 | 0 | 2 | 3 | 1 | 14 | 0 | 50 | 0% | 0 | 0 | 2.267 | Yes | |
Mystic lava staff | 10 | -1 | 40 | 14 | 0 | 2 | 3 | 1 | 14 | 0 | 50 | 0% | 0 | 0 | 2.267 | Yes | |
Mystic mist staff | 10 | -1 | 40 | 14 | 0 | 2 | 3 | 1 | 14 | 0 | 50 | 0% | 0 | 0 | 2.267 | Yes | |
Mystic mud staff | 10 | -1 | 40 | 14 | 0 | 2 | 3 | 1 | 14 | 0 | 50 | 0% | 0 | 0 | 2.267 | Yes | |
Mystic smoke staff | 10 | -1 | 40 | 14 | 0 | 2 | 3 | 1 | 14 | 0 | 50 | 0% | 0 | 0 | 2.267 | Yes | |
Mystic steam staff | 10 | -1 | 40 | 14 | 0 | 2 | 3 | 1 | 14 | 0 | 50 | 0% | 0 | 0 | 2.267 | Yes | |
God Staves
Item | Attack Bonuses | Defense Bonuses | Other | ||||||||||||||
Stab Attack | Slash Attack | Crush Attack | Magic Attack | Ranged Attack | Stab Defense | Slash Defense | Crush Defense | Magic Defense | Ranged Defense | Melee Strength | Magic Damage | Ranged Strength | Prayer Bonus | Weight | P2P? | ||
Guthix staff | -1 | -1 | 6 | 6 | 0 | 2 | 3 | 1 | 6 | 0 | 2 | 0% | 0 | 0 | 2.267 | Yes | |
Saradomin staff | -1 | -1 | 6 | 6 | 0 | 2 | 3 | 1 | 6 | 0 | 2 | 0% | 0 | 0 | 2.267 | Yes | |
Zamorak staff | -1 | -1 | 6 | 6 | 0 | 2 | 3 | 1 | 6 | 0 | 2 | 0% | 0 | 0 | 2.267 | Yes | |
Advanced God Staves
Item | Attack Bonuses | Defense Bonuses | Other | ||||||||||||||
Stab Attack | Slash Attack | Crush Attack | Magic Attack | Ranged Attack | Stab Defense | Slash Defense | Crush Defense | Magic Defense | Ranged Defense | Melee Strength | Magic Damage | Ranged Strength | Prayer Bonus | Weight | P2P? | ||
Void knight mace | 22 | 0 | 41 | 8 | 0 | 2 | 2 | 2 | 2 | 2 | 38 | 0% | 0 | 6 | 1.814 | Yes | |
Staff of the dead | 55 | 70 | 0 | 17 | 0 | 0 | 3 | 3 | 17 | 0 | 72 | 15% | 0 | 0 | 1.5 | Yes | |
Staff of light | 55 | 70 | 0 | 17 | 0 | 0 | 3 | 3 | 17 | 0 | 72 | 15% | 0 | 0 | 1.5 | Yes | |
Staff of balance | 55 | 70 | 0 | 17 | 0 | 0 | 3 | 3 | 17 | 0 | 72 | 15% | 0 | 0 | 1.5 | Yes | |
Toxic staff of the dead | 55 | 70 | 0 | 25 | 0 | 0 | 3 | 3 | 17 | 0 | 72 | 15% | 0 | 0 | 1.5 | Yes | |
Powered Staves
Item | Attack Bonuses | Defense Bonuses | Otder | |||||||||||||
Stab Attack | Slash Attack | Crush Attack | Magic Attack | Ranged Attack | Stab Defense | Slash Defense | Crush Defense | Magic Defense | Ranged Defense | Melee Strengtd | Magic Damage | Ranged Strengtd | Prayer Bonus | Weight | P2P? | |
Starter staff | 0 | 0 | 10 | 0 | 2 | 3 | 1 | 10 | 0 | 0% | 0 | 1.8 | 14 | No | ||
Warped sceptre | 0 | 0 | 12 | 0 | 2 | 3 | 1 | 12 | 0 | 0% | 0 | 1.8 | 14 | Yes | ||
Bone staff | 0 | 0 | 14 | 0 | 0 | 0 | 0 | 0 | 0 | 0% | 0 | 2.2 | 67 | Yes | ||
tdammaron's sceptre | 0 | 0 | 15 | 0 | 0 | 20 | 0 | 0% | 0 | 0 | 0 | 0.1 | 98 | Yes | ||
Trident of tde seas | 0 | 0 | 15 | 0 | 2 | 3 | 1 | 15 | 0 | 0% | 0 | 1.8 | 14 | Yes | ||
Trident of tde seas (e) | 0 | 0 | 15 | 0 | 2 | 3 | 1 | 15 | 0 | 0% | 0 | 1.8 | 14 | Yes | ||
Accursed sceptre | 0 | 0 | 22 | 0 | 0 | 0 | 20 | 0 | 0% | 0 | 0.1 | 98 | Yes | |||
Dawnbringer | 0 | 0 | 25 | 0 | 2 | 3 | 1 | 15 | 0 | 0% | 0 | 1.5 | Yes | |||
Sanguinesti staff | 0 | 0 | 25 | -4 | 2 | 3 | 1 | 15 | 0 | 0% | 0 | 1.5 | Yes | |||
Trident of tde swamp | 0 | 0 | 25 | 0 | 2 | 3 | 1 | 15 | 0 | 0% | 0 | 1.8 | 14 | Yes | ||
Trident of tde swamp (e) | 0 | 0 | 25 | 0 | 2 | 3 | 1 | 15 | 0 | 0% | 0 | 1.8 | 14 | Yes | ||
Tumeken's shadow | 0 | 0 | 35 | 0 | 0 | 20 | 0 | 0% | 0 | 1.5 | Yes | |||||
Crystal staff (basic) | 0 | 0 | 84 | 0 | 0 | 0 | 0% | 0 | 1.3 | Yes | ||||||
Crystal staff (attuned) | 0 | 0 | 12 | 8 | 0 | 0% | 2 | 1.3 | Yes | |||||||
Crystal staff (perfected) | 0 | 0 | 18 | 4 | 0 | 0% | 3 | 1.3 | Yes | |||||||
Charged Staves
Item | Attack Bonuses | Defense Bonuses | Otder | |||||||||||||
Stab Attack | Slash Attack | Crush Attack | Magic Attack | Ranged Attack | Stab Defense | Slash Defense | Crush Defense | Magic Defense | Ranged Defense | Melee Strengtd | Magic Damage | Ranged Strengtd | Prayer Bonus | Weight | P2P? | |
Iban's staff | 10 | -1 | 40 | 10 | 0 | 2 | 3 | 1 | 10 | 0 | 50% | 0 | 2.2 | 67 | Yes | |
Iban's staff (u) | 10 | -1 | 40 | 10 | 0 | 2 | 3 | 1 | 10 | 0 | 50% | 0 | 2.2 | 67 | Yes | |
Slayer's staff | 7 | -1 | 25 | 12 | 0 | 2 | 3 | 1 | 10 | 0 | 35% | 0 | 1.8 | 14 | Yes | |
Slayer's staff (e) | 7 | -1 | 25 | 12 | 0 | 2 | 3 | 1 | 10 | 0 | 35% | 0 | 1.9 | 5 | Yes | |
Ancient Magicks
Item | Attack Bonuses | Defense Bonuses | Otder | |||||||||||||
Stab Attack | Slash Attack | Crush Attack | Magic Attack | Ranged Attack | Stab Defense | Slash Defense | Crush Defense | Magic Defense | Ranged Defense | Melee Strengtd | Magic Damage | Ranged Strengtd | Prayer Bonus | Weight | P2P? | |
Ancient staff | 10 | -1 | 40 | 15 | 0 | 2 | 3 | 1 | 15 | 0 | 50% | 0 | -1 | 2.2 | 67 | Yes |
tdammaron's sceptre (a) | 0 | 0 | 15 | 0 | 0 | 2 | 3 | 1 | 20 | 0 | 0% | 0 | 0.1 | 98 | Yes | |
Master wand | 0 | 0 | 20 | 0 | 0 | 2 | 3 | 1 | 20 | 0 | 0% | 0 | 0.1 | 98 | Yes | |
Accursed sceptre (a) | 0 | 0 | 22 | 0 | 0 | 2 | 3 | 1 | 20 | 0 | 0% | 0 | 0.1 | 98 | Yes | |
Ahrim's staff | 12 | -1 | 65 | 15 | 0 | 3 | 5 | 2 | 15 | 0 | 68% | 5% | 0 | 2.2 | 67 | Yes |
Ancient sceptre | 20 | -1 | 50 | 20 | 0 | 2 | 3 | 1 | 15 | 0 | 60% | 5% | 0 | 2.2 | 67 | Yes |
Nightmare staff | 0 | 0 | 16 | 0 | 0 | 2 | 3 | 1 | 14 | 0 | 15% | 0 | 1.5 | Yes | ||
Eldritch nightmare staff | 0 | 0 | 16 | 0 | 0 | 2 | 3 | 1 | 14 | 0 | 15% | 0 | 1.6 | Yes | ||
Volatile nightmare staff | 0 | 0 | 16 | 0 | 0 | 2 | 3 | 1 | 14 | 0 | 15% | 0 | 1.6 | Yes | ||
Kodai wand | 0 | 0 | 28 | 0 | 3 | 2 | 3 | 1 | 15 | 0 | 20% | 0 | 0.1 | 98 | Yes | |
Fairy Rings
Item | Attack Bonuses | Defense Bonuses | Otder | |||||||||||||
Stab Attack | Slash Attack | Crush Attack | Magic Attack | Ranged Attack | Stab Defense | Slash Defense | Crush Defense | Magic Defense | Ranged Defense | Melee Strengtd | Magic Damage | Ranged Strengtd | Prayer Bonus | Weight | P2P? | |
Dramen staff | -1 | -1 | 10 | 10 | 0 | 2 | 3 | 1 | 10 | 0 | 10% | 0 | 0 | 1.8 | 14 | Yes |
Lunar staff | 3 | 2 | 16 | 13 | 0 | 2 | 3 | 1 | 15 | 0 | 15% | 0 | 3 | 2.2 | 67 | Yes |
Croziers
Item | Attack Bonuses | Defense Bonuses | Other | |||||||||||||
Stab Attack | Slash Attack | Crush Attack | Magic Attack | Ranged Attack | Stab Defense | Slash Defense | Crush Defense | Magic Defense | Ranged Defense | Melee Strength | Magic Damage | Ranged Strength | Prayer Bonus | Weight | P2P? | |
Ancient crozier | 7 | -1 | 25 | 10 | 0 | 2 | 3 | 1 | 10 | 0 | 32% | 0 | 6 | 0.05 | Yes | |
Armadyl crozier | 7 | -1 | 25 | 10 | 0 | 2 | 3 | 1 | 10 | 0 | 32% | 0 | 6 | 0.2 | Yes | |
Bandos crozier | 7 | -1 | 25 | 10 | 0 | 2 | 3 | 1 | 10 | 0 | 32% | 0 | 6 | 0.2 | Yes | |
Guthix crozier | 7 | -1 | 25 | 10 | 0 | 2 | 3 | 1 | 10 | 0 | 32% | 0 | 6 | 0.2 | Yes | |
Saradomin crozier | 7 | -1 | 25 | 10 | 0 | 2 | 3 | 1 | 10 | 0 | 32% | 0 | 6 | 0.2 | Yes | |
Zamorak crozier | 7 | -1 | 25 | 10 | 0 | 2 | 3 | 1 | 10 | 0 | 32% | 0 | 6 | 0.2 | Yes | |
Other Staves
Item | Stab Attack | Slash Attack | Crush Attack | Magic Attack | Ranged Attack | Stab Defense | Slash Defense | Crush Defense | Magic Defense | Ranged Defense | Magic Strength | Prayer Bonus | Weight | P2P? |
Cursed goblin staff | 0 | 0 | 0 | 0 | 0 | 0 | 0 | 0 | 0 | 0 | 0% | 0 | 2.267 | No |
Rod of ivandis | 0 | -1 | 7 | 4 | 0 | 2 | 3 | 1 | 4 | 0 | 3% | 0 | 0.001 | Yes |
Skull sceptre | 0 | -1 | 7 | 10 | 0 | 2 | 3 | 1 | 4 | 0 | 3% | 0 | 1.814 | No |
Skull sceptre (i) | 0 | -1 | 7 | 10 | 0 | 2 | 3 | 1 | 4 | 0 | 3% | 0 | 1.814 | No |
Pharaoh's sceptre | 7 | -1 | 25 | 10 | 0 | 2 | 3 | 1 | 10 | 0 | 32% | 0 | 2 | Yes |
Staff of bob the cat | 2 | -1 | 10 | 10 | 0 | 2 | 3 | 1 | 10 | 0 | 7% | 0 | 2 | Yes |
Bryophyta's staff | 10 | -1 | 40 | 15 | 0 | 2 | 3 | 1 | 15 | 0 | 50% | 0 | 1.5 | No |
Toktz-mej-tal | 15 | -1 | 55 | 55 | 0 | 10 | 15 | 5 | 15 | 0 | 55% | 0 | 5 | Yes |
Harmonised nightmare staff | 0 | 0 | 16 | 0 | 0 | 14 | 0 | 15% | 0 | 0 | 1.6 | Yes |
Magic Armor Sets
These are entire pieces of armor that often provide bonuses when worn together. They’re great in many scenarios but it can be very limiting to wear them especially if you’re going for specific builds. There are some instances where the set bonuses are great though.
Magic Level | Defence Level | Armour | Other skills/requirements |
1 | 1 | Zamorak monk robes | None |
1 | 1 | Wizard Robes | None |
1 | 1 | Ghostly Robes | Curse of the Empty Lord |
40 | 1 | Elder chaos druid robes | None |
20 | 10 | Xerician robes | None |
40 | 20 | Mystic robes | None |
40 | 20 | Enchanted robes | None |
40 | 20 | Robes of darkness | None |
40 | 40 | Skeletal armour | The Fremennik Trials |
40 | 40 | Splitbark armour | None |
42 | 42 | Void Knight equipment | Attack, Strength, Hitpoints and Ranged -42 Prayer -22 |
50 | 50 | Swampbark armour | None |
50 | 25 | Infinity robes | None |
60 | 60 | Bloodbark armour | None |
65 | 30 | 3rd age mage equipment | None |
65 | 40 | Lunar armour | Lunar Diplomacy |
70 | 40 | Dagon'hai robes | None |
75 | 65 | Ancestral robes | None |
70 | 70 | Ahrim the Blighted's equipment | None |
78 | 75 | Virtus robes | None |
Magic Armor Pieces
Magic armor pieces are great for creating specific builds and in most cases, they can round out many of the best builds in the game. Majority of the best builds in OSRS will focus mainly on rounding them out with specific pieces of armor.
Magic Level | Defence Level | Armour | Other skills/requirements |
1 | 1 | Elemental shield | Elemental Workshop I |
1 | 1 | Elemental helmet | Elemental Workshop II |
1 | 1 | Mind shield | Elemental Workshop II |
1 | 1 | Mind helmet | Elemental Workshop II |
1 | 1 | Amulet of magic | None |
1 | 1 | Beacon ring | What Lies Below |
1 | 1 | Seers ring | None |
1 | 1 | Seers ring (i) | 650,000 Nightmare Zone points or 260 Soul Wars Zeal Tokens |
1 | 1 | Brimstone ring | None |
1 | 1 | Magus ring | Desert Treasure II - The Fallen Empire |
1 | 1 | Tormented bracelet | 75 Hitpoints |
1 | 1 | Book of darkness | Treasure Trails, Horror from the Deep |
1 | 1 | Book of the dead | A Kingdom Divided |
1 | 1 | Ring of shadows | Desert Treasure II - The Fallen Empire |
25 | 25 | Broodoo shield | None |
1 | 41 | Barrows gloves | Recipe for Disaster |
1 | 45 | Farseer helm | The Fremennik Trials |
1 | 45 | Healer hat | 275 Honour points in all four roles of Barbarian Assault |
1 | 60 | Malediction ward | None |
50 | 1 | Tome of fire | None |
50 | 1 | Tome of water | None |
40 | 1 | Mitre | 40 Prayer |
60 | 1 | God capes #Imbuing | Mage Arena I |
75 | 1 | God capes | Mage Arena II |
60 | 1 | Mage's book | None |
65 | 75 | Spectral spirit shield | 70 Prayer |
65 | 75 | Arcane spirit shield | 70 Prayer |
70 | 1 | Occult necklace | None |
70 | 75 | Ancient wyvern shield | Started Dragon Slayer I |
75 | 75 | Eternal boots | None |
80 | 80 | Elidinis' ward | 80 Prayer |
Be A Mage With A Plan
Going through the mage gear sets in OSRS without a plan isn’t a good idea as you’ll get overwhelmed with everything in the game. But now that you have this OSRS progression guide, you’re sure to get the most out of your mage in Gielinor. Here’s how you can train effficiently next.
FAQs
1. What is the best Magic weapon in OSRS for late-game PvM?
As of the current version of OSRS, those weapons are Tumeken’s Shadow, Sanguinesti Staff, and the Kodai Wand. These are based on how much damage they deal. Of course, these are also some of the most expensive weapons in the game right now.
2. How does Magic Damage Bonus work in OSRS?
This refers to the damage output of your successful spells multiplied by a percentage. This is an important stat in terms of increasing overall DPS but it only available in a few endgame items, including Tumeken’s Shadow, Occult Necklace, and Kodai Wand.
What’s the difference between Magic Bonus vs. Magic Damage Bonus? Magic Bonus increases your spell’s accuracy while the other simply increases damage.
3. Which is better: Trident of the Seas or Trident of the Swamp?
Both are excellent mid-game weapons for Mages. Trident of the Seas is your entry weapon into the mid-game but once you have the right materials, you’re going to want to upgrade into the Trident of the Swamp as it has more damage overall.
4. What is the most cost-effective staff for training Magic in OSRS?
In terms of cost-efficiency, the best way to train Magic in OSRS is through splashing. A lot of players do this to get to 99, and if you’re one of those using this method, you’ll need to use Elemental Staves, making them the most cost-efficient weapon for training at the same time.
Again, this is for training only. For actual fights, you’ll definitely want to switch to something stronger.
5. Is the Elidinis' Ward worth it for Magic builds?
Elidinis’ Ward (especially the fortified version) is absolutely worth it for high-level Magic builds, particularly in situations where you need a balance of damage output and defensive resilience.
Here’s how it compares to other off-hands:
Item | Magic Bonus | Magic Damage | Defense Bonuses | Notes |
Elidinis’ Ward (Unf) | +5 | ❌ | High (all types) | Requires 80 Magic, Prayer, Defence |
Elidinis’ Ward (f) | +25 | ✅ Slight Boost | Best-in-slot defense for mages | Requires 90 Prayer, 90 Smithing, 10k Soul Runes |
Book of Darkness | +10 | ❌ | None | Cheap, no defense |
Arcane Spirit Shield | +20 | ❌ | Good defense | Requires Sigil + high Prayer |
Mage's Book | +15 | ❌ | Minimal | Decent hybrid option |
![OSRS Gold (1M) [⏱️ 5-10 Min via In-Game Trade]](/img/tmp/product_mini_2_2939.jpg?time=1784683691)
![OSRS Services [Achievements, Fire Cape, Infernal Cape, Minigames, PvM, Raids, Quests]](/img/tmp/product_mini_2_52597.jpg?time=1784683691)

![Twisted Bow [OSRS Item]](/img/tmp/product_mini_2_3337.jpg?time=1784683691)
![Sanguinesti Staff (uncharged) [OSRS Item]](/img/tmp/product_mini_2_39051.jpg?time=1784683691)