Arc Raiders: What We Left Behind - Quest Walkthrough
20.04.2026 - 05:24:32
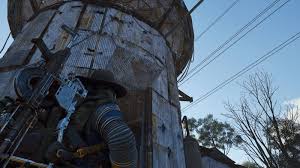
Arc Raiders , Game Guides

The Arc Raiders: What We Left Behind quest is a very complicated one in the game and we're sure that you want to finish it as well as other players on the game.
The quest is pretty much one of the toughest in the game but the good news is that we've got a guide that will help you out. It's not just about getting the quest done, it's also about getting it done as as properly as possible so that you get all of the rewards you can get out of it.
If you want to get it done even faster, make sure to check out our Arc Raiders blueprints for sale and start building a stronger loadout.
Quest Overview – What We Left Behind
“What We Left Behind” is one of those quests that quietly tests whether you actually understand how Arc Raiders works beyond just shooting bots. On paper, it sounds simple. You're heading into a contested zone to recover specific items tied to a past operation, then getting out alive. In reality, it's a tight loop of risk management, map awareness, and efficient movement.
You'll typically find this quest tied to mid-game progression, most often sending you into the Spaceport zone or an equivalent high-value loot area depending on your contract rotation. The objectives revolve around locating remnants of a previous expedition, interacting with them, and extracting with proof.
The core gameplay loop looks like this: enter the zone, locate the required items, survive encounters, and extract safely. That's it, but every part of that loop has pressure baked into it. Spaceport especially tends to funnel players into conflict-heavy routes.
Expect moderate difficulty. Most players tackling this are somewhere in the mid-level range, already comfortable with extraction mechanics but not yet fully geared. Enemy density is higher than early zones, and the presence of other players is a constant wildcard.
Step-by-Step Walkthrough
Quest Objective Breakdown Table
Step | Requirement | Location |
1 | Accept quest + prepare loadout | Base / Hub |
2 | Enter zone | Spaceport |
3 | Reach first objective | Outer structures |
4 | Collect items | Interior buildings |
5 | Survive encounters | Throughout zone |
6 | Extract | Designated extraction point |
Step 1: Accept quest and prepare loadout
Before you even deploy, take a second to read the objective text carefully. This quest often involves multiple items, not just one pickup, and missing one means wasting the entire run.
You'll want a balanced loadout here. Not full combat, but not stealth-only either. Expect contact. Bring healing, ammo, and at least one mobility tool.
Step 2: Enter required zone (Spaceport or designated area)
Most runs will send you into Spaceport, which is a high-traffic zone. You're not alone, and you should assume at least one other squad is chasing the same objectives.
Entry points matter. If you spawn on the outskirts, you've got a small window to move uncontested. If you spawn closer to central structures, slow down and listen before pushing.
Step 3: Navigate to first objective location
The first objective is usually located near outer facilities or partially collapsed buildings. These are less contested early on but become hotspots quickly.
Use terrain to your advantage. Hug walls, move through cover, and avoid open runways unless you're sure the area is clear. Sound travels far in Spaceport, so sprinting constantly is a bad habit.
Step 4: Collect required items or interactables
Items are typically found inside structures, containers, or marked terminals. Some require interaction rather than just pickup.
Take your time inside buildings. Check corners, upper levels, and side rooms. This is where players often miss items and have to double back.
Spawn randomness plays a role here. The item won't always be in the exact same spot, but it will be within a known cluster. Learn those clusters and you'll cut your search time in half.
Step 5: Handle combat encounters or extraction triggers
This is where things get messy. Once you've grabbed at least one item, the pressure ramps up. You're now a target if other players spot you.
Enemy spawn zones tend to cluster around choke points and high-value areas. Expect resistance near central buildings and extraction routes.
If you engage, keep it short. Long fights attract attention. If you can disengage safely, do it.
Step 6: Complete final objective and extract safely
Once you have everything, your priority shifts completely to extraction. Do not linger.
Extraction zones are predictable and often contested. Approach cautiously, clear the immediate area, and be ready for last-second interference.
All Item Locations Explained
This quest revolves around a handful of key items scattered across the Spaceport. While exact spawn points vary, their general locations stay consistent.
Item Location Breakdown
- Item 1 location (zone reference)
Usually found near the outer maintenance areas. Look for broken machinery or storage crates. These areas are quieter early on. - Item 2 location (building/landmark reference)
Often inside a central structure like a control building or hangar. Expect more resistance here. Check desks, terminals, and side rooms. - Item 3 location (secondary structure)
Smaller buildings near the runway edges or adjacent corridors. These are easy to miss if you rush. - Optional or hidden item locations
Occasionally, you'll find alternate spawn spots in adjacent rooms or upper levels. These aren't always required but can help if primary locations are empty.
Visual landmarks matter a lot. Use things like crashed ships, large antennas, or unique building layouts to orient yourself. If you rely purely on the map, you'll waste time.
Spawn randomness means you need a flexible route. Don't commit to a single path. Instead, plan a loop that covers all possible spawn clusters efficiently.
Spaceport Route Strategy (If Applicable)
Spaceport is the heart of this quest. It's where most objectives are located and where most players will be.
A good route balances speed and safety. You don't want to zigzag across the map, but you also don't want to run straight into the busiest areas without a plan.
Safe routes usually stick to the perimeter, moving from outer structures inward only when necessary. High-risk routes cut straight through central buildings, saving time but increasing exposure.
Recommended entry points are those that give you immediate access to outer objectives. Exit points should be chosen based on proximity once you've collected everything.
Here's a useful way to think about your efficiency:
Quest Efficiency=Objective Completion SpeedTravel Time+Combat Downtimetext{Quest Efficiency} = frac{text{Objective Completion Speed}}{text{Travel Time} + text{Combat Downtime}}Quest Efficiency=Travel Time+Combat DowntimeObjective Completion Speed
If you're spending too much time fighting or backtracking, your efficiency drops fast.
Common Mistakes and Failure Points
One of the biggest issues players run into is simply missing items. Some of them are tucked away in corners or secondary rooms, and if you don't check thoroughly, you'll leave without them.
Another common mistake is pushing into high-risk zones too early. Just because an objective is in a central building doesn't mean you should rush it immediately. Let other players clear each other out first.
Extraction timing is another big one. Players often hesitate after completing objectives, thinking they should grab extra loot. That hesitation gets them killed.
Loadout preparation is also overlooked. Going in under-equipped or overly specialized can ruin your run before it even starts.
Finally, ignoring audio cues is a huge problem. Footsteps, gunfire, and mechanical sounds give away enemy positions. If you're not listening, you're playing blind.
How to Complete the Quest Faster
Speed comes from planning, not rushing. The more you understand the map and item locations, the smoother your runs will be.
Start by mapping out your route before deployment. Know which clusters you'll hit first and how you'll transition between them.
If you're playing solo, stealth is your best friend. Avoid fights unless necessary. In a group, you can afford to be more aggressive, but coordination becomes key.
Speed Completion Checklist
- Pre-mark objectives
- Use shortest traversal route
- Avoid optional combat
- Extract immediately after completion
A practical example here is a solo player running a perimeter route through Spaceport, hitting outer objectives first, then dipping into a central building only if needed before extracting on the nearest edge.
On the other hand, a co-op speedrun might involve splitting into two pairs, each covering different spawn clusters, then regrouping for extraction.
Recommended Loadouts for This Quest
Your loadout should match your playstyle, but there are some general guidelines that work well for this quest.
Mobility-focused builds are great for solo players. Lightweight weapons, stamina boosts, and quick-use healing items help you move fast and avoid trouble.
Combat-focused builds work better in groups. Heavier weapons and more ammo allow you to control engagements and protect teammates.
Utility items like scanners or throwable distractions can make a big difference. They help you avoid unnecessary fights or escape bad situations.
For solo runs, prioritize survivability and escape tools. For groups, balance between damage and support so you can handle unexpected encounters.
Final Rewards and Quest Value
Completing “What We Left Behind” rewards you with a mix of experience, materials, and sometimes unique items tied to progression.
The real value comes from how it fits into the broader loop of Arc Raiders. It pushes you into contested zones, forces you to learn map layouts, and rewards efficient play.
For most players, the rewards justify the effort, especially if you're aiming to progress through mid-game content. It's not just about what you get, but what you learn while doing it.
FAQ
Where is the “What We Left Behind” quest in Arc Raiders?
It's typically accessed through mid-game contracts and often sends you into the Spaceport zone or similar high-value areas.
How do you complete What We Left Behind quickly?
Plan your route, avoid unnecessary fights, and extract immediately after collecting all required items.
Where are all item locations in Spaceport?
They spawn within known clusters like outer maintenance areas, central buildings, and smaller side structures. Exact positions vary per run.
Why does this quest fail for some players?
Common reasons include missing items, dying before extraction, or engaging in too many unnecessary fights.
Can you complete it solo?
Yes, and it's often easier to avoid detection solo, but you need to play carefully and prioritize stealth.
What is the best route through Spaceport?
A perimeter-first route that moves inward only when needed is generally the safest and most efficient.
What rewards do you get from this quest?
Experience, crafting materials, and progression-related items depending on your contract tier.
Is this quest required for progression?
In most cases, yes. It's part of the mid-game progression chain and helps unlock further content.
Help With More Arc Raiders Problems?
What we left behind is just the start of it. If you want to do other things like farm for resources, check out our Arc Raiders guides as well.