Ultimate OSRS Fire Cape Guide
14.06.2025 - 19:45:57
Game Guides , OSRS Guides , OSRS Minigames , OSRS PvM , Runescape

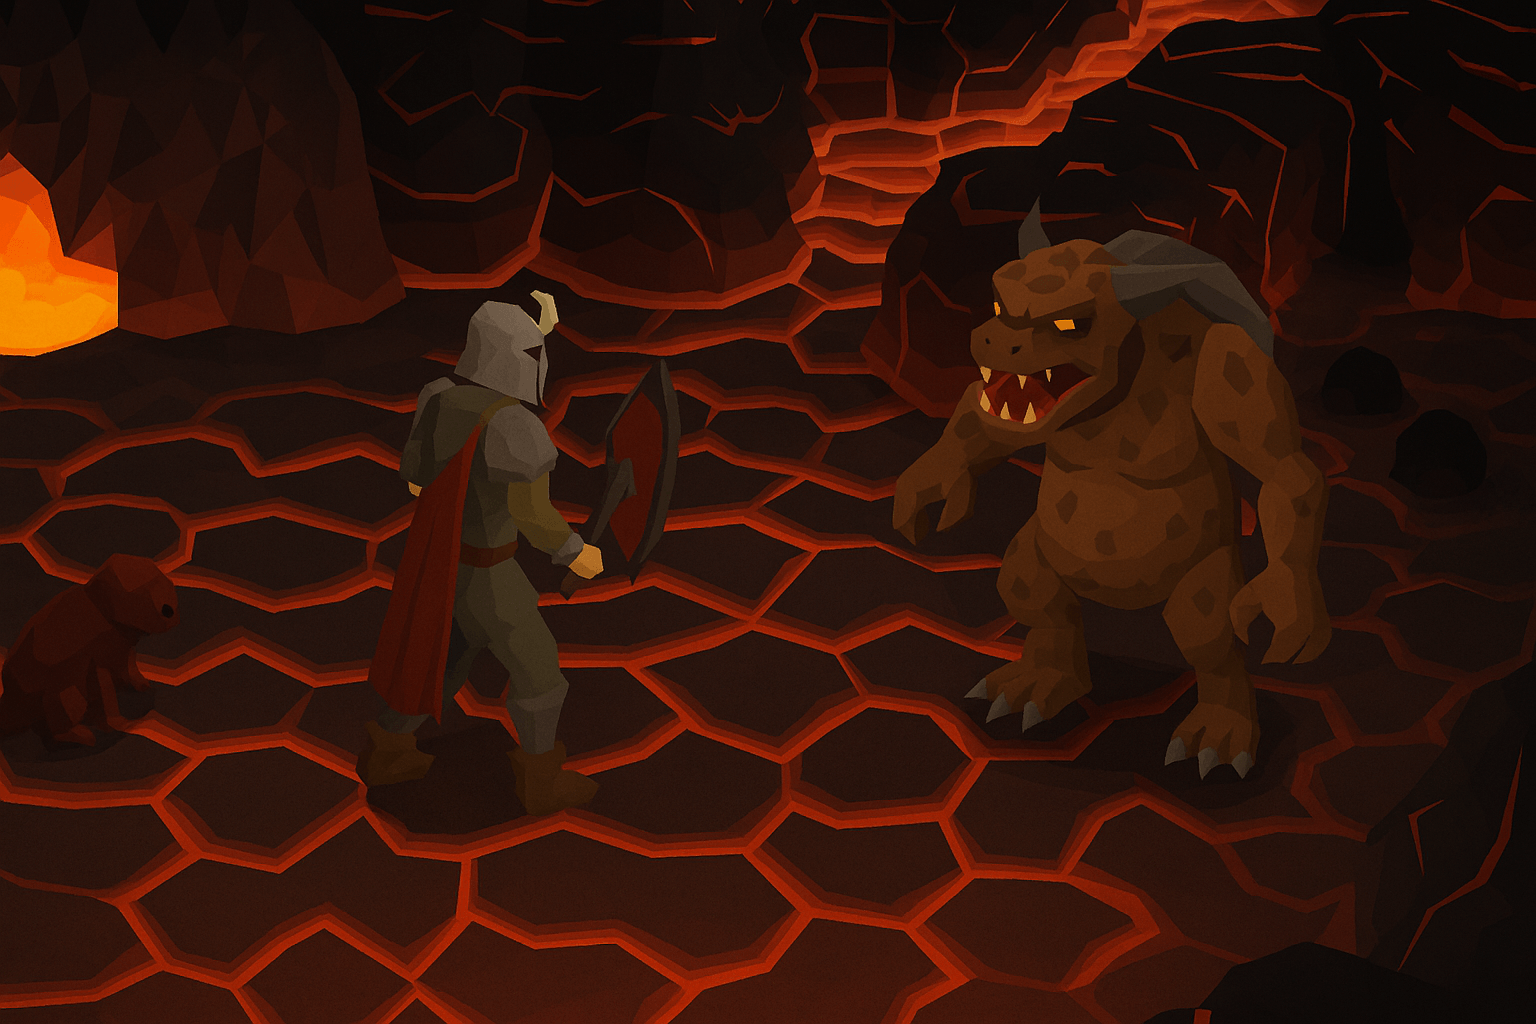
The Fire Cape isn't just one of the BIS capes in OSRS. It's also a status symbol that many players go crazy for.
There is a lot of illustrious equipment in OSRS: helmets, swords, armors, and so much more. No newcomer would expect that one of the most highly after items in the game is but a simple cape. Most particularly, we're talking about the fire cape which is easily one of the true marks of great OSRS players.
True to its legacy, the OSRS fire cape is indeed one of the best pieces of equipment in the game. As with all things gaming, getting the best items often comes at the expense of a lot of hard work and a little bit of luck. If you're struggling with both of these, we'll help you get the OSRS Fire Cape, Infernal Cape, or with any other item you might need.
This guide will give you a better idea of how to get the Fire cape. Before that though, let's talk about this item and what makes it so special.
What is OSRS Fire Cape?
The fire cape is a melee cape, given as a reward for beating the TzHaar Fight Cave. It's the second-best melee cape in the game, being beaten only by the Infernal Cape. As a piece of equipment, the fire cape provides a lot of amazing bonuses to your melee combat abilities, as well as for some of your other skills.
Other than its great bonuses for your skills and stats, the fire cape is also used for the following:
- Can be stored in the cape rack of a costume room. It can also be added to your cape hanger in an achievement gallery inside your own house. It's the only way to prove that you beat the challenging Fight Cave.
- You can sell the cape to TzHaar-Mej-Jal which can get you the Tzrek-jad pet or 8,000 Tokkul.
- You can combine it with the max cape to get you the fire max cape, which is essentially the same item but with a new look.
- If you're in Wintertodt, you can equip the cape as it counts as warm clothing too.
How To Get The OSRS Fire Cape?
Now, getting the fire cape is a lot easier said than done. There's a reason why this is one of the most powerful equipment in the game after all. If you want an easy way to do it, we offer services that will help you get this coveted item fast.
We have an in-house team of pro OSRS players that will help you get the cape without the sweat and tears, and the time of course. The only thing we ask in return is a small fee and that your account meets a few requirements. These requirements are there to ensure that our players can get you the fire cape in the most efficient way possible. Here's a look at the minimum requirements.

Minimum Stats | ETA, hours | Required Items |
70 Ranged 40 Defence 50 HP 43 Prayer | 3-8 | Coif or Mitre or Archers or Neit or Robin Hat Black Dhide Set Snakeskin Boots Glory or Fury Avas or Cloak or Obby Cape Karils Crossbow, 3000 Bolt Racks 17 x Super Restore Potion (4), 4 x Range Potion (4), 7 x Saradomin Brew (4) |
70 Ranged 1 Defence 50 HP 43 Prayer | 3-8 | Coif or Mitre or Robin Hat |
60 Ranged 40 Defence 50 HP 43 Prayer | 3-8 | Coif or Mitre or Robin Hat |
60 Ranged 1 Defence 50 HP 43 Prayer | 3-12 | Coif or Mitre or Archers or Neit or Robin Hat Red Dhide Legs Red Dhide Vambs Monk Robe Climbing or Leather Boots Glory or Fury Avasor Cloak or Obby Cape Magic Shortbow, 4000 x Rune Arrows 16 x Super Restore (4), 4 x Range Potion (4), 7 x Saradomin Brew (4) 400 x Purple Sweets |
50 Ranged 40 Defence 50 HP 43 Prayer | 3-12 | Blue Dhide Set |
50 Ranged | 3-12 | Coif or Mitre or Archers or Neit or Robin Hat Blue Dhide Legs Blue Dhide Vambs Monk Robe Climbing or Leather Boots Glory or Fury Avas or Cloak or Obby Cape Magic Shortbow, 5000 x Rune Arrows 16 x Super Restore Potion (4), 4 x Range Potion (4), 7 x Saradomin Brew (4) 500 x Purple Sweets |
We offer professional gaming services trusted by many worldwide. Of course, we understand that this might not be what you're looking for. As such, we're also going to give you a guide on how you can get the fire cape - the hard and natural way.
How to Beat The TzHaar Fight Cave
Getting the fire cape the natural way is not as easy as it sounds. There are a few things that you need to take into consideration when trying the challenge out for yourself.
- The cape will not be rewarded if you and TzTok-Jad die at the same time. The boss log will count the kill, but you won't get the cape. You'll need to beat the challenge again in cases like these.
- The fire cape will be required to gain access deeper into Mor Ul Rek. You'll need to show the cape to TzHaar-Key guards in the city center. This doesn't consume the fire cape but if you want to get to the Inferno, you'll need to sacrifice your cape to TzHaar-Ket-Keh.
- If you die in Wilderness areas below level 20, the fire cape will remain in your inventory but it won't be usable until you have it repaired by using Perdu and giving him a whopping 150,000 coins.
- If you die in Wilderness areas level 20 and higher and you aren't protected the cape turns into coins. You can use a Trouver parchment and 500,000 coins on Perdu to have the cape unlocked.
OSRS TzHaar Fight Cave Strategy Guide
The TzHaar Fight Cave doesn't have any strict requirements. You can technically go through the dungeon with low levels but that's not a good idea of course. If you want to make the journey a breeze, you'll need to be at these skill levels for your chosen type of combat.
Skill | Ranged | Void | Guthan's | Pure | Melee | Tank | Magic | Iron |
Ranged | 75 | 75 | 75 | 80 | N/A | 80+ | N/A | 61+ |
Hitpoints | 75 | 75 | 75 | 80 | 85+ | 85 | 75 | 70+ |
Prayer | 60 | 43 | 60 | 43 | 75+ | 75+ | 43 | 43+ |
Defense | 70 | 42+ | 70 | < 20 | 90+ | 90+ | 40+ | 50+ |
Attack | N/A | 75 | 70 | N/A | 90+ | N/A | 30+ | 50+ |
Strength | N/A | 42 | 70 | N/A | 90+ | N/A | N/A | 50+ |
Magic | N/A | 80/92 | N/A | N/A | 94 | N/A | 90+ | 56+ |
Best Fight Caves Setup
Having the best gear will certainly help make the Fight Caves easier. Here are a few setups to consider.
Fight Caves Magic Setup
Slot | Item | Why It Matters |
Helmet | Ancestral Hat / Ahrim's Hood | Highest Magic accuracy and damage bonus. |
Neck | Occult Necklace | +10% Magic damage. Core for bursting DPS. |
Cape | Imbued God Cape | +2% Magic damage (best-in-slot for most scenarios). |
Chest | Ancestral Robe Top / Ahrim's | Ancestral is best-in-slot, Ahrim's is budget. |
Legs | Ancestral Robe Bottom / Ahrim's | Ditto. |
Weapon | Trident of the Swamp | Self-contained, consistent, venom proc. |
Shield | Mage's Book / Arcane Spirit Shield | Mage's Book is cheap, Arcane adds prayer sustain. |
Gloves | Tormented Bracelet | +5% Magic damage — massive boost. |
Boots | Eternal Boots | +Magic accuracy. |
Ring | Seers' Ring (i) | Enhanced accuracy, affordable. |
Inventory | Saradomin Brews, Super Restores, Blood Barrage | Blood spells give you healing leeway. |
It's easy to get overwhelmed by all of the monsters in the Fight Caves. What makes Magic extra effective is that it gives you the chance to control these waves which is going to be very important when you're up against Rangers and Blobs.
The self-healing of Magic sets also give you that much needed chance to sustain yourself when your health gets low.
Fight Caves Melee Setup
Slot | Item | Why It Matters |
Helmet | Ancestral Hat / Ahrim's Hood | Highest Magic accuracy and damage bonus. |
Neck | Occult Necklace | +10% Magic damage. Core for bursting DPS. |
Cape | Imbued God Cape | +2% Magic damage (best-in-slot for most scenarios). |
Chest | Ancestral Robe Top / Ahrim's | Ancestral is best-in-slot, Ahrim's is budget. |
Legs | Ancestral Robe Bottom / Ahrim's | Ditto. |
Weapon | Trident of the Swamp | Self-contained, consistent, venom proc. |
Shield | Mage's Book / Arcane Spirit Shield | Mage's Book is cheap, Arcane adds prayer sustain. |
Gloves | Tormented Bracelet | +5% Magic damage — massive boost. |
Boots | Eternal Boots | +Magic accuracy. |
Ring | Seers' Ring (i) | Enhanced accuracy, affordable. |
Inventory | Saradomin Brews, Super Restores, Blood Barrage | Blood spells give you healing leew |
Requires a bit of practice with safespotting and prayer flicking but it's definitely worth the effort. Damage is easier to sustain, and you have better survivability with this as well since the armor's pretty good.
Fight Caves Ranged Setup
Slot | Item | Why It Matters |
Helmet | Verac's Helm / Armadyl Helmet | High range def + prayer. Armadyl = better range stats. |
Neck | Necklace of Anguish | +15 Range, +5% damage — huge boost. |
Cape | Ava's Assembler | +2 max range accuracy, +defense. |
Chest | Armadyl Chestplate / Karil's | Armadyl is bis for ranged, Karil's is budget. |
Legs | Armadyl Chainskirt / Karil's Skirt | Prayer + ranged bonuses. |
Weapon | Toxic Blowpipe / Rune Crossbow + Broad Bolts | Blowpipe for DPS and healing, Crossbow for tank waves. |
Shield | Crystal Shield / Book of Law | For tanking waves pre-Jad. |
Gloves | Barrows Gloves / Zaryte Vambraces | Balanced defense/offense. |
Boots | Pegasian Boots | Best Ranged bonus in slot. |
Ring | Archers' Ring (i) | Ranged accuracy stacking. |
Inventory | Saradomin Brews, Super Restores, Ranging Potions | Blowpipe spec healing. |
Most experienced players go for Ranged setups when going through the fight caves. You get healing from the blowpipe and a lot of space for safety as well. It's the best overall setup for the Fight Caves, whether you're new or old to the game.
Best Weapons
Choosing weapons can make or break your fight cave run. There are tons of weapons in the game but these are the ones that we find to be most effective when it comes to efficiency.
- Toxic Blowpipe - It's very effective against all of the enemies inside the cave - including TzTok-Jad. It's not as accurate and as powerful compared to crossbows but the damage you get in return is much better thanks to its attack speed of 2 ticks, when on rapid. You're also getting a substantial damage bonus thanks to venom making it a perfect choice for high-health enemies in the higher levels of the cave.
- Twisted Bow - Very effective when used against the Ket-Zeks and TzTok-Jad. However, it's a bad choice against every other enemy inside the cave. Recommended to bring this around for specific areas such as the fight against Ket-Zeks and TzTok-Jad.
- Crossbows - The Rune crossbow stands as a Ranged weapon accessible in the early stages of the game, requiring a Ranged level of 61 for usage. For added versatility, one can opt for an off-hand, either to bolster Defense, like the crystal shield for handling Tok-Xil with less trepidation while Ket-Zeks are still in play, or to amplify offense, such as the twisted buckler for maximum damage or the book of law for improved prayer and accuracy. The accessibility of the rune crossbow marks it as the earliest viable weapon for Ironmen seeking their initial fire cape. However, as one progresses, higher-tiered crossbows offer the advantage of employing dragon bolts, delivering an extra punch of damage.
- Blood Spells - One of the best utility tools you can have for the fight cave are Blood Spells. These magicks give you a life leech effect which lets you heal yourself for 25% of the damage you deal. It goes without saying that the harder you hit, the more you heal yourself. This is going to help with your overall durability and survivability for the entire run which is one of the most important aspects to look into. The challenge with Blood Spells is that you'll need at least a Magic level of 56 and must have completed the Desert Treasure I quest to be able to use it.
- Gunthan's equipment - For those wielding Guthan's equipment, a strategic approach is vital to harness its potential. To activate the set effect, Infestation, one must carry both the weapon and the armor. This necessitates a robust 70 Attack and 70 Defence to don the complete ensemble. A successful strike with this set presents a chance to not only deal damage but also to restore health equivalent to the inflicted harm. With the addition of the Amulet of the Damned, it's possible to exceed one's maximum Hit Points by 10, enhancing survivability. Managing healing resources becomes a pivotal aspect of navigating the Fight Caves. This equipment offers a buffer for mistakes and heightens the odds of triumph, particularly when facing foes that can be safely engaged. This equipment can help you out through many of the levels in the fight cave. It's one of the best healing tools at your disposal during critical moments.
- Saradomin Godsword - This is going to be one of the best secondary weapons to have at your disposal. While the high Attack level requirement can be hard to overcome, the effort on your end will be worth it as it's one of the most potent and versatile weapons to bring into the Fight Caves. It's a special attack, the Healing Blade gives you healing capabilities, as well as Prayer points which are calculated depending on the amount of damage that you deal.
- Holy Wrench - This is one of the utility items that you should have with you. It enhances the efficiency of your Prayer potions, as well as your restores. Each time you use your Prayer potion, you're able to restore an extra point which is going to be very helpful in your run.
- Ring of the Gods (i) - This makes your Prayers extra potent. This bonus is going to be a boon throughout your entire journey in the Fight Caves.
While you should bring the weapons you are most comfortable with, keep in mind that the Fight Caves feature a set of challenges that are the same for every player. As such, these weapons are going to be very helpful as you go up against the foes inside the area.
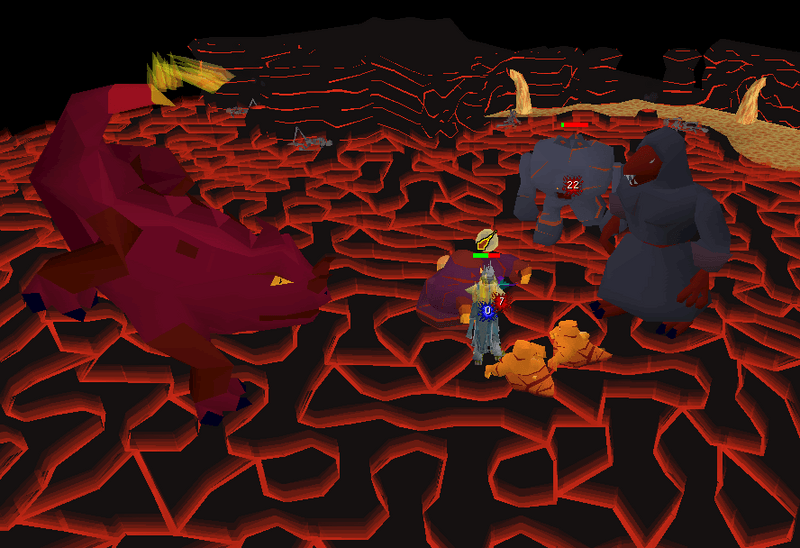
Fight Caves: The Battles Ahead
The concept of the Fight Caves remains pretty simple, you need to get through 62 waves of monsters that range from level 22 to 360. After all that, you'll need to face the final boss, TzTok-Jad, who is one of the toughest bosses in the game. Each of the floors will require a specific strategy. The monsters that occupy them generally have high Attack and Strength, making them quite the foes to deal with, even at high level. To give you a better idea of what you're up against, here's a floor-by-floor guide of who you're going to have to beat.
Before that though, here's a quick list of the monsters you'll face, and the best strategy against them.
1st Wave | Level | Name | Hitpoints | Attack style | Max hit (approx.) | Notes |
1 | 22 | Tz-Kih | 10 | Melee | 4 | A fairly weak monster but can be very deadly when facing off along with other monsters. They can drain Prayer points at close range too. Regardless of the case, always go for these monsters first so that they don't waste your Prayer Points. |
3 | 45 | Tz-Kek | 20 | Melee | 7 | A melee fighter that can be very annoying if you don't plan well. They are the least dangerous of all the monsters so they should be your last priority just in case they're in a group with other monsters. |
3 | 22 | Tz-Kek | 10 | Melee | 4 | These spawn after you kill a higher level Tz-Kek. |
7 | 90 | Tok-Xil | 40 | Ranged, Melee | 13 | One of the most dangerous enemies on the Fight Caves. They can deal serious damage if not taken care of quickly. Focus on them once you've killed off the bats. |
15 | 180 | Yt-MejKot | 80 | Melee | 31 | While pretty dangerous, these monsters are fairly easy to kill too since they can be easy to trap in the area. Don't get too close though as the amount of damage they deal can be very dangerous. |
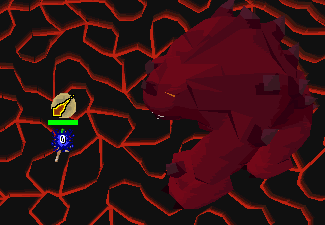
31 | 360 | Ket-Zek | 160 | Magic, Melee | 54 | A monster that can deal heavy Magic damage to you. Your best bet against its attack is to mitigate them with prayers. Get to a safe spot and block its attack as you dish out your own. |
63 | 702 | TzTok-Jad | 255 | Melee, Magic, Ranged | 97 | The final boss of the cave and what stands between you and your fire cape. Requires a lot of strategy and planning. |
63 | 108 | Yt-HurKot | 60 | Melee | 14 | Very annoying enemies that can make the boss fight go on forever as long as they're alive. |
Tz-Kih (level 22)
Tok-Xil (level 90)
Tz-Kek (level 45)
Yt-Mejkot (level 180)
Yt-Hurkot (level 108)
Ket-Zek (level 360)
Wave | Monsters | Notes |
1 | Tz-Kih (level 22) | Don't get too greedy against them. Hit and then move away so that you don't get your prayer drained. |
2 | Tz-Kih (level 22) x3 | Same as above and focus on one enemy at a time. |
3 | Tz-Kek (level 45) | |
4 | Tz-Kek (level 45) x2 Tz-Kih (level 22) | Always kill the Tz-Kih first because their prayer drain can really hamper your progress. Same with above, use a hit and run tactic. Always kill the fiery, bat-like, level-22 Tz-Kih first using a hit-and-run tactic to prevent its Prayer drain![1] |
5 | Tz-Kek (level 45) Tz-Kih (level 22) x2 | |
6 | Tz-Kek (level 45) x2 | |
7 | Tok-Xil (level 90) | Use Protect from Missiles to greatly mitigate the damage from this monster. Its range attacks are its bread and butter. |
8 | Tok-Xil (level 90) Tz-Kih (level 22) | |
9 | Tok-Xil (level 90) Tz-Kih (level 22) x2 | |
10 | Tok-Xil (level 90) Tz-Kek (level 45) | |
11 | Tok-Xil (level 90) Tz-Kek (level 45) Tz-Kih (level 22) | |
12 | Tok-Xil (level 90) Tz-Kek (level 45) Tz-Kih (level 20) x2 | |
13 | Tok-Xil (level 90) Tz-Kek (level 45) x2 | |
14 | Tok-Xil (level 90) x2 | |
From here onwards, you'll be going off against the Yt-Mejkots. If there are smaller monsters in the area, use them to block the Yt-Mejkots. Alternatively, you can also use Italy Rock or Dragon Rock. | ||
15 | Yt-Mejkot (level 180) Tok-Xil (level 90) Tz-Kek (level 45) Tz-Kih (level 22) | Focus on blocking the Yt-Mejkot first and then heal any damage with Guthan's Protect from Melee when necessary. |
16 | Yt-Mejkot (level 180) Tz-Kih (level 22) | |
17 | Yt-Mejkot (level 180) Tz-Kih (level 22) x2 | |
18 | Yt-Mejkot (level 180) Tz-Kek (level 45) | |
19 | Yt-Mejkot (level 180) Tz-Kek (level 45) Tz-Kih (level 22) | |
20 | Yt-Mejkot (level 180) Tz-Kek (level 45) Tz-Kih (level 22) x2 | |
21 | Yt-Mejkot (level 180) Tz-Kek (level 45) x2 | |
22 | Yt-Mejkot (level 180) Tok-Xil (level 90) | |
23 | Yt-Mejkot (level 180) Tok-Xil (level 90) Tz-Kih (level 22) | |
24 | Yt-Mejkot (level 180) Tok-Xil (level 90) Tz-Kih (level 22) x2 | |
25 | Yt-Mejkot (level 180) Tok-Xil (level 90) Tz-Kek (level 45) | |
26 | Yt-Mejkot (level 180) Tok-Xil (level 90) Tz-Kek (level 45) Tz-Kih (level 22) | |
27 | Yt-Mejkot (level 180) Tok-Xil (level 90) Tz-Kek (level 45) Tz-Kih (level 22) x2 | |
28 | Yt-Mejkot (level 180) Tok-Xil (level 90) Tz-Kek (level 45) x2 | |
29 | Yt-Mejkot (level 180) Tok-Xil (level 90) x2 | |
30 | Yt-Mejkot (level 180) x2 | Use Protect from Magic once you get into this battle. It can greatly mitigate most of the damage that you can take. |
From here, you'll be going up against Ket-Zeks which are pretty powerful mages. You can use Protect from Magic to cancel out the effects of Auto-Retaliate. | ||
31 | Ket-Zek (level 360) | Now would be a good time to use your ranged weapons. The melee attacks of Ket-Zeks can be very painful. A hit-and-run tactic for melee users is advised but this is a hard tactic to stick with. |
32 | Ket-Zek (level 360) Tz-Kih (level 22) | |
33 | Ket-Zek (level 360) Tz-Kih (level 22) x2 | |
34 | Ket-Zek (level 360) Tz-Kek (level 45) | |
35 | Ket-Zek (level 360) Tz-Kek (level 45) Tz-Kih (level 22) | |
36 | Ket-Zek (level 360) Tz-Kek (level 45) Tz-Kih (level 22) x2 | |
37 | Ket-Zek (level 360) Tz-Kek (level 45) x2 | |
38 | Ket-Zek (level 360) Tok-Xil (level 90) | Unless the Tok-Xils are far-off, go after them first as they can really disrupt your plan of attack against the Ket-Zek. |
39 | Ket-Zek (level 360) Tok-Xil (level 90) Tz-Kih (level 22) | |
40 | Ket-Zek (level 360) Tok-Xil (level 90) Tz-Kih (level 22) x2 | |
41 | Ket-Zek (level 360) Tok-Xil (level 90) Tz-Kek (level 45) | |
42 | Ket-Zek (level 360) Tok-Xil (level 90) Tz-Kek (level 45) Tz-Kih (level 22) | |
43 | Ket-Zek (level 360) Tok-Xil (level 90) Tz-Kek (level 45) Tz-Kih (level 22) x2 | |
44 | Ket-Zek (level 360) Tok-Xil (level 90) Tz-Kek (level 45) x2 | |
45 | Ket-Zek (level 360) Tok-Xil (level 90) x2 | On this level, go after the Tok-Xils first even if they're far off. Focus on fighting them one at a time. |
46 | Ket-Zek (level 360) Yt-Mejkot (level 180)) | Use the Ket-Zek to block the Yt-Mejkot. Alternatively, you can also use Italy Rock or Dragon Rock. |
47 | Ket-Zek (level 360) Yt-Mejkot (level 180) Tz-Kih (level 22) | |
48 | Ket-Zek (level 360) Yt-Mejkot (level 180) Tz-Kih (level 22) x2 | |
49 | Ket-Zek (level 360) Yt-Mejkot (level 180) Tz-Kek (level 45) | |
50 | Ket-Zek (level 360) Yt-Mejkot (level 180) Tz-Kek (level 45) Tz-Kih (level 22) | |
51 | Ket-Zek (level 360) Yt-Mejkot (level 180) Tz-Kek (level 45) Tz-Kih (level 22) x2 | |
52 | Ket-Zek (level 360) Yt-Mejkot (level 180) Tz-Kek (level 45) x2 | |
You're now going up against all basic enemies. In case you get confused, here's how you should kill them in order - Tz-Kih, Tok-Kill, Ket-Zek, Yt-Mejkot, Tz-Kek | ||
53 | Ket-Zek (level 360) Yt-Mejkot (level 180) Tok-Xil (level 90) | You can use the Tok-Kill to block the Yt-Mejkot if you're having a tough time against them. |
54 | Ket-Zek (level 360) Yt-Mejkot (level 180) Tok-Xil (level 90) Tz-Kih (level 22) | |
55 | Ket-Zek (level 360) Yt-Mejkot (level 180) Tok-Xil (level 90) Tz-Kih (level 22) x2 | |
56 | Ket-Zek (level 360) Yt-Mejkot (level 180) Tok-Xil (level 90) Tz-Kek (level 45) | |
57 | Ket-Zek (level 360) Yt-Mejkot (level 180) Tok-Xil (level 90) Tz-Kek (level 45) Tz-Kih (level 22) | |
58 | Ket-Zek (level 360) Yt-Mejkot (level 180) Tok-Xil (level 90) Tz-Kek (level 45) Tz-Kih (level 22) x2 | |
59 | Ket-Zek (level 360) Yt-Mejkot (level 180) Tok-Xil (level 90) Tz-Kek (level 45) x2 | |
60 | Ket-Zek (level 360) Yt-Mejkot (level 180) Tok-Xil (level 90) | |
61 | Ket-Zek (level 360) Yt-Mejkot (level 180) x2 | Before killing off all monsters, make sure to use Guthan's to heal your health in a safespot. You won't have time to do so on the next floor. Use Protect from Magic before the level ends as well to prepare for the next and last wave before the boss. |
62 | Ket-Zek (level 360) x2 | Once this floor begins, make sure to get to the Orange Ket-Zek as soon as you can. Also, remember where it spawned out of as that will be where Tz-Tok-Jad will be in the next round. Once you kill the last enemy, move away from the spawn area a bit because Tz-Tok-Jad will open with a melee attack that can deal massive damage. You should also restore your health and Prayer as much as you can. Activate Protect from Ranged, and then switch to Protection Prayers as soon as you possibly can as well. |
63 | TzTok-Jad (level 702) Yt-HurKot (level 108) x4 | Tz-Tok-Jad also has a ranged attack which he does by stomping on the ground to deal massive damage. He can also use Magic attack whenever he growls. This is very easy to telegraph as he winds up before discharging a fireball. Once the wave starts, he will use one of these two attacks if you aren't within melee range. Make sure that you're prepared to retaliate with the right Prayer skill to greatly mitigate the damage you receive from his initial attack. Aside from Tz-Tok-Jad, you're also going to have to kill four Yt-Kurhots that appear and heal the boss once his health drops to 50%. Deal with the healers one at a time from a long distance. If they fully heal Tz-Tok-Jad, they'll disappear and then come back later once he's at half-health again. An alternative strategy here would be to kill at least one or two of the healers and then go out against Tz-Tok-Jad as you don't need to kill the healers to beat the challenge. |
Live In Style
The OSRS fire cape isn't simply a stylish cape, it's a cape that can improve your combative abilities in the game heavily. But of course, players are going to be very ecstatic to see that you're one of the few that got through the Fight Cave to get the fire cape.
If you want to get more powerful capes in OSRS, check out our list of the best OSRS capes in 2025!
FAQs
What are the Fight Caves in OSRS?
This is a solo PvM minigame you can do inside the TzHaar City. You'll need to fight 63 Waves of enemies, which end in a fight against TzTok-Jad. Beating the fight gaves gives you the Fire Cape, one of the best capes in the game.
What are the requirements to do the Fight Caves in OSRS?
There are no formal stat requirements, but recommended levels include:
- 75+ Ranged (for Blowpipe or Crossbow setup)
- 43+ Prayer (for Protect from Missiles/Magic)
- 70+ Hitpoints (to survive Jad)
What gear should I use for Fight Caves in OSRS?
Best gear setups (Ranged focus):
- Weapon: Toxic Blowpipe / Rune/Dragon Crossbow + Ruby & Diamond bolts (e)
- Armor: Karil's / Void Elite / Armadyl / Crystal armor
- Accessories: Ava's Assembler, Archers Ring (i), Necklace of Anguish
- Shield (if crossbow): Odium Ward / DFS / Dragonfire Ward
How do I beat TzTok-Jad in the Fight Caves?
To defeat TzTok-Jad (Wave 63):
- Pray correctly: Switch between Protect from Missiles and Magic based on Jad's attack animation
- Listen closely or watch attack animations
- Kill Healers quickly after Jad reaches half HP
- Stay calm and focused—most deaths are due to panic misclicks
What's the best inventory for Fight Caves?
Optimal inventory includes:
- Prayer potions (8-12 depending on Prayer level)
- Saradomin brews + Super restores (defensive)
- Ranging potions
- High-heal food (Sharks/Karambwans)
- Emergency teleport (if not hardcore)
Is the Fight Caves worth doing multiple times in OSRS?
While one Fire Cape is enough, players often return to:
- Practice for Inferno
- Farm Slayer tasks (TzHaar tasks)
- Challenge themselves with speed runs
- Get multiple Fire Capes for account builds (e.g., pure mains)
![OSRS Gold (1M) [⏱️ 5-10 Min via In-Game Trade]](/img/tmp/product_mini_2_2939.jpg?time=1781312301)
![OSRS Services [Achievements, Fire Cape, Infernal Cape, Minigames, PvM, Raids, Quests]](/img/tmp/product_mini_2_52597.jpg?time=1781312301)

![Twisted Bow [OSRS Item]](/img/tmp/product_mini_2_3337.jpg?time=1781312301)
![Scythe of Vitur (Uncharged) [OSRS Item]](/img/tmp/product_mini_2_4419.jpg?time=1781312301)