


Arc Raiders: Map Selection and Raid Types
14.02.2026 - 08:40:20
Arc Raiders , Game Guides
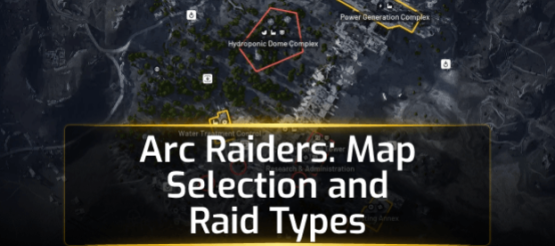

If you don't know which maps to choose and which raid types to focus on, you're going to have a bad time in Arc Raiders.
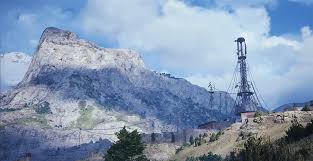
While many are focused on thinking about the best builds and set ups, you should focus more on understanding the map selection and the raid types in the game. If you know where and what you're playing, you'll have a better shot a good raids in the game and that's what we're here to help out with.
Aside from our guide, make sure to check out our Arc Raiders Blueprints for sale. We're going to help you get good gear so that you can easily take on the maps you choose to explore.
Overview of Available Maps
Buried City
Buried City feels like a place the world forgot. Cracked roads, collapsed towers, and vines crawling over old concrete create a maze of tight streets and dark interiors. It is the kind of map where every doorway could hide a drone or another Raider waiting for a clean shot.
The environment itself is the main hazard here. Sightlines are short, corners are everywhere, and the verticality of the map means danger can come from above or below. You might step into a building to search a crate and suddenly hear metal footsteps echoing down the stairwell. That usually means you are not alone.
Spaceport
Spaceport is the complete opposite of Buried City. It is wide, industrial, and exposed. Massive launch structures, fuel depots, and metal platforms dominate the landscape. The central Launch Tower is visible from far away and often becomes the focal point of the entire raid.
The main environmental hazard is the lack of cover. Long sightlines mean that once a fight begins, it rarely stays private. Gunfire echoes across the map and pulls in both players and Arc drones. If the Launch Tower Loot modifier is active, expect heavy resistance from machines and aggressive squads.
Spaceport is best suited for coordinated squads. Solo players can survive, but it requires patience and a willingness to avoid the central zones. Teams that communicate well can control space, clear objectives, and extract with large amounts of loot.
The Wilds
The Wilds sits somewhere between the other two maps in terms of pacing. It is a forested region with rolling terrain, abandoned structures, and scattered industrial remnants. There is plenty of foliage, which makes it easier to move unseen.
Environmental hazards mostly come from Arc patrols and the terrain itself. Drones often move through tree lines or guard small facilities. It is easy to walk over a hill and run straight into a hostile machine or another player.
PvPvE fights here feel more organic. Instead of tight ambushes or long-range shootouts, most engagements happen at mid-range. Players weave through trees, use rocks as cover, and reposition constantly. It rewards awareness and movement rather than raw firepower alone.
Understanding Raid Types
Raid types in ARC Raiders are shaped by map modifiers. These modifiers can change the entire tone of a run. Some add bosses. Others alter the environment or boost certain resources.
Standard Raids
Standard raids are the baseline experience. You drop in, collect materials, complete objectives, and try to reach extraction before things get messy.
Enemy encounters are mostly regular Arc patrols with the occasional elite drone. The main threat usually comes from other players, especially near high-value locations.
These raids are perfect for farming, leveling, or running solo. The risks are manageable, and the rewards are steady.
High-Event Raids

High-event raids revolve around major objectives or boss encounters. These include events like the Harvester, the Matriarch, or the Hidden Bunker.
In a Harvester raid, a massive wreck guarded by the Queen Arc becomes the center of attention. The Matriarch event introduces a roaming boss with the chance to drop legendary components. Hidden Bunker raids involve activating antennas and solving puzzles for valuable loot.
Environmental Hazard Raids
Some modifiers change the map itself instead of adding a single objective.
Examples include:
- Electromagnetic Storm, which brings lightning strikes and fewer extraction points.
- Night Raid, which lowers visibility and increases enemy presence.
- Husk Graveyard, where old Arc husks can spark and freeze you during looting.
These raids increase tension. You are not just fighting enemies. You are also dealing with the environment. The trade-off is better loot chances and improved rewards.
Resource-Focused Raids
Certain modifiers are designed for targeted farming.
Examples include:
- Lush Blooms, which increases nature-based resources.
- Prospecting Probes, which adds more drone probe drops.
- Uncovered Caches, which hide valuable loot around the map.
These raids are usually less intense than boss events, but they come with their own risks. Probe alarms attract enemies. Caches can explode if left too long.
Risk vs Reward
Your raid type directly affects what you are gambling.
- Standard raid means low risk and steady progress.
- Resource-focused raid gives moderate risk with targeted loot.
- Hazard raid increases tension but improves drops.
- Boss event raid offers the highest risk with the best rewards.
If you are carrying expensive gear, safer raids make more sense. If you are chasing legendary materials, you will have to step into the dangerous ones.
Choosing the Right Map and Raid Type
Picking the right setup is often the difference between a profitable run and a painful loss.
Squad Size
Solo players should lean toward Buried City or The Wilds, especially with standard or resource modifiers. These environments allow stealth and flexible movement.
Duos can handle most maps, but boss events are still risky unless both players are confident. Full squads shine in Spaceport or high-event raids. Coordination and firepower matter more there than stealth.
Skill Level
New players should stick to standard raids or gentle modifiers like Lush Blooms. These runs teach the map layouts and enemy patterns without overwhelming pressure. Experienced players can take on environmental hazards or boss events for better rewards.
Gear Quality
Low-tier gear works best in standard or resource raids. Mid-tier gear can handle hazard modifiers. High-tier gear is better reserved for boss encounters or Night Raids.
Loot Priorities
If you need specific materials, choose your raid accordingly.
- Arc parts come faster during Prospecting Probes or Husk Graveyard.
- Nature resources are easier during Lush Blooms.
- Legendary components are more likely in Matriarch or Harvester events.
Balancing Risk and Reward
A simple mindset helps. If losing your gear would sting, play safe. If you are running budget equipment, take bigger risks.
Many experienced players alternate between safe farming runs and high-risk raids for rare loot.
Timing Considerations
Map modifiers rotate, and player activity changes throughout the day. Peak hours usually mean more PvP and faster boss fights because more players are present.
Off-peak hours often lead to quieter matches. This is the best time for safe farming and easier extractions.
Tactical Tips for Successful Runs
Solo Player Approach
Solo players should focus on stealth and mobility. Stay near the edges of the map. Avoid central hotspots unless the reward is worth the risk. Keep fights short and move on quickly. Always think about extraction early. Waiting too long can leave you trapped.
Squad-Based Approach
Teams should assign clear roles. One player takes the frontline. Another focuses on support and supplies. A third watches flanks or scouts ahead.
During boss events, secure the surrounding area before attacking the objective. Many squads lose valuable gear because another team ambushes them mid-fight.
Positioning and Movement
Good positioning often matters more than raw aim. Stay close to cover. Avoid open ground unless you have overwatch. Use elevation to control sightlines.
Always keep an escape route in mind. If a fight drags on, disengaging is often the smarter move.
Extraction Strategies
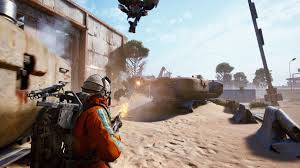
Move toward extraction earlier than you think you need to. Check for ambush points around Return Points. Clear the area before committing. This becomes even more important during Night Raids or storms where exits are limited.
Loadout Suggestions
Standard Raids
- Mid-tier rifle or SMG
- Light armor
- Basic healing and utility
Hazard or Night Raids
- Accurate weapons for low visibility
- Extra healing supplies
- Batteries or utility tools
Boss or Event Raids
- High-damage primary weapon
- Heavy armor
- Full utility kit for extended fights
Common Mistakes to Avoid
Entering High-Risk Maps Unprepared
Jumping into a Matriarch or Harvester raid with weak gear is a fast way to lose everything. These events are built for well-equipped squads.
Ignoring Environmental Hazards
Lightning, sparking husks, and unstable caches can kill you just as easily as a player. Pay attention to audio and visual cues at all times.
Poor Squad Coordination
Teams without clear roles often fall apart during fights. This leads to split engagements, missed extractions, and easy ambushes.
Simple communication and clear responsibilities go a long way. Even a basic plan is better than none when things start to get chaotic.
Better Map Selection, Better Success
You're definitely going to do better if you know which maps that you work on much better. Hopefully, this guide has showed you what you're most comfortable with. Check out our Arc Raiders Guides. This is just one of the many guides we have for the game so don't hesitate to reach out to us!