WoW 20th Anniversary: Black Wing Lair Boss Guide
28.03.2025 - 02:31:55
World Of Warcraft , WOW Gameplay Guides

Struggling with the latest raid in WoW Classic? We’ve got a WoW 20th Anniversary Black Wing Lair boss guide to make things easier for you. It’s a very tough raid, and even if you have a solid party to support you, you’re still going to struggle without a proper guide for you and your team. Prefer PvP between raid resets? Our Arathi Basin guide covers the Anniversary battleground scene.
With this guide, we’re going to assume that you’ve gotten a ton of WoW TBC Anniversary gold already, so you’re characters are well-equipped. This guide is going to be focused on fighting the bosses in this massive raid.
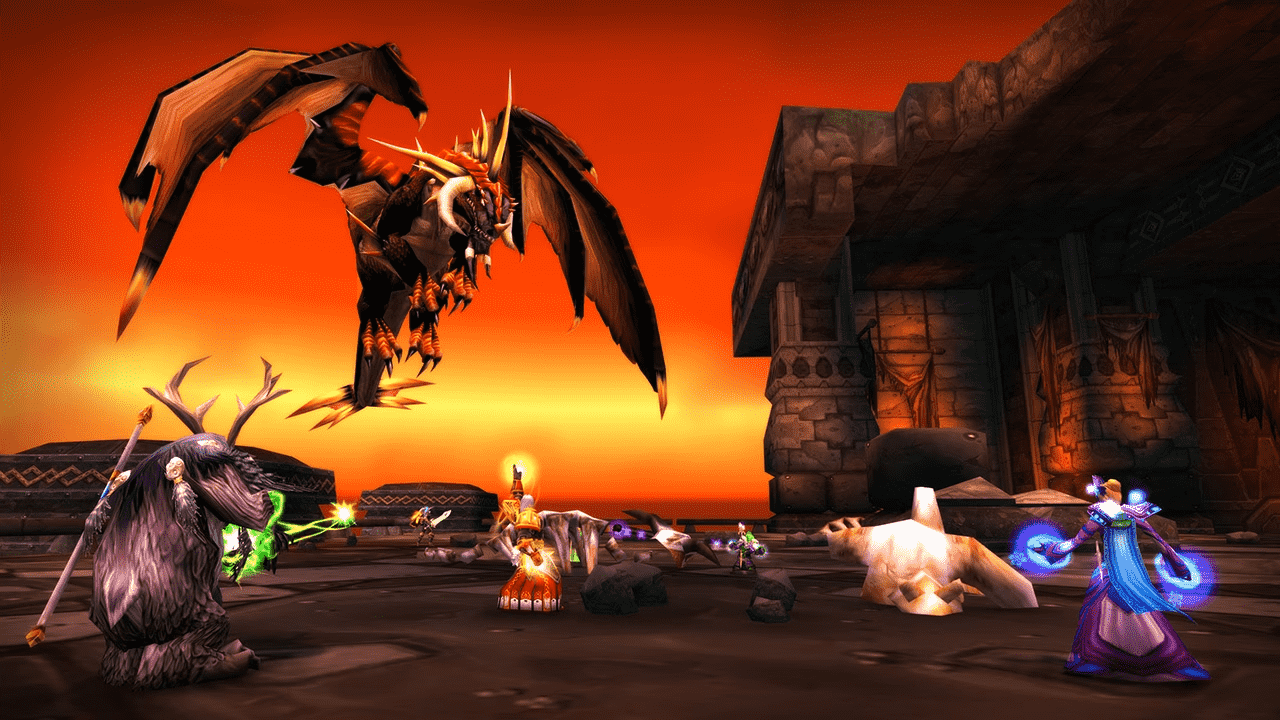
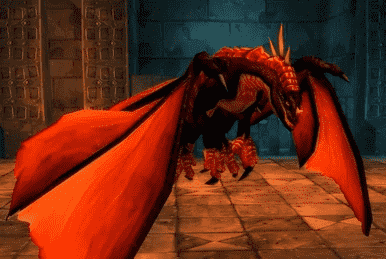
Razorgore the Untamed
Razorgore kicks off the Blackwing Lair raid, and it's a two-phase encounter that demands coordination right out the gate.
Phase One: The Add Phase and Egg Destruction
To start the fight, you need to take control of the orb on the left side of the room. The optimal way to do this is having your entire raid rush in and simultaneously pop Goblin Sapper Charges.
All those explosions, combined with some AoE spells, will instantly wipe out the three Orb Protectors. This gives your raid time to set up without worrying about being overwhelmed.
Once the protectors are down, have your main tank—or any of your tanks—use the orb. This mind-controls Razorgore and starts the encounter. The tank controlling Razorgore gets a pet bar with his abilities, one of which is Destroy Egg. That’s the main job: destroying all 30 eggs throughout the room as fast as possible.
Razorgore can also Hibernate Dragonkin adds, which can buy some time if things start to get overwhelming. It’s not mandatory, but it’s a helpful tool if used right.
Meanwhile, your raid splits into four groups with evenly spread DPS. Each group takes a quadrant and is responsible for killing the adds as they spawn. These adds include orc mages, elite warriors, and dragonkin.
You’ll need a “quasi-tank” in each group—this doesn’t have to be a full tank; a Fury Warrior can do the job as long as someone is there to hold aggro on Dragonkin in particular.
Alternatively, you can have Hunters and Mages kite the Dragonkin using Distracting Shot, Frostbolt, or similar spells to stall them. This tactic helps if your DPS isn’t strong enough to keep the adds under control or if your healers are struggling with the incoming damage.
The goal of Phase One is simple but demanding: hold off the waves of enemies while your Razorgore controller clears all the eggs. Once all eggs are destroyed, Phase Two begins. The leftover adds from Phase One will despawn, and now it’s just the boss.
Phase Two: Burn It Down
Once Razorgore is no longer mind-controlled, the tank who controlled the orb will likely have the most threat. You want this tank to immediately drag Razorgore to the designated tank spot. The ranged group should be positioned at the back pillar.
This is crucial for avoiding Fireball Volley. When the volley cast begins, the ranged group should line of sight it by hiding behind the pillar, then move back out to continue DPS.
Melee DPS and tanks need to prep with Free Action Potions. Razorgore has a War Stomp that stuns everyone around him for about five seconds. Popping Free Action Pots before heading into Phase Two will help you avoid that and keep DPS consistent.
Another mechanic to watch is Conflagration, a frontal cone AoE targeted at the main tank. When it hits, the off-tank should be ready to pick Razorgore up while healers focus on keeping the main tank alive through the DOT effect.
As long as you manage positioning, swap tanks when needed, and keep DPS high, Phase Two should be smooth.
This fight is a good gauge as to whether or not you can handle the raid. If you can’t try some WoW raid carry Services first to put your character up to speed.
Vaelastrasz the Corrupt
Vaelastrasz is notorious for being a guild-breaker. This fight is a DPS race from the moment it starts, and if your group isn’t ready, things go downhill fast.
Vael starts the fight friendly. Your main tank should initiate the RP by interacting with him because after 30 seconds, Vael auto-aggros whoever started the dialogue. If your tank isn’t the one who triggers it, Vael might turn around and wipe the raid with his Fire Breath before positioning is set.
He starts at 30% HP, so he’s immediately in Execute range, and the whole point is to kill him fast. You cannot drag this fight out—mechanics will overwhelm you.
The first big mechanic is Essence of the Red. This is a buff that gives everyone in the raid infinite resources. Rogues get endless Energy, Warriors get infinite Rage, and mana users get unlimited mana. That means you can spam your highest output abilities without restraint. For healers, this means nonstop top-rank healing spells.
Next is Burning Adrenaline. Think of it like a ticking time bomb, but with a twist. When it’s applied, you’re going to die—no way around it—but while it’s active, you can cast all your spells instantly.
If you're a Mage, this means backing away from the raid and machine-gunning instant-cast Frostbolts until you explode. Healers should do the same—position away and pump instant-cast heals into the tank.
Eventually, your main tank will get Burning Adrenaline. When that happens, they’re on a death timer. Worse, the debuff reduces their max health steadily, so even before they explode, they become vulnerable to being one-shot by the boss.
At this point, your off-tank needs to be second on threat, ready to take over—but remember: you can’t taunt Vael. The off-tank must naturally be second in threat so the handoff is clean.
If you’re using Fury Warriors as off-tanks, make sure they’re watching their threat generation closely. A key tip: don’t use Heroic Strike. It generates bonus threat, and you don’t want that unless you're tanking.
Instead, Fury Warriors should use Cleave, which does not have the same threat modifier. Let your tank Warriors and off-tank spam Heroic Strike, while DPS Warriors rotate Cleave to keep damage high but threat manageable.
Rogues should vanish when needed. Casters should have a Limited Invulnerability Potion ready for emergencies. Hunters can manage with Feign Death.
If your DPS is on point, you'll bring Vael down before things spiral. Once you're in the Execute phase, and especially if you have a Warrior-heavy raid, he can go down very quickly.
Broodlord Lashlayer
Now for Broodlord Lashlayer. Half this encounter is just getting to him through the suppression room. If you’re looking for a breakdown of that, there’s a separate guide covering it. What matters here is the fight at the end. BWL is one stop on a packed calendar, and our TBC Anniversary guide maps the whole celebration.
Positioning and Mechanics
This is a healing-heavy, threat-sensitive boss fight—very on-brand for Blackwing Lair. You want all your tanks stacked together at the end of the suppression room. The main tank should have Broodlord against the wall.
Ranged should spread out at the opposite end of the room with their backs to the wall, ideally beside the pillar. Melee should be directly behind Broodlord, but again, with their backs against the wall to avoid getting launched by Blast Wave. If someone gets knocked into the suppression room or aggroes a whelp, it’s chaos.
Broodlord’s toolkit includes:
- Blast Wave, a knockback AoE
- Cleave
- Mortal Strike, which makes healing the tank rough
- Knock Away, which reduces the top threat target’s aggro by 50%
Because of Knock Away, your off-tanks need to be second on the threat list at all times. To make sure a DPS doesn’t accidentally become the top threat after a knockback, you may want to delay DPS at the start of the fight. Let the tanks establish solid threat—maybe have ranged do light damage and melee just auto-attack for the first 10-20% of the fight.
The key is keeping your tank rotation steady and your top two threat positions secure. If the threat table gets messy, the fight quickly snowballs out of control.
Firemaw
After Broodlord, you head into loot piñata territory with the black drakes. A lot of players prepared for Anniversary Phase 3 for this section as now, the loot becomes more abundant. First up is Firemaw.
Shadowflame and Cloak Requirement
Position Firemaw right outside the tunnel after Broodlord. He patrols, so grab him as soon as he’s in range. Everyone in the raid must have their Onyxia Scale Cloak equipped for this fight.
Firemaw uses Shadowflame, a frontal Shadow AoE that applies a devastating DoT unless you’re immune—thanks to the cloak. Even with the cloak, if Firemaw turns due to a bad aggro swap, it can easily wipe half your raid instantly.
Firemaw has a threat-drop mechanic that makes this very likely to happen if you're not careful. Combine that with Wing Buffet, a frontal cone knockback that reduces the threat of anyone hit, and you’ve got a recipe for disaster unless you manage tank swaps correctly.
You can handle Wing Buffet two ways:
- Have an off-tank taunt right before the Wing Buffet hits, eat it, then have the main tank taunt back.
- Time the taunt exactly at the moment of the Wing Buffet to catch aggro cleanly and resume the tanking role.
Either works, but the second method—swapping tanks in sync with the Buffet—is cleaner and avoids stacking too many debuffs on one tank.
Flame Buffet and Raid Damage
Firemaw also casts Flame Buffet, a raid-wide fire AoE that stacks infinitely. The more stacks you get, the more fire damage you take. Once you hit about 6-8 stacks, the damage becomes unmanageable, and healers can’t keep up. Everyone—ranged, melee, and healers—needs to rotate out and line of sight the boss to drop stacks before coming back in.
First Aid becomes crucial here. Every time you line of sight and drop Flame Buffet stacks, bandage yourself to help lighten the load on your healers.
Tank swaps during Wing Buffet help drop Flame Buffet stacks too. While one tank takes over, the other can step out, reset stacks, and then rotate back in.
If you're not killing Firemaw quickly enough, you may need two separate healer groups. Group A goes out, takes a few stacks, heals, then hides while Group B comes in and takes over. You repeat this rhythm the whole fight, keeping heals constant while rotating to avoid being overwhelmed.
This pattern—stack control, healer swaps, and tight threat management—is your path to a clean Firemaw kill.
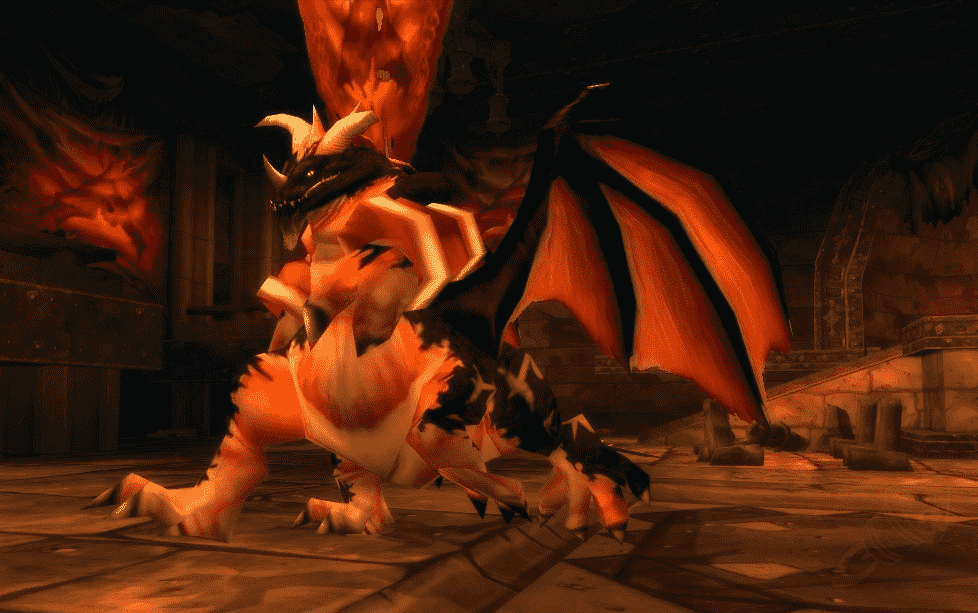
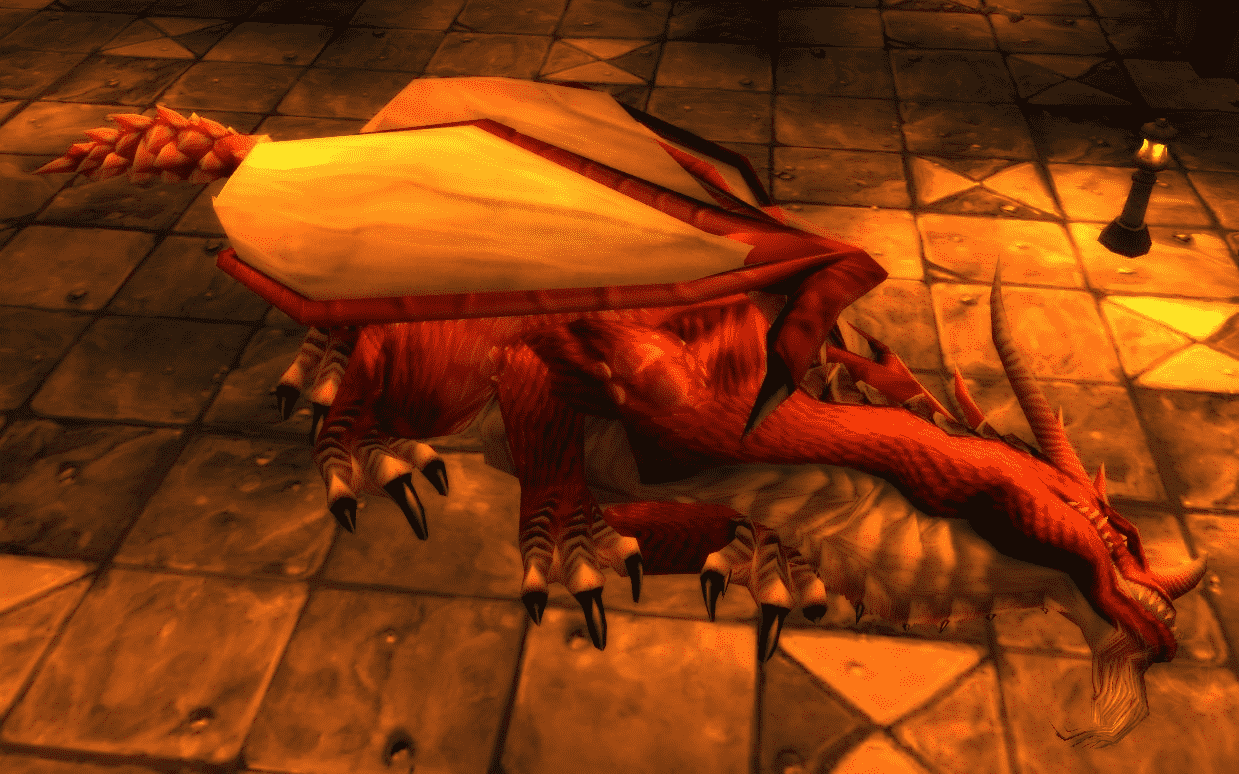
Ebonroc
Ebonroc shares a few core mechanics with the other drakes in Blackwing Lair, namely Wing Buffet and Shadow Flame, but there’s one ability that makes him stand out and demands tight coordination from your tanking team: Shadow of Ebonroc.
This ability is a debuff cast on the current main tank every eight seconds. Once applied, every melee swing Ebonroc lands on that target heals him for 25,000 HP. You can’t dispel it, you can’t cleanse it, and there’s no workaround other than doing tank swaps correctly and consistently.
Here’s how you handle it: when Shadow of Ebonroc goes out, your off-tank needs to taunt immediately and take over. Then, once the debuff hits the new tank, your third tank—or whoever’s next in line—takes over again. You’ll want to rotate your tanks like this for the entire fight. Communication between tanks is critical.
Now, while you're juggling the Shadow of Ebonroc debuff, you also have to stay on top of Wing Buffet. That’s where things can get tricky. Sometimes Wing Buffet and Shadow of Ebonroc will go off close together or even simultaneously, which can easily throw your taunt timing off.
Just stay calm. If a taunt gets resisted or the boss heals a bit because you didn’t swap fast enough, it’s not the end of the world. You can recover. Just keep the swaps going and keep the group coordinated.
Flamegor
Flamegor is arguably the easiest of the three black drakes. He’s got Shadow Flame, he’s got Wing Buffet, and he has Fire Nova—and that’s it.
Every so often, Flamegor becomes enraged and starts spamming Fire Nova, a raid-wide AoE. It doesn’t do much damage by itself, but you don’t want it going off repeatedly. Luckily, it’s easily countered with Tranquilizing Shot. You’ll want three Hunters assigned to a tranq shot rotation, each responsible for covering the enrages as they come up.
You’re basically just tanking the boss, swapping tanks to manage Wing Buffet, and keeping Fire Nova suppressed through Hunter tranq shots. That’s the fight.
A note about all three drakes: if you’re playing during the first week and addons like Deadly Boss Mods aren’t working reliably, you’ll have to pay attention to boss emotes. Every time a Wing Buffet is about to cast, the boss will yell something in chat—like “Flamegor begins casting Wing Buffet.” That’s your cue that threat is about to reset, so keep your eyes on the chat log.
Chromaggus
Now we get into the heavy hitters. Chromaggus is one of the most complicated bosses in Blackwing Lair and arguably one of the hardest due to the sheer number of mechanics happening all at once. You might have to do a WoW Classic Gold run if you’re struggling here.
Breath Abilities
Let’s start with Chromaggus’s breaths. He only has two of them per raid instance, but there are five possible breath mechanics in total, and which two he has is randomized.
- Incinerate – Frontal cone fire breath that deals 3–4k damage.
- Corrosive Acid – Frontal breath that applies a DOT and reduces armor.
- Frost Burn – Frontal frost breath that slows attack speed significantly.
- Ignite Flesh – Another fire breath, this one stacks and deals increasing damage over time.
- Time Lapse – The big one. Stuns targets for six seconds, cuts their health in half, and wipes their threat.
You only get two of these in any given Chromaggus attempt, but Time Lapse is the most punishing by far. If your main tank eats a Time Lapse, their threat is gone permanently.
This is where a three- or four-tank rotation becomes mandatory. You need backup tanks near the top of the threat list at all times, ready to take over instantly.
The breath comes every 30 seconds. To deal with it, everyone in the raid hides before the breath goes off. Your tank pulls the boss and backpedals—yes, backpedals—into the perfect spot at the corner by the arch.
Ranged hides around one side, melee hides in a cubby on the other. Healers keep the tank up while line-of-sight. Then, 5–10 seconds before every breath, everyone hides.
If Time Lapse is one of the breaths and your tank gets hit, threat drops instantly, and the next person on the threat list needs to take over. That’s why your tanks need to rotate and manage threat carefully throughout the fight. If Time Lapse isn’t in your breath combo, the fight becomes way easier—but you won’t know until you pull.
Debuffs
On top of the breaths, Chromaggus also applies up to five different afflictions to your raid:
- Affliction: Red (Fire) – A fire-based disease.
- Affliction: Green (Nature) – A poison that reduces healing by 50% and deals nature damage.
- Affliction: Blue (Arcane) – Drains mana, increases attack speed, and slows movement.
- Affliction: Black (Curse) – Increases fire damage taken by 100%.
- Affliction: Bronze – Can’t be dispelled; stuns you for four seconds periodically.
If you get all five afflictions at once, you’ll be transformed into a Drakonid that attacks your raid—so dispelling is non-negotiable.
Priests, Paladins, Druids, Mages—everyone needs to be on top of their dispels. The Bronze Affliction, though, can only be removed with Hourglass Sand, which drops from trash mobs before Chromaggus. You won’t have much of it early on, so prioritize giving it to your main tank. Everyone else just has to eat the stuns and plan around them.
If you have Bronze, give yourself more time to hide before breaths. Don’t wait until three seconds are left. Move at eight or nine seconds in case you get stunned.
Frenzy
Just like Magmadar, Chromaggus frenzies every 15 seconds. Right after each breath, he’ll go into a frenzied state. Hunters need to Tranquilizing Shot immediately. Then he’ll frenzy again halfway between breaths, and another Hunter needs to handle that one.
This is why you want at least three or four Hunters on this fight—some will get stunned with Bronze and miss their window, so the rotation needs to be flexible.
If a Frenzy goes untranqed, the boss will hit like a truck. This is a key mechanic to manage consistently or you risk a wipe.
Spell Vulnerabilities
Chromaggus is highly resistant to all magic schools except one, and that vulnerability rotates periodically. Casters should use Rank 1 spells to “probe” and discover the active vulnerability. If a Rank 1 Frostbolt hits for 400 instead of 100, you’ve found it.
Once the vulnerability is identified, everyone switches to that school. It could be Frost, Fire, Arcane, Shadow, or Nature. Communicate quickly and adjust accordingly. Vulnerabilities rotate throughout the fight, so this is a constant team effort.
At 20% HP, Chromaggus soft enrages. He grows in size, turns red, and hits a lot harder. Your main tank should prep with Stone Shield Potions, be ready with Last Stand, Shield Wall, and Paladins can throw down Lay on Hands for the armor boost.
You can game this phase: stop DPS around 22% and wait for a good spell vulnerability—ideally Frost or Fire—then blow him up in one big push. Try to time it so a breath just happened, giving you a 30-second window to nuke. Also, make sure a Frenzy doesn’t line up with the enrage, or get your Hunters ready to tranq immediately.
Managing this last stretch is the difference between a clean kill and a disaster. Line up your cooldowns, wait for a solid window, and go hard.
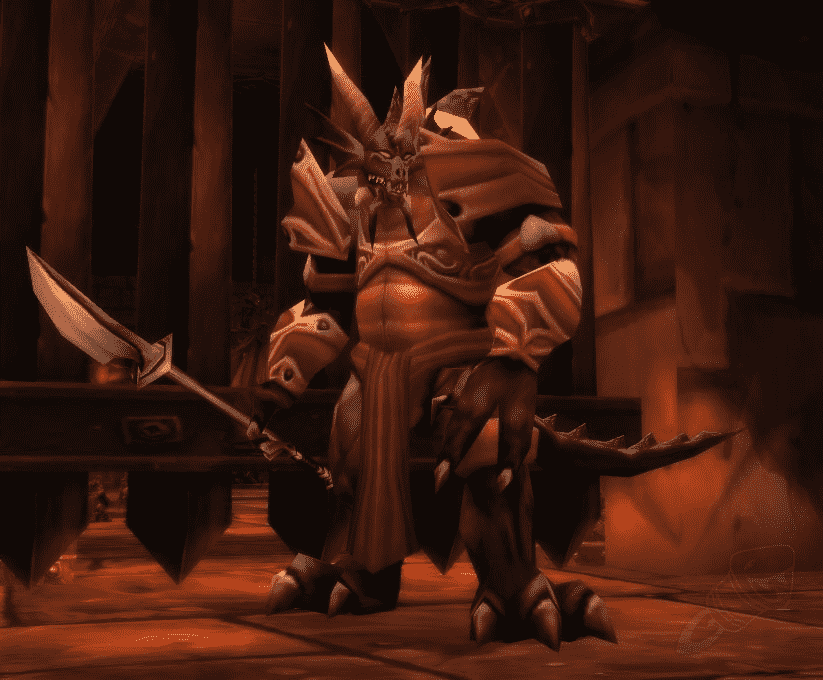
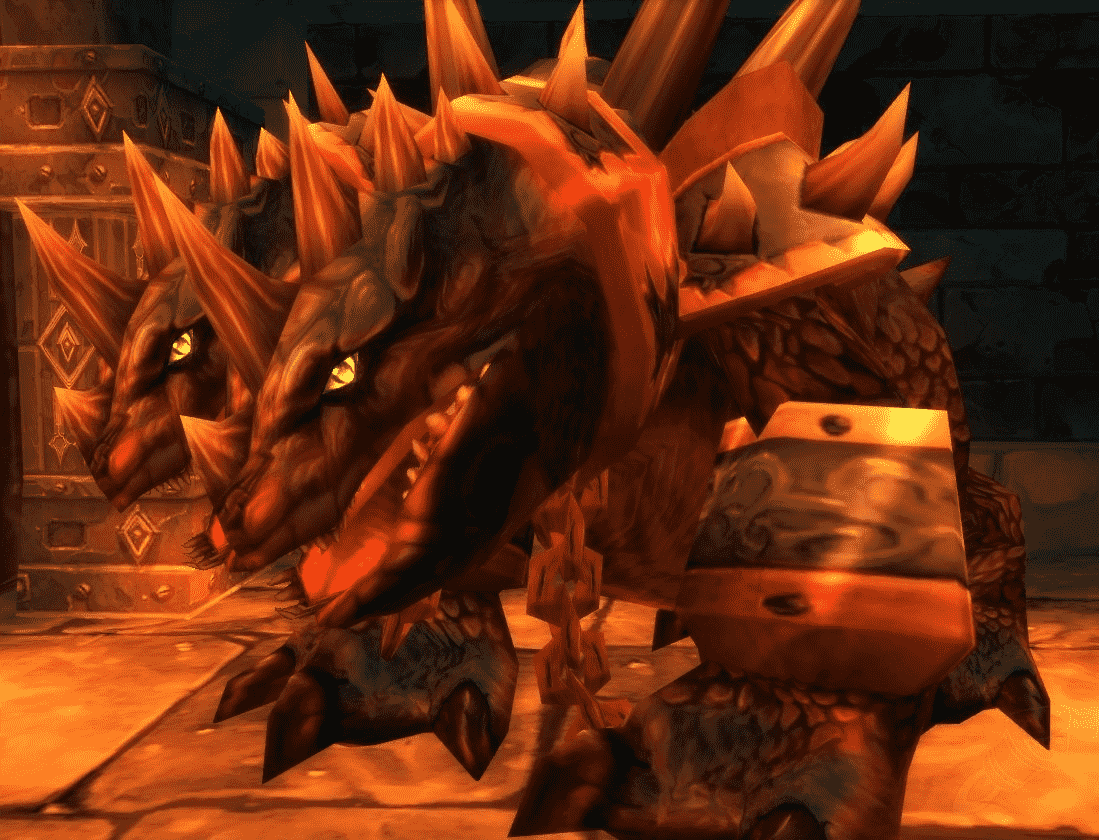
Nefarian
Nefarian, like Razorgore, is a two-phase encounter that starts with an add phase and ends in a boss burn marathon. It's the final and most complex boss fight in Blackwing Lair, with unique mechanics that push your raid’s coordination, awareness, and class knowledge.
Phase One: Add Waves
The first phase is a controlled chaos of add spawns. You’re dealing with waves of Dragonkin coming from both sides of the room. Split your DPS into two balanced groups. However, all mages should stay grouped on one side.
Why? Because one side is going to spawn frost-resistant adds—blue Dragonkin and Wyrmkin. Once you identify which side has the frost-resistant mobs, shift the mage group to the opposite side. The other DPS group handles the resistant side.
Meanwhile, Lord Victor Nefarius—Nefarian’s human form—is casually walking around above, casting Shadow Bolt Volleys into the raid. These volleys deal moderate damage, and it’s a good idea to have everyone pop Shadow Protection Potions before you engage.
The add phase lasts about a minute and a half to a minute and 45 seconds. After that, the boss descends.
Phase Two: The True Fight Begins
Once Nefarian lands in his dragon form, the real war begins. He has a massive health pool, and you're in for a long, attrition-based fight.
Nefarian periodically curses the main tank, reducing incoming healing by 75%. This must be decursed instantly, so make sure Mages and Druids are in range and ready to clear it as soon as it lands.
Every 30 seconds, he also casts a fear that affects players within 30 yards—just like Onyxia. Warriors can stance-dance, and Tremor Totems help keep tanks stable. Fear Ward from Priests should be consistently cycled on the main tank.
Ranged DPS should stand outside the fear radius unless they’re required to help with decursing. If you're inside and too close to his head, there’s a risk of getting feared into a cleave and dying instantly.
It’s all about stabilizing the tank, watching for fears, and managing the steady chip damage over time.
Class Calls
This is where the fight gets creative. Every 25–35 seconds, Nefarian performs a Class Call, adding an extra layer of chaos based on specific classes in your raid. Here's how each call works:
- Warrior Call – All warriors are forced into Berserker Stance, reducing their threat and increasing incoming damage. Keep the tank alive at all costs.
- Warlock Call – Summons one Infernal per Warlock. You can either kill or banish them. You can’t enslave them in Classic.
- Shaman Call – Spawns corrupted versions of Shaman totems that buff Nefarian or damage your raid. Prioritize killing these quickly.
- Rogue Call – Teleports all Rogues to the front of Nefarian, where they’re immobilized in cleave and breath range. The tank must move away from the Rogues so they don’t get obliterated.
- Paladin Call – Nefarian casts Blessing of Protection on himself, becoming immune to physical damage. Rogues and Warriors should back off until it wears off.
- Priest Call – Applies Corrupted Healing, where any healing done causes a stacking DOT on the target. If you over-heal during this call, you could kill your raid. Heal carefully or use alternatives like Shields and HoTs that don't trigger the effect.
- Mage Call – The most annoying one. Nefarian starts randomly polymorphing raid members into cows, worms, giraffes—you name it. Mages should blink behind the throne or out of LOS to avoid hitting teammates with chain polymorphs.
- Hunter Call – Breaks your ranged weapon. Hunters should carry a backup weapon, like the AV or Stratholme bow, and swap when needed.
- Druid Call – Forces all Druids into Cat Form for 30 seconds. They can’t shift out. Since Druids usually handle decursing, Mages must cover for them during this call.
These class calls make each fight slightly different. Stay adaptable, keep communication open, and you can manage them effectively.
Phase Three: The Undead Rush at 20%
At 20% HP, Nefarian reanimates every Wyrmkin you killed during Phase One. They rise as skeletons and charge the raid all at once. This is a make-or-break moment.
- Paladins should Blessing of Protection your strongest Mages to keep them from getting annihilated.
- Mages and Warlocks should use Limited Invulnerability Potions (LIPs) to stay alive and AoE everything down immediately.
- Make sure your whole raid is stocked with Stratholme Holy Water. Doing Stratholme runs in advance is highly recommended so everyone can use these AoE bombs when the skeletons spawn. One Holy Water per person can turn this phase into a joke.
Once the skeletons are dealt with, it’s back to burning the boss down. Keep dodging class calls, stay steady with the tank management, and eventually, you’ll win this war of attrition.
Take On The Black Wing Lair
The Black Wing Lair is currently the toughest raid in WoW Classic right now. If you’re still struggling to go through it even with our guide, you might need to grind for some WoW Classic Gold first to upgrade your gear.