2025 OSRS Ironman Equipment Progression Guide
29.05.2025 - 11:30:29
Game Guides , OSRS Guides , OSRS Money Making , OSRS PvM , OSRS Quests & Achievements , Runescape

Ironman is hard enough on its own but having a decent gear progression route can make things easier for you. With lots of restrictions, this is easier said than done though.
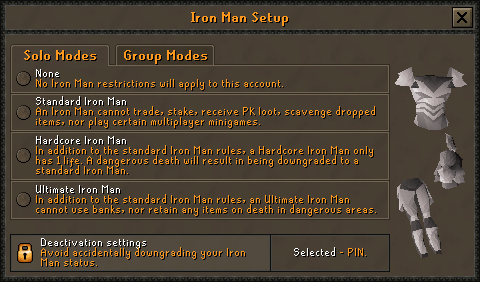
There are lots of things that make an OSRS Ironman challenge difficult. Aside from the fear of losing your Ironman status upon death, there are many restrictions that prevent you from progressing through gear as you normally would on a regular account. When it comes to the toughest challenges in OSRS.
If you want to try out an Ironman run without messing up your account, RPG Stash has OSRS Ironman accounts for sale so make sure to drop by out store.
Here are restrictions that will make gear progression significantly more difficult:
- You can't trade with other players, or buy from them through their shops to take advantage of cheaper items.
- Drops from the kills of other players - including PvP won't be applicable to you. As long as another player has attacked that monster you also tried to kill, you won't get any loot. This means farming for gear or gold will be more difficult.
- You can't use the Grand Exchange unless you're transacting bonds. This alone greatly handicaps your capability to create a certain build or to easily gather the right materials for a certain item you're creating.
- You can't receive items from the Falador Party Room.
There are many other systems in place that could prevent you from building the perfect gear. However, if you have the right plan in check, you should have a solid way to the top through gear progression.
OSRS Ironman Gear Progression
The builds you'll see below are specifically curated to make progression through an Ironman account as seamless as possible. The items will be listed from best to least so if you were to check it out, start by securing the item at the bottom of each slot and work your way up.
We're no longer going to include early game items that are relatively easy to get even on an Ironman run. We're going to instead start by listing items that you can get from mid to late-game. Lastly, while these are good progression paths to follow, they aren't set in stone and you should still abide by what you're most comfortable with.
The notes beside the items is to show you where you can stash that particular item.
Melee
When you're first starting out in your Ironman run and you want to focus on improving your melee capabilities,it's best to get the adamant sword, goblin paint cannon, and the rune sword first.
These are the most accessible and most powerful options for all beginners in Ironman.
If you're lucky enough, you can try to get the Rune scimitar ornament kit by doing beginner clues.
You can skip that entirely and go directly to doing Monkey Madness I to get the dragon scimitar instead. This will help you through a huge chunk of the mid-game but keep in mind that Monkey Madness I isn't an easy quest and will require a lot of preparation as well. If you can, try to get the Sarachnis Cudgel from Sarachnis.
For general usage, we highly suggest getting the Abyssal Whip as it's the best and most cost-efficient one for Ironman runs. It is rather risky to wield though as using it requires you to have a Slayer level of 85. If you want something better but harder to get, go for the Voidwaker instead. It has better stats and can be passed on for your best-in-slot choice for special attack.
The two best weapons for Ironmen are the Ghrazi rapier and the Osmumten's fang. Unfortunately, these weapons are very hard to get even on a regular account, let alone on an Ironman account where trading and resources are fairly limited.
For your off-hand or shield, we highly recommend getting the defenders instead with the dragon defender or the avernic defender being your penultimate goal. If you want to farm dragons, you can get a dragon defender but outside this purpose, you're better off with avernic defender.
It can be enticing to get melee armor with high defense stats but for Ironmen, offense is the best defense so it's best to look for Strength bonuses as well. You can cover your lack of defenses with Protection Prayers after all.
That said, one of the most versatile head pieces to get is the Neitiznot faceguard. If this is too expensive for you, you can opt for the berserker helmet which offers less Strength bonus but is far more affordable.
If you're planning on training your melee combat skills, you can instead go for a full obsidian set partnered with a Berserker Necklace. The Torva helm should be your main goal but seeing that it's very expensive, you're better off with other helmets instead.
For your body armor, aim for the bandos chest plate or the fighter torso. The former is preferred as aside from its considerable Strength bonus, you're also getting higher defense bonuses as well. Since you have the bandos chest plate, you should also consider getting the tassets too for even more Strength bonus.
Ideally, you'd want to get a Full Torva set to cover most of your armour but it's the most expensive melee armor around. It's best reserved for late game adventures so try not to focus on this too much.
For the gloves, go for the culinaromancer's gloves but ultimately focus on getting the ferocious gloves. As for your boots, the climbing boots are the most optimal during mid-game but you'd eventually want to upgrade these for dragon boots and primordial boots later on.
You're going to want to max out your Strength bonus with the Amulate of torture in the endgame but you can make ends meet with the amulet of fury or glory early on. For your ring, consider getting the berserker ring (i) for its amazing strength bonus. It's also relatively easy to obtain compared to other strength-based rings out there.
Slot | Items |
Head | - Torva full helm - Neitiznot faceguard - Serpentine helm - Helm of neitiznot (Shop, STASH) - Obsidian helmet (POH) / Berserker helm (Shop) |
Neck | - Amulet of torture - Amulet of fury - Amulet of strength / Strength amulet (t) (POH) - Amulet of glory (POH, STASH) / Amulet of glory (t) (POH) - Amulet of power / Amulet of power (t) (POH) |
Back | - Infernal cape (POH) - Fire cape (POH, STASH) - Mythical cape (POH) - Trimmed skillcape (POH) - Skillcape (POH) |
Body | - Torva platebody - Bandos chestplate / Inquisitor's hauberk (POH, skip) / Fighter torso (POH) - Obsidian platebody (POH) |
Legs | - Torva platelegs - Bandos tassets / Inquisitor's plateskirt (POH, skip) - Obsidian platelegs (POH) / Barrows legwear |
Weapon | - Osmumten's fang - Ghrazi rapier / Inquisitor's mace - Abyssal whip (STASH) / Voidwaker - Sarachnis cudgel / Dragon scimitar (Shop) / Rune sword (Shop) |
Shield | - Avernic defender (STASH) - Dragon defender (STASH) |
Hands | - Ferocious gloves - Barrows gloves (Shop, STASH) - Dragon gloves (Shop) - Rune gloves (Shop) - Combat bracelet |
Boots | - Primordial boots (STASH) - Dragon boots (STASH) / Dragon boots (g) (POH) - Spiked manacles (POH) - Rune boots (STASH) - Climbing boots (Shop) / Climbing boots (g) (POH) |
Ring | - Ultor ring - Bellator ring - Berserker ring (i) - Brimstone ring - Berserker ring |
Range
For the Ranged approach, we're going to give you two suggestions. Let's start with two-handed Ranged weapons. For this, you're going to want to mainly focus on shortbows.
The first goal should be to get the magic shortbow (i) which should be good enough to get you through most of the early stages in the game. Once you have access to The Gauntlet (and can beat it), you should then aim for the Bow of Faerdhinen.
This is one of the best all-around Ranged weapons in the game because of its high damage output. If you want something more with firepower, go for the Toxic Blowpipe instead but make sure to use Dragon Darts. The end goal however, is to get the Twisted Bow but given its value, it will take a lot of time before you can get this.
Next up, we've got one-handed crossbows. You're going to want to get the Dorgeshuun crossbow first because it has cheap ammo and is easy to train with. It's the best option during the early game.
Work your way up to the Zaryte crossbow next but in all honesty, don't go anything beyond here. It's best to use two-handed weapons because of their power and investing more into one-handed ranged weapons is a waste.
If you're opting for one-handed ranged weapons, the best off-hand equipment to partner it with is the twisted buckler. Before that, you can use the dragonfire ward instead.
For your armor, you're going to want to start with regular dragonhide armor and then work your way up into blessed dragonhide armor. Once you're capable of doing the Barrows, do a few runs and aim to complete Karil's set for its sweet set bonus. You can follow it up with an Armadyl armor set or you can go ahead and shoot for the Masori armor and then its upgraded version instead.
If you're using the bow of Faedhinen, you can skip the Masori armor and then just go for a Crystal armor instead as this creates a deadly combo.
For the boots, the best options are the Pegasian boots but you can start with either the blessed boots or ranger boots. However, these two alternatives are good enough to last you throughout your run. You can skip the Pegasian boots and just focus on spending money on your armor.
As for your gloves, the best options include the barrows gloves, culinaromancer's gloves, and the Zaryte vambraces. Any of these are strong contenders for your BiS weapons to be honest.
Once you hit 99 Ranged, the best cape to get is obviously the Ranging Cape but if you're not planning on maxing out this skill, the best cape is the Assembler max cape instead.
Since this is a Ranged setup we're talking about, make sure to aim for the necklace of anguish. If you don't have this, the amulet of fury and glory are both viable alternatives as well.
Slot | Items |
Head | - Masori mask (f) (POH) / Crystal helm - Masori mask (POH) - Armadyl helmet / Robin hood hat (POH) - Blessed coif (POH) - Archer helm (Shop) |
Neck | - Necklace of anguish - Amulet of fury - Amulet of glory (POH, STASH) / Amulet of glory (t) (POH) - Amulet of power / Amulet of power (t) (POH) - N/A |
Back | - Assembler max cape (POH) - Ava's assembler (storage concerns) - Ranging cape(t) (POH) + Vorkath's head - Ranging cape(t) (POH) - Ava's accumulator (Shop) |
Body | - Masori body (f) (POH) / Crystal body - Masori body (POH) - Armadyl chestplate / Blessed body (POH) - Karil's leathertop - Black d'hide body / Black d'hide body (g) (POH) / Black d'hide body (t) (POH) |
Legs | - Masori chaps (f) (POH) / Crystal legs - Masori chaps (POH) - Armadyl chainskirt / Blessed chaps (POH) - Karil's leatherskirt - Black d'hide chaps / Black d'hide chaps (g) (POH) / Black d'hide chaps (t) (POH) |
Weapon | - Zaryte crossbow - Armadyl crossbow / Dragon hunter crossbow - Dragon crossbow - Rune crossbow (STASH) - Dorgeshuun crossbow (Shop) |
Shield | - Twisted buckler - Dragonfire ward - Book of law (Shop) / Unholy book (Shop) - Blessed d'hide shield (POH) |
Two-Handed Weapon | - Twisted bow - Bow of faerdhinen (STASH) - Toxic blowpipe / Venator bow - Magic shortbow (imbued) |
Hands | - Zaryte vambraces - Barrows gloves (Shop, STASH) - Rune gloves (Shop) |
Boots | - Pegasian boots - Ranger boots (POH) - Blessed d'hide boots (POH) - Shayzien boots (5) (POH) - Snakeskin boots (POH) |
Ring | - Venator ring - Archers ring (i) - Ring of shadows (NPC) - Brimstone ring - Archers ring |
Magic

For your weapons on a Magic build, let's first talk about powered staves. Obviously, the best choice here is Tumeken's Shadow but is easily one of the most expensive items in the game. If we're talking scalability and ease of handling, you'd first want to start with the Trident of the Sea. Thanks to its many charges, this is an excellent weapon to have. If you want more fire power, you can upgrade to a Trident of the Swamp but again, the Sea variant has more charges.
Before jumping into the Tumeken's Shadow, we highly suggest going for the Sanguinesti staff first. Obtaining this is a must fo Ironmen and for any account for that matter. Ironman players typically have a hard time getting this because of its prices so many get it during the end game. Quick access to Tumeken's Shadow is near impossible.
If you want to focus mainly on regular spellcasting, you'd first want to start with the ancient staff or any of the elemental staves. The latter is highly recommended if you're looking to train your Magic with splashing. You'd eventually want to work your way up to the Master Wand, then the Ancient Sceptre. For this category, the best and prime options are the Kodai Wand and the Nightmare Staff.


For an all-around staff, you can settle for the Dust battle staff which is very high-utility thanks to House Teleport. The problem with this is that the runes required to use this staff isn't easy to get.
You're going to want to equip an Elidinis' Ward for your off-hand so that your magic damage is maximized further. Many players get this as soon as they can. If this is too expensive for you at the moment, you can settle for the book of darkness or the unholy book instead. Don't forget to pick up the Tome of Fire if you want to use fire magic mostly.
For your armor, you're going to start with the Mystic Robes which should be more than enough to help you go through the Barrows to get the Ahrim's set. Once you have this powerful set, you can move forward to the Virtus robes but you can also jump to the Ancestral Robes set if you want to.
Both the Ancestral robes and Virtus robes are excellent choices but what you choose will entirely depend on what type of magic you're focusing on in the first place. Ancestral robes are better for general magic use while Virtus Robes are excellent for using Ancient Magicks. For Blood Spells, you're going to want to get the Bloodbark Armor instead. With this set, your healing with Blood Spells is significantly better, allowing you to save up on runes and healing items.
The strongest magic cape in the game is one of the imbued god capes as it provides substantial Magic damage bonus. When you're starting out however, it's best to take any regular god cape with you instead.
At the start of your Ironman journey, you're going to want to carry the culinaromancer's gloves first because it's a quick and easy way to increase your Magic accuracy. Progress a little deeper into the Ironman run and you'd want to switch to Barrows gloves instead. The best for the hand slot however is the tormented bracelet.
It's easy to say that the eternal boots are the best choice for Ironman mages because of their high Magic bonus but it's not worth keeping in the long run. The better option would be the Wizard boots since you can store them in your treasure chest so it's easy to keep safe. For those lacking in defenses, you can use the Boots of Brimstone instead as it gives a decent Magic damage bonus and defense bonus all at once.
The best neckwear is the occult necklace and luckily, this isn't that hard to get. Focus on getting this early on as it adds a substantial Magic bonus which can make many grind easier. Not having the occult necklace isn't a good idea even if you have a full set of the best gear.
Slot | Items |
Head | - Ancestral hat (POH) - Virtus mask (POH) - Farseer helm (Shop) - Healer hat (POH) / Bloodbark helm (POH) - Mystic hat (Shop, POH) |
Neck | - Occult necklace - Amulet of fury - Amulet of glory (POH, STASH) / Amulet of glory (t) (POH) - Amulet of magic / Amulet of magic (t) (POH) - Amulet of power / Amulet of power (t) (POH) |
Back | - Imbued god cape (POH) - God capes (POH) - Ardougne cloak 4 (Shop) - Ardougne cloak 3 (Shop) - Ardougne cloak 2 (Shop) |
Body | - Ancestral robe top (POH) - Virtus robe top (POH) - Ahrim's robe top - Bloodbark body (POH) - Mystic robe top (Shop, POH) |
Legs | - Ancestral robe bottom (POH) - Virtus robe bottom (POH) - Ahrim's robeskirt - Bloodbark legs (POH) - Mystic robe bottom (Shop, POH) |
Weapon | - Kodai wand / Sanguinesti staff / Nightmare staff - Trident of the swamp / Trident of the seas / Ancient sceptre (storage concerns / Master wand) - Slayer's staff (Undead grasp, Shop) / Iban's staff (u) (NPC) - Accursed sceptre - Staff of fire (Shop) |
Shield | - Elidinis' ward (f) / Elidinis' ward / Arcane spirit shield - Book of darkness (Shop) / Unholy book (Shop) - Book of the dead (NPC, thralls) - Tome of fire |
Two-Handed Weapon | - Tumeken's shadow |
Hands | - Tormented bracelet - Barrows gloves (Shop, STASH) - Rune gloves (Shop) / Bloodbark gauntlets (POH) |
Boots | - Eternal boots / Infinity boots (POH) / Bloodbark boots (POH) / Wizard boots (POH) - Mystic boots (Shop, POH) |
Ring | - Magus ring (with shadow) - Ring of shadows (NPC) - Seers ring (i) / Brimstone ring - Seers ring - Beacon ring (NPC) |
Specialty Build

This build below offers a more versatile approach for your Ironman run. Its goal is to make sure that you have a setup that's readily available to use depending on what you need. While it's good to have a multitude of options at your disposal, this method is rather risky as it means you'll be bringing along lots of gear with you but it's a good way to gain an advantage against the raids and bosses in the game.
As a general rule of thumb, you'd want to invest what money you have into getting equipment rather than healing items. You can use Magic and food items to sustain yourself throughout your Ironman run.
Slot | Items |
Head | - Slayer helmet (i) (STASH) - Void Knight helmets (POH) - Serpentine helm - Justiciar faceguard (POH) |
Neck | - Salve amulet (ei) - Amulet of blood fury |
Back | - Max cape (POH) - Construction cape (t) (POH) |
Body | - Proselyte hauberk (Shop, POH) - Elite void top (POH) - Zealot's robe top (POH) - Monk's robe top (Spawn) / Monk's robe top (t) (POH) / Shade robe top (POH) - Justiciar chestguard (POH) |
Legs | - Proselyte cuisse (Shop, POH) - Elite void robe (POH) - Zealot's robe bottom (POH) - Monk's robe (Spawn) / Monk's robe (t) (POH) / Shade robe (POH) - Justiciar legguards (POH) |
Weapon | - Blade of saeldor (Don't corrupt) - Arclight (STASH) - Dragon hunter lance - Zamorakian hasta - Dragon hunter crossbow |
Shield | - Elysian spirit shield - Spectral spirit shield - Dragonfire shield |
Two-Handed Weapon | - Scythe of vitur - Elder maul - Zamorakian spear - Dinh's bulwark - N/A |
Ammo/Spell | - Ghommal's lucky penny - Rada's blessing 4 |
Hands | - Void knight gloves (POH) |
Boots | - Holy sandals (POH) |
Ring | - Lightbearer - Ring of suffering (i) - Ring of suffering - Explorer's ring 4 - Ring of wealth |
Special Attack | - Dragon warhammer / Dragon claws / Voidwaker / Bandos godsword (STASH) - Dragon dagger (Shop) - Toxic blowpipe / Saradomin godsword - Dragon battleaxe (STASH, Shop) |
Pro Tips For Ironman
Of course, it's easy to say that you should get this build or get that build but the Ironman challenge in OSRS is a lot tougher than you think because of all the restrictions put in place. To help you out, here are a few essential tips to keep in mind.
Pick Your Quests Well
Questing is a lot more important in an Ironman run than it is on a regular account. You can heavily rely on the rewards you get for each of the quests in the game so it's more than essential that you progress through the quests in the right order. You'd want to focus on certain quests first so that you get important unlocks for them.
For starters, you'd want to finish the quests where you're able to unlock certain skills, teleports, and areas in the game. Below is a table showing just that.
Quest | Unlocks |
Animal Magnetism | Ava's Devices |
Bone Voyage | Fossil Island |
Desert Treasure | Ancient Magicks |
Dragon Slayer | Rune Platebody/Green D'hide Body |
Druidic Ritual | Herblore |
Dwarf Cannon | Dwarf Multicannon |
Fairytale Parts 1 and 2 | Fairy Rings |
Family Crest | Cooking/Goldsmithing/Chaos Gauntlets |
Ghosts Ahoy | Ectophial |
King's Ransom | Piety |
Lost City | Dragon Dagger |
Lunar Diplomacy | Lunar Spells |
Monkey Madness 1 | Dragon Scimitar |
Nature Spirit | Mort Myre Swamp |
Priest in Peril | Morytania |
Recipe for Disaster | Barrows Gloves |
Royal Trouble | Extra 5 workers for Managing Miscellania |
Rune Mysteries | Runecrafting |
The Fremmenik Isles | Helm of Neitiznot |
The Grand Tree | Gnome Gliders |
The Slug Menace | Proselyte Armour |
Throne of Miscellania | Managing Miscellania |
Tree Gnome Village | Spirit Trees |
By prioritizing certain quests, you can make traveling, combat, and a lot of other things easier. Some of the quests above can even give you some great gear for free. In an Ironman run, it's always best to find sources for free items so that you don't waste time farming which also puts yourself at risk of dying.
Making Money
Getting rich and buying stuff for lower the price than they actually are is impossible because the Grand Exchange isn't available on Ironman accounts. Making money is going to be more difficult and you'll need to be really practical and knowledgeable in the game if you want to start making gold that you'll use for buying gear.
There aren't a lot of money making techniques on an Ironman account but these are the best ones.
Method | Hourly Profit | Hourly XP | Hourly Resources | Requirements | Notes |
Picking up ruby rings | 400,000 | 22,000 Magic | None | Magic - 55 , Crack the Clue III | This is one of the most popular methods out there but the problem is that lots of players are doing it too. The profit you get is heavily depended on what others are doing since the respawn timer of ruby rings is 240 seconds. Once picked up, you High-Level Alchemy on the rings for even more profit. Unfortunately, it's not available to Ultimate Ironmen. |
Wintertodt | 30,000 | 300,000 Firemaking, 20,000 Woodcutting | Various logs, gems, ores, herbs, seeds, and fish | Woodcutting 50 , Firemaking 50 | It's a great method to earn money within the early game. However, it's not efficient to do once you reach our Firemaking level goal. |
Blackjacking (50 Thieving) | 127,000 | 103,000 Thieving | None | Thieving 45 , The Feud, Rogue equipment | Both methods are great as these help you train your Thieving Skill at the same time. It's very intensive and will require your attention though with the risk involved to take caution when doing this. |
Blackjacking (99 Thieving) | 220,000 | 265,000 Thieving | |||
Battlestaves (shop-bought) | 928,000 | 96,000 Crafting, 40,000 Thieving | None | Desert Treasure I, Lunar Diplomacy | The amount you earn on this is rather volatile and depends on various factors as well. For one, you should use air orbs to make the staves. It also considers that you've bought at least five staves on different world. The staves should come from the Magic Guild. It also requires you to blow molten glass to create an unpowered orb. This is a good method as you're training your Thieving via Artefact Thieving as well. Lastly, this rate doesn't count the time it takes for sand and seaweed to grow. That said, this method does help if you're training your Crafting skill at the same time. |
Battlestaves (monster drops) | 2,057,000 | ||||
Green dragons (lance) | 496,000 | Melee, unclear value | 320 dragon bones | Basic melee setup (Dragon defender, Berserker ring (i), A Kingdom Divided for thralls) | While lucrative, this method isn't highly recommended because of the risks involved. It's only actually worthwhile if you already unlocked your Piety Skill since this makes the fight easier. If you want to make it easier, you also need to ensure that you've gotten all relevant upgrades for maximum efficiency. Unfortunately, you'll have to train Prayer separately before doing this which means it's not an optimal method to earn money unless you've met all conditions already. |
Green dragons (minimum gear) | 265,000 | 180 dragon bones | |||
Hallowed Sepulchre (72-82) | 94,000 | 63,700 Agility, 2,100 Thieving | Agility 72 , Sins of the Father | ||
Hallowed Sepulchre (82-92) | 181,000 | 72,900 Agility, 2,500 Thieving | Agility 82 , Sins of the Father | ||
Hallowed Sepulchre (92-99) | 990,000 | 88,200 Agility, 7,200 Thieving | Agility 92 , Sins of the Father | ||
Corrupted Gauntlet | 915,000 | Combats, unclear values | Uncut gems, runes, crystal shards, dragon arrows | Song of the Elves | One of the main reasons for this money making method is that you're also getting access to the bow of Faerdhinen which is one of our recommended progression items. Due to the risks involved, we recommend switching to another method once you've acquired the bow. |
ZMI (banked pure essence) | 1,470,000 | 80,000 Runecraft | None (accounted as profit) | Raiments of the Eye, Colossal pouch, Lunar Diplomacy, Magic - 71 , Sins of the Father or banked Pure essence from PvM | ZMI Runecrafting isn't that great of a money maker unless you have endgame gear because it takes considerably long to do it. For the Daeyalt rates, it takes into account the time you take to mine the ore. |
ZMI (1.5 Daeyalt) | 780,000 | 120,000 Runecraft | |||
ZMI (AFK Daeyalt) | 510,000 | 120,000 Runecraft | |||
Three Tick Gem Mining | 165,000 | 110,000 Mining | 23,000 banked Crafting XP | Shilo Village, charged Amulet of glory, hard Karamja Diary | This is good on its own already but for more profit, you can turn diamonds into amulates. However, it's not advisable to do this anymore once you go beyond 87 Crafting. |
Vorkath | 1,950,000 | 26,000 Slayer | 110,000 banked Cooking XP | Dragon Slayer II, Osmumten's fang | Most efficient on task. |
Processing adamantite ore | 3,150,000 | 80,000 Smithing | |||
Processing runite ore | 15,774,000 | 104,000 Smithing |
Builds Matter
As we've said a while back, builds are going to matter heavily in an Ironman account. While you can make do with different builds for raids and bosses on a regular account, there's little to no room for adjustment when playing an Ironman account in OSRS. You really need to strictly follow recommended build guides.
If you can't devote yourself into getting all of the best items in the game, what you can do is to make sure that you're at least capable of transitioning into all forms of combat. That way, you'll have a means to adjust accordingly depending on what type of fight is ahead of you don't forget to collect the best gear and attempt to have the best setup possible before taking on any bosses.
Treat The Game Differently
A big mistake you can make is to treat an Ironman run similarly to any other game of OSRS. Everything from how you build your character to how you earn money is different in an Ironman account. It's very difficult and considering that you're only given one life, this also means that you should train combat skill diffferently as well.

Make sure to read up on guides and other strategies to make your Ironman run more successful. In fact, do research on any updated Ironman guide to see which quests are worth doing. It might take you a few tries before you can start maxing out your account but the prestige and glory in doing so is well worth it for any fan of the game.
Don't Skip Out On Achievement Diaries
Achievement Diaries are easy to overlook when you're playing the game but the rewards you can get from it are really useful, especially in Ironman where items and resources are scarce. Here's a list of diaries and their rewards so you know which ones to attempt first.
Diaries | Main reward | Taskmaster | Highest requirement |
Ardougne Diary | Ardougne cloak | Two-pints | 94 Magic |
Desert Diary | Desert amulet | Jarr | 95 Fletching |
Falador Diary | Falador shield | Sir Rebral | Unlocked all music tracks,or level 99 in any skill,or Completion of all quests |
Fremennik Diary | Fremennik sea boots | Thorodin | 83 Slayer |
Kandarin Diary | Kandarin headgear | The 'Wedge' | 90 Smithing |
Karamja Diary | Karamja gloves | Pirate Jackie the Fruit | 91 Runecraft |
Kourend & Kebos Diary | Rada's blessing | Elise | 95 Slayer |
Lumbridge & Draynor Diary | Explorer's ring | Hatius Cosaintus | 88 Smithing and Completion of all quests |
Morytania Diary | Morytania legs | Le-sabrè | 96 Fishing |
Varrock Diary | Varrock armour | Toby | 95 Cooking |
Western Provinces Diary | Western banner | Elder gnome child | 93 Slayer |
Wilderness Diary | Wilderness sword | Lesser Fanatic | 96 Magic |
Ready For Your Ironman Journey?
Any Ironman journey should not be treated one and the same. The gear progression above should only serve as a great updated ironman guide that will help you ease through the tougher parts of the game. It's the most efficient way to progress through the challenge. However, don't be afraid to mix and match your gear as necessary depending on what you need.
If you want a different challenge, you might want to try finishing all of the quests in the game next. Check out this optimal questing guide for OSRS here.
FAQs
1. What is the best gear setup for OSRS Ironman accounts in 2025?
The best OSRS Ironman gear setup in 2025 will, of course, depend on combat style. For melee, theTorva full helm, Osmumten's Fang, and Bandos chestplate are the best options currently.
For ranged, aim for theBow of Faerdhinen paired withCrystal armor. For magic,Tumeken's Shadow andAncestral Robes offer the highest DPS. But keep in mind that the restrictions in Ironman might mean that you have to steer of the path in most cases. Wear what's best available to you.
- How should Ironmen prioritize quests for gear progression?
Ironmen should always for for quests that unlockkey gear and game mechanics, such as:
- Monkey Madness I (Dragon Scimitar)
- Recipe for Disaster (Barrows Gloves)
- Desert Treasure (Ancient Magicks)
- The Fremennik Isles (Helm of Neitiznot)
- Lunar Diplomacy (Lunar Spells)
- What are the best money-making methods for OSRS Ironman accounts?
Top Ironman money-making methods in OSRS 2025 include:
- Wintertodt (Early game; passive resource gathering)
- Corrupted Gauntlet (High-tier loot, access to Bow of Faerdhinen)
- Vorkath (Best GP/hour with elite setup)
- ZMI Runecrafting (Consistent profit with high RC level)
- Battlestaff Crafting (Profitable and scalable with Crafting XP)
Each method scales with account progression and unlocks. You should focus on passive income via questing and skill leveling early on.
- What are the best weapons for Ironman accounts in OSRS?
For each combat style, the best Ironman weapons include:
- Melee: Osmumten's Fang, Ghrazi Rapier, Abyssal Whip
- Ranged: Twisted Bow, Bow of Faerdhinen, Toxic Blowpipe
- Magic: Tumeken's Shadow, Sanguinesti Staff, Trident of the Seas
5. How important are Achievement Diaries for Ironman accounts?
Very. Achievement Diaries areimportant for Ironmen because of the things they unlock. Some of the more important unlocks include:
- Ardougne Cloak (Ardy Diary) - Best-in-slot teleport item
- Rada's Blessing (Kourend Diary) - Ranged bonus and teleport utility
- Explorer's Ring (Lumbridge Diary) - Free alchs and run energy restore
- Falador Shield, Desert Amulet, Morytania Legs - Skilling and PvM perks
![OSRS Gold (1M) [⏱️ 5-10 Min via In-Game Trade]](/img/tmp/product_mini_2_2939.jpg?time=1781902678)
![OSRS Services [Achievements, Fire Cape, Infernal Cape, Minigames, PvM, Raids, Quests]](/img/tmp/product_mini_2_52597.jpg?time=1781902678)

![Magus Ring [OSRS Item]](/img/tmp/product_mini_2_54476.jpg?time=1781902678)
![Kodai Wand [OSRS Item]](/img/tmp/product_mini_2_39043.jpg?time=1781902678)