OSRS Strength Training Weapons Guide (2025)
07.10.2025 - 14:01:35
Game Guides , OSRS Guides , OSRS PvM , OSRS Skills & Skilling , Runescape
")
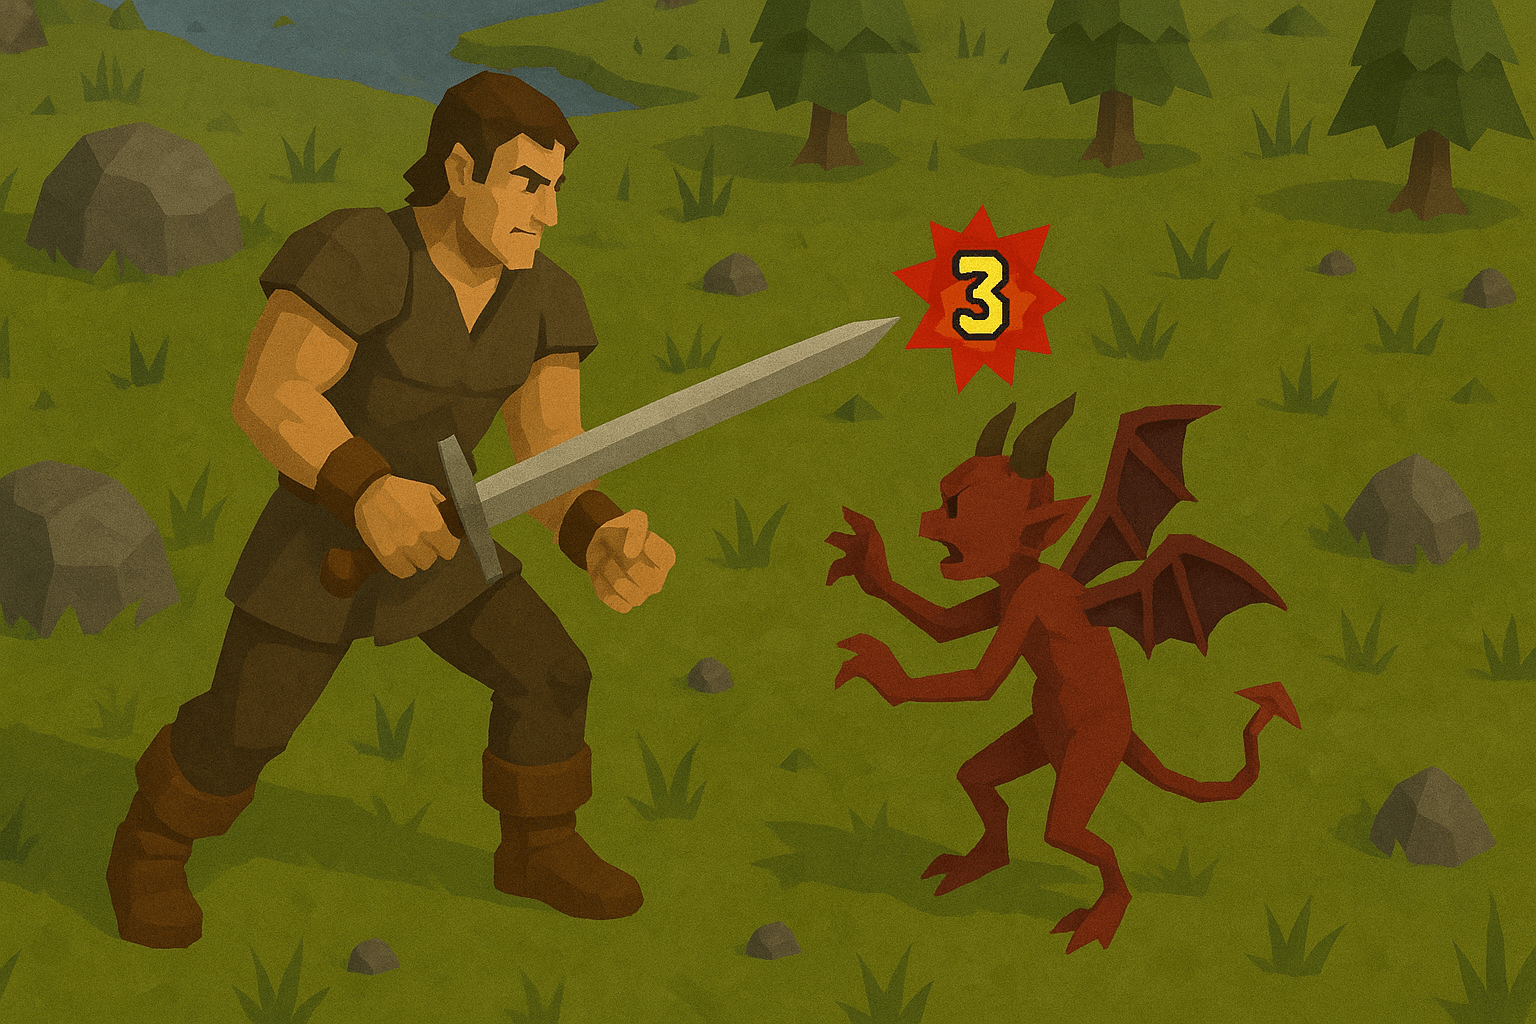
Getting any Skill to 99 in OSRS is definitely difficult but it becomes even more challenging for combat skills like Strength. And if you’re struggling to hit 99, we’ve got just the guide to carry you.
Training your Strength Skill in OSRS is more than just about knowing which areas to go to and which monsters to fight. You’ll also need the right weapons and BiS OSRS gear for the job. Picking the right melee weapon means you’ll be able to deal as much damage as possible but there are other factors that come into play.
Best Strength Training Weapons In OSRS
Below is a list of all the best melee weapons you can use for Strength Training. These are listed from best to least effective. If you’re wondering how we chose them, we’ve basically made the list depending on not just the damage of the weapon, but also its attack speed.
As a rule of thumb, weapons with the highest attack speed are best. For melee weapons, the best you can get is 4, which totals to one hit per 2.4 seconds.
You also need to keep in mind that some weapons can perform better or worse, depending on which monsters you’re using them against. Monster weakness plays a role in how much damage you can deal.
| Weapon Name | Requirements | Price | Notes |
|---|---|---|---|
| Soulreaper Axe | 80 Attack, 80 Strength | 396,242,676 | This weapon is situational due to Soul Stack. Each hit gives you +6% Strength (up to 30%). Requires fighting many monsters to maintain stacks. Damages user per attack. Avoid using on strong enemies. |
| Osmumten's Fang | 82 Attack | 15,485,078 | Ideal against high-Defense enemies due to its passive. Cheaper alternative to Soulreaper Axe. Use Ghrazi Rapier for weaker enemies. |
| Ghrazi Rapier | 80 Attack | 61,924,367 | Non-degradable and versatile. Considered the best for strength training by many players. |
| Inquisitor's Mace | 80 Attack | 307,607,764 | Best if you own the Inquisitor's Armor. High Strength and Crush bonus. Effective vs high-Defense monsters. |
| Blade of Saeldor | 80 Attack | 131,573,412 | Slash version of Ghrazi/Inquisitor. Requires Crystal shards (Song of the Elves access). Not ideal for training. |
| Voidwaker | 75 Attack, 60 Magic | 89,569,552 | Doesn’t degrade. Gains Magic and Hitpoints XP as well. Good choice at level 75. |
| Abyssal Tentacle | 75 Attack | 2,568,226 | Powerful but degrades after 10,000 hits. Costs around 256,919 gold/hour. Created from Abyssal Whip + Kraken Tentacle. |
| Abyssal Whip | 70 Attack | 1,712,797 | Affordable, non-degradable, solid XP. Best with Controlled style. Not ideal for Pures or low Combat builds. |
| Saradomin's Blessed Sword | 75 Attack | 3,997,820 | Strong but degrades. Converts back to Saradomin’s Tear after 10,000 hits. |
| Abyssal Bludgeon | 70 Attack, 70 Strength | 13,928,670 | Good Crush weapon. Expensive; best with Inquisitor’s set for full benefit. |
| Zamorakian Hasta | 70 Attack, Barbarian Training | 4,957,037 | Great for Stab. Defensive mode helps with safe training. Has minor Crush bonuses. |
| Abyssal Dagger | 70 Attack | 3,548,327 | Fast one-handed weapon. Low base damage, good against Stab-weak enemies. |
| Staff of the Dead | 75 Attack, 75 Magic | 14,436,096 | Hybrid weapon. Works well with defender. Less Strength than Saradomin Sword. |
| Saradomin Sword | 70 Attack | 168,983 | Strong, cheap Slash weapon. Best for low-Defense monsters. Great budget pick. |
| Zombie Axe | 65 Attack | 1,746,368 | Slow but strong vs high-Defense foes. Synergizes well with Inquisitor’s set. |
| Sarachnis Cudgel | 65 Attack | 239,291 | Needs Inquisitor’s set to shine. Outclassed by Saradomin Sword and Staff of the Dead. |
| Viggora's Chainmace | 60 Attack | 3,211,716 | No quest needed. Boosts damage in Wilderness with Revenant Ether. Risky training area. |
| Dragon Scimitar | 60 Attack, Monkey Madness I | 59,307 | Solid choice for Attack training. Not good for Defense XP. Very affordable. |
| Dragon Sword | 60 Attack | 88,114 | Slightly more expensive, but no quest required. Good scimitar alternative. |
| Leaf-bladed Battleaxe | 65 Attack, 55 Slayer | 58,756 | Strong 5-tick weapon. Enhanced with Inquisitor’s set. |
| Dragon Longsword | 60 Attack, Lost City | 58,969 | Easier to get than scimitar. Slower but solid early game choice. |
| Leaf-bladed Sword | 50 Attack, 55 Slayer | 39,818 | Great for Turoths/Kurasks. Best at level 50 if Slayer unlocked. |
| Granite Hammer | 50 Attack, 50 Strength | 506,020 | Powerful early weapon. Pricey. Boosted significantly by Inquisitor’s set. |
| Brine Sabre | 40 Attack | 502,566 | Better than Rune Scimitar but more expensive. Great for Crush. |
| Rune Scimitar | 40 Attack | 14,896 | Budget-friendly. Many players use until 70+ Attack. |
| Other Scimitars | < 40 Attack | N/A | Perfect for beginners. Balanced damage across attack types. |
There are a lot of melee weapons in OSRS but if you want a complete rundown on each of them, check out the official Wiki for help. What we're going to focus on for this guide are the best Strength training weapons.
Alternative Training Gear
Obsidian Equipment + Berserker Necklace:
This build is harder to build but it’s actually worth the trouble considering that you’re getting the most bonuses out of it. The Obsidian set alone will provide 10% damage and accuracy when you’re using melee obsidian weapons. In that regard, you should focus on getting the Obsidian Sword as this is the best of all of them.
This build results in the best Strength training XP in the game. As for the method, it’s best to go against low-defense monsters. Just be warned though that this set will be lacking when it comes to defensiveness.
Void Knight Equipment:
Second to the Obsidian set is simply wearing a full Void Knight set., It has the same 10% bonus as the Obsidian set. The difference is that the Strength bonus of the Void Knight is far less so training with this will become significantly lower.
Still, that doesn’t change the fact that the Void set is the best alternative if you don’t have access to the Obsidian pieces just yet.
Dharok the Wretched's Equipment:
The special effect of Dharok’s set is that you can deal more damage the lower your HP is. At 1 HP, you can deal a lot of damage to opponents, thus making Strength training a lot easier. While risky, you can mitigate incoming damage at low health by using Protection Prayers.
Items like the Dwarven Rock Cake and the Locator Orb can also protect you from the set’s risky gameplay. This is best used when you’re in the Nightmare Zone.
Guthan the Infested's Equipment:
If not Dharok’s set, you can switch to Guthan’s instead. This is the complete opposite of Dharok’s set as instead of fighting at 1 HP, you can heal yourself occasionally. This makes Strength training less dangerous and less costly as you don’t have to spend resources to heal.
In the case of Guthan’s, it’s best to use this set when you’re planning on training for longer periods.
In terms of viability, both Guthan’s and Dharok’s set are excellent choices for Strength training. It only really depends on whether you’re planning on a speedier but risky training, or a slower but relatively safer way of training.
Extra Gear For Strength Training
Below is a list of other gear that you should wear to help make Strength training more proficient. Keep in mind that the items listed will be in order of their effectiveness. They’re also not necessary but highly recommended.
Slot | Items (Best → Alt) | Notes |
Head |
| All grant the same Strength bonus. Choose based on defense, availability, or poison immunity (Serpentine). |
Cape |
| Infernal Cape is BiS (Best-in-Slot). Obsidian Cape is a fallback with minimal damage boost. |
Neck |
| Use Salve Amulet (e/i) for undead enemies, if not using Slayer helm. |
Torso |
| Bandos offers defense + Strength, Fighter is free & effective. |
Shield |
| Defenders > Shields for Strength. DFS for dragon fights. Toktz is temporary until Defender unlocked. |
Legs |
| Tassets reign supreme with top-tier Strength. |
Hands |
| Barrows Gloves best overall. Gloves tiered by RFD progress. Regen Bracelet is niche. |
Feet |
| Primordials dominate. Granite/Guardian for tanking. Climbing = budget option. |
Ring |
| Imbue rings for full Strength bonus. No Strength ring? Use Wealth for profit. |
Strategic Reminder from the Pros:
When training, Strength bonuses > Accuracy unless you're struggling to hit consistently.
Slayer helm bonuses override most neck-slot choices unless fighting undead (then Salve wins).
Suggested Strength Training Method

Once you have your weapons, the next step is to train to level 99 of course. While there are many ways to reach that journey, here’s an optimized route to consider. Keep in mind that this method is only best if you want to focus solely on Strength.
Strength Level | Monster | Monster Details | Extra Details |
1-10 | Chicken |
| You can find chickens in Lumbridge, precisely east of River Lum. There are many in a place called Fred’s chicken coop. They’re all non-aggressive so there’s no need to waste potions or food. The monsters provide very low XP per hit but it’s still the best way to train at this point in the game. No food is required for the fight and you can even get feathers that you can sell for profits. Chickens can also drop bones for prayer training. |
10-60 | Ammonite Crab |
| While relatively weak, Ammonite Crabs have a huge amount of health and defences, making them a safe and effective method to train Strength. Ammonite crabs spawn in groups so training with them is easy and requires less effort. However, make sure to avoid getting stuck in a corner as it’s easy to be swarmed by them. To do this, you’ll need to finish Bone Voyage first which is a lengthy but easy quest. If you want to reduce trips for restocking or selling, make sure to get a bank chest inside the island first. |
Sand Crab |
| These are basically the same monsters as Ammonite Crabs but are weaker. You can find them Crabclaw Isle, Crabclaw caves, and the beach near Great Kourend. The crabs in Great Kourend are easy to access. The ones in Crabclaw isle will require 10,000 gold or at least completion of The Depths of Despair. We recommend focusing on the ones at the Great Kourend beach though as there’s a bank near Hosidius House. | |
Rock Crab |
| You can find these on Waterbirth Island or north of Rellekka. We suggest going to Waterbirth Island as it only requires 1,000 coins to access the area as opposed to Relleka which you’ll need to do the Fremennik Trials. | |
60-99 | Nightmare Zone Monsters | Varies | One of the best ways to get to level 99 is by simply going to the Nightmare Zone. Many of the monsters here are weak to melee. You only need to adjust your gear depending on the damage style and weakness of the monsters. You’ll struggle a bit during your first initial runs as you combat level is still low. During these levels, make sure to have super combat and prayer potions to make the fight easier. The only downside here is that you don’t get any drops. If you’re looking for profit, it’s best to look for other strong monsters in OSRS. |
Slayer Tasks | Varies | If you don’t want to do the Nightmare Zone, you can switch to doing Slayer tasks instead. This method is more profitable considering that many of the monsters have great drops. Finding good Slayer tasks for slaying might be hard though as you’ll need to do quests first. Another downside is that not all of the tasks allow you to use melee. |


Alternative Method: Levels 60 to 99
Monster: Yak
Location: Neitiznot
Combat level: 22
Hitpoints: 50
Requirements: Full completion of The Fremennik Trials
Fighting Yaks in Neitiznot has relatively good XP yields for training. The monsters aren’t strong and they don’t crowd in one place so there’s less of a threat here. The downside is that there aren’t any decent drops so you can’t earn money while doing this method.
Monster: Monkey Guards
Location: Marim
Combat level: 167
Hitpoints: 130
Requirements: At least started Monkey Madness I
If you’re going to train using Monkey Guards, make sure to wear monkey greegree to avoid getting attacked on sight. While the monsters aren’t strong, it’s easy to get overwhelmed once they gang up on you. As there’s a nearby altar, you can use as many Prayers as you want for the fight.
Just keep in mind that the guards don’t have any drops. Make sure to bring anti-poison as well as there are spiders in the area which can also attack on sight.
Pest Control
Location: Void Knights' Outpost
Combat level: Varies
Hitpoints: Varies
You can start a round of Pest Control as long as you have 4 other players with you. However, you can make the entire activity easier by having a max party of 25. As for the gear, make sure to bring your best Strength training gear. If anything, at least have Dharok’s set.
It’s easy to gain a ton of XP in Pest Control but the challenge itself is hard. The good news is that your Health, Prayer, and run energy are filled back after each round. Additionally, you can gain a good amount of gold per round so this is a lucrative way to train your Strength skill.
The downside is that this activity is only really viable as a training method if you have a lot of players with you. We suggest looking for groups online who are willing to train the same way. Queues for a match of Pest Control can be considerably long.
Bash Your Way To 99
The journey to level 99 is long but getting there is important. While you can play OSRS in any way that you want, the amount of combat sequences in the game will force you to rely on your Strength skill most of the time. With this guide, you’ll be able to get there in no time. Once you've mastered Strength training, take it up a notch by trying out Ironman in OSRS.
FAQs
1. What is the best overall weapon for Strength training in OSRS?
As of the most recent verison of OSRS, the Ghrazi Rapier stands to be the best weapon for Strength training. Mainly because it has the highest DPS of all the weapons, on top of a +89 Strength bonus. The only downside is that it requires 80 Attack to use and it’s an expensive and challenging weapon to get.
2. Which OSRS weapon offers the best value for mid-level players?
While the Ghrazi Rapier is the best weapon, you’re going to want to use the Dragon Scimitar if you’re at the mid-game. It has 60 Attack and the completion of the Monkey Madness I quest. It has an amazing Strength bonus and damage, and getting it is very easy. It’s the best for getting 99 Strength if you don’t have the top-tier weapons.
3. What are the best OSRS F2P Strength training weapons?
The choices are limited, but yes, in Free-to-Play (F2P), the Rune Scimitar is the go-to weapon for Strength training. It has an amazing balance between attack speed and Strength bonus. It’s a lot weaker than P2P weapons, but it’s the best if you don’t want to spend money on a membership.
4. How does weapon attack speed affect OSRS Strength training?
It’s actually one of the most important aspects of Strength training. Weapons that have a higher attack speed do more damage over time, meaning you’re able to get more XP at the same time. Ideally, you’d want a weapon that has a balance of a high Strength bonus and attack speed.
5. What are some budget-friendly weapons for OSRS Strength training?
If you’re on a budget, it’s best to go with the Saradomin Sword. This has an Attack of 70, a good Strength bonus. It’s one of the more budget-friendly weapons for Strength training and a lot of players can even use this to carry themselves to the endgame.
6. Is the Abyssal Bludgeon a good choice for OSRS Strength training?
Yes, this is an amazing weapon that packs a high Strength bonus. It’s perfect for players who are already at 70 Attack and Strength. You can use it best against enemies that are weak against Crush attacks. The only downside is that it doesn’t have a shield.
![OSRS Gold (1M) [⏱️ 5-10 Min via In-Game Trade]](/img/tmp/product_mini_2_2939.jpg?time=1781917844)
![OSRS Services [Achievements, Fire Cape, Infernal Cape, Minigames, PvM, Raids, Quests]](/img/tmp/product_mini_2_52597.jpg?time=1781917844)

![Torva Full Helm [OSRS Item]](/img/tmp/product_mini_2_42742.jpg?time=1781917844)
![Amulet of Torture [OSRS Item]](/img/tmp/product_mini_2_4111.jpg?time=1781917844)