OSRS ToA Gear Progression Guide 2025
29.05.2025 - 11:25:43
Game Guides , OSRS Guides , OSRS PvM , Runescape

The key to making Tombs of Amascut easier isn't just understanding the full mechanics of the Raid, but also knowing the best gear to wear. And with that, we've got a guide to help you out.
If you really want to put yourself to the test in OSRS, then it's time that you take on the raids in the game. There aren't that many yet but these raids require a lot of teamwork, strategy, and most importantly, the right build. Of all the raids, one that many players struggle with is the Tombs of Amascut, or ToA for short.
This is one of the most challenging raids in the game. Having the right gear is necessary. If you're lacking the proper OSRS gear or gold to guide you, don't hesitate to reach out to us for help.
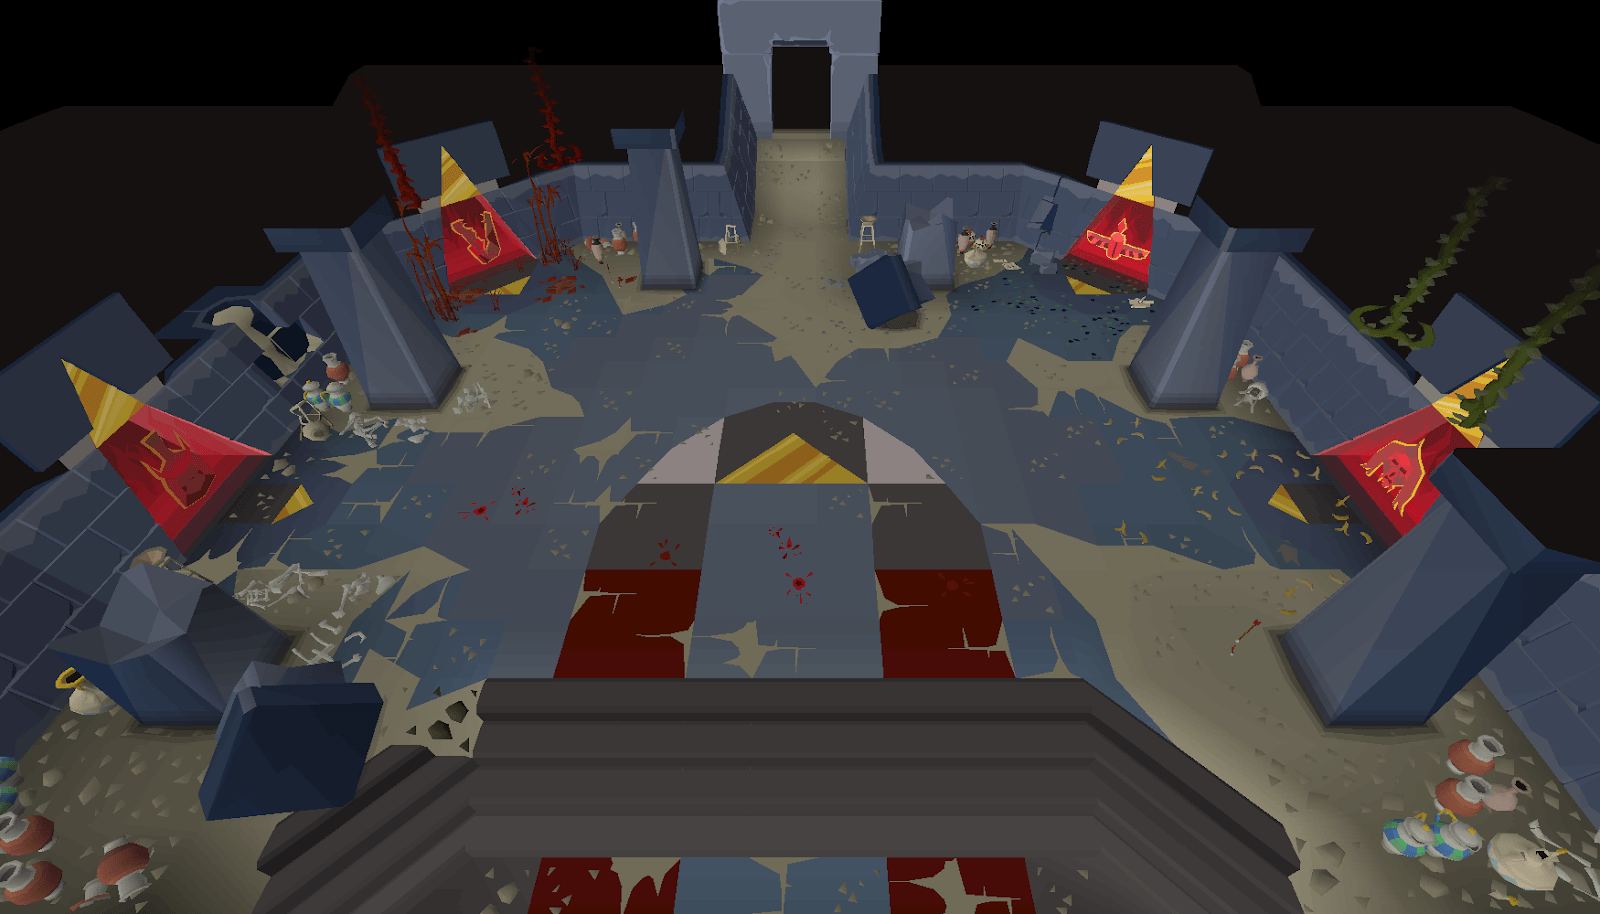
What Is The Tombs of Amascut?
The Tombs of Amascut is a raid that you can find within the Kharidian Desert - more specifically, inside the Jaltevas Pyramid. The only requirement you'll need to get access to this is to finish the Beneath Cursed Sands quest. Just to give you a quick recap, here's what you'll need for this quest:
Requirements | Completion of:
Skill Level (not boostable):
|
Items Required For Quest |
|
Recommendations |
|
With all these acquired, head to Jamila in Sophanem. Up to eight players can join the raid. The ultimate goal is to drive out Amascut to free the lesser gods from her influence.
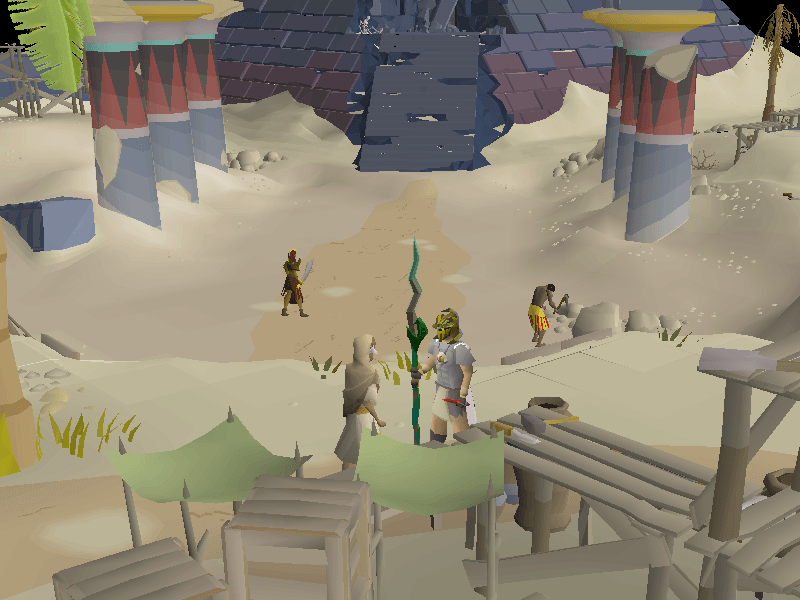
How To Get To The Tombs Of Amascut
There are a few ways to reach the necropolis but if you've gone through the quest, these should all be pretty familiar to you. The easiest ways so far are:
- Using the Pharoa's scepter to get to Jaltevas but for this to work, you should've it first on the northern obelisk within necropolis.
- Using Fairy Ring code AKP but if you're going this route, make sure you have level 62 Agility first.
- Teleport to Nardah and then walk southwest until you reach the Necropolis. The way is long however and you'll need protection against the desert heat.
- If you have access to the magic carpet from Shantay Pass to Pollnivneach, you can use this as well. This will cost a few hundred coins however and other methods are still more efficient.
OSRS ToA Gear Progression
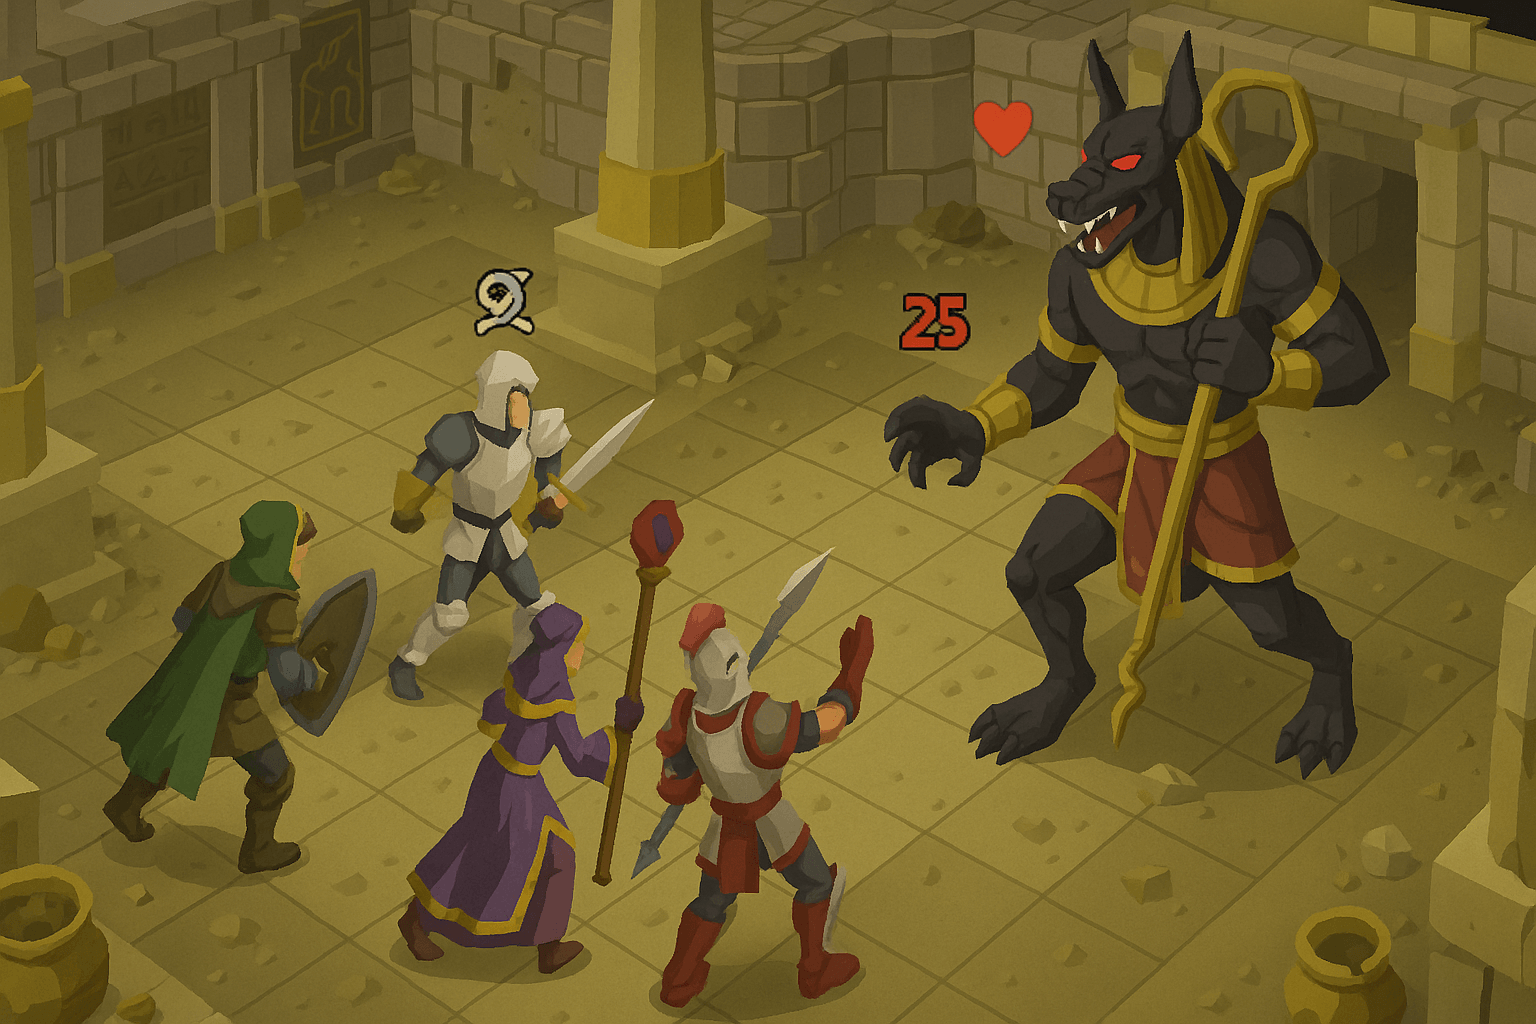
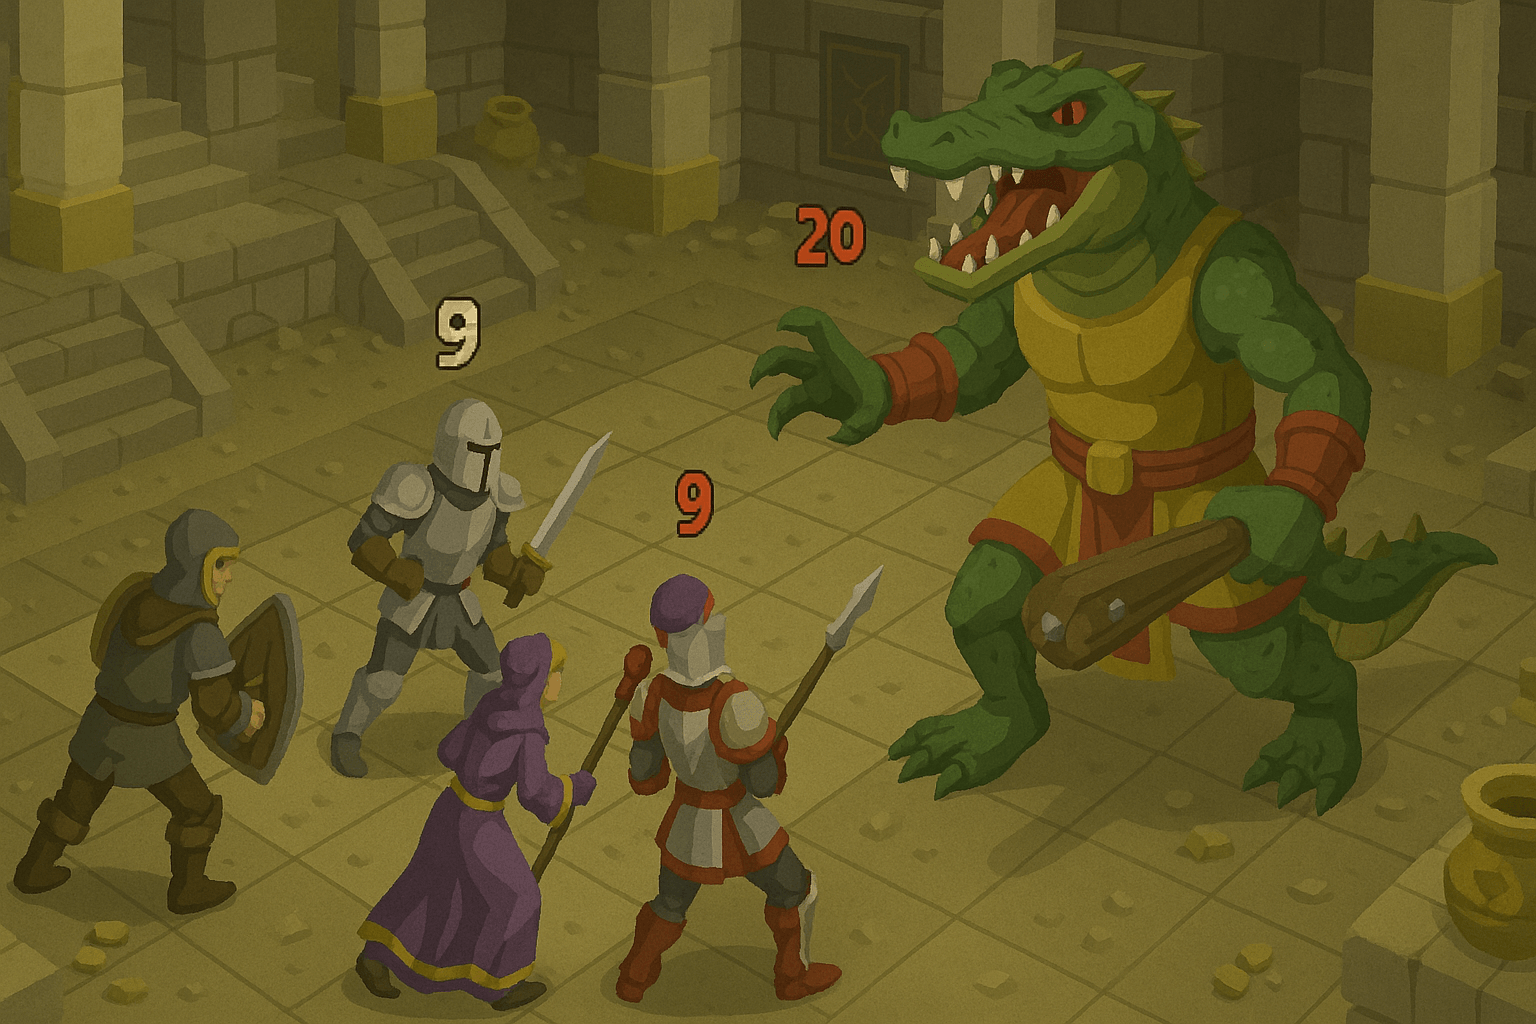
When doing the ToA raid, you'll need a lot of teamwork and understanding of the raid's mechanic to actually finish it and any combat achievement. What's most important however is the build that you'll have for your character. ToA is a high-level raid which means preparing for it is very important. On this part of the guide, we'll show you the best gear progression for Melee, Ranged, and Magic builds.
Just to give you an idea, all combat types are important in ToA. With up to eight players within the raid, you and your teammates should properly distribute the builds depending on what you're most comfortable with. There are multiple bosses throughout the raids and below, you'll see which combat type they're best fought with:
Boss | Best Combat Type | |
Akkha, the Guardian of Het. | Melee | |
Ba-Ba, the Guardian of Apmeken. | Melee | |
Kephri, the Guardian of Scabaras. | Melee | |
Zebak, the Guardian of Crondis. | Ranged | |
Tumeken's Warden, the final boss. | Range | |
Elidinis' Warden, also the final boss. | Range |
While some guides give out builds for tanks within the team, we're going to focus mainly on creating Melee, Range, and Magic DPS builds. The reasons being that we want to kill the boss as quickly as possible so we're going to maximize our damage output rather than look for tanks. With max hit, all of the fights will be relatively easier
TOA Melee Gear Progression
This is one of the most important setups in the raid as Melee is most likely going to carry you throughout the entire raid. For ToA, the “cheapest” and easiest setup to get should at least consist of:
- Serpentine Helm
- Bandos Chestplate
- Abyssal Dagger/Dragon Dagger
This might sound like a heavy investment on your end already but this is the ToA raid we're going for after all. The only negotiable gear here is the Bandos Chestplate which you can drop down to a either a Guthan's Platebody or Torag's Platebody if it's too expensive. If you're starting out with with cheaper armor, just skip on the next upgrade instead.
If you have enough money, you'd want to swap out your Abyssal Dagger and Dragon Dagger for the Zamorakian Hasta. From here, the next upgrades you should get will consists of the Ghrazi Rapier and then the best in slot weapon for melee builds is the Fang of Osmuten.
Again, we're going to focus on increasing your damage to the bosses in the game. It's okay to skip out on upgrading to a Bando's chest plate early on. Once you have better weapons, it will be much easier to farm ToA.
Once you've maxed out your melee damage potential, you'd want to swap out your Serpentine Helm for a Neitiznot Faceguard. If you're going to swap out your helmets, make sure to bring something to negate the poison from the Kephri fight. Don't bring too much that it overwhelms your inventory.
The end goal of your melee gear progression should end with getting a Full Torva set. Apart from giving you good defenses, this set also significantly increases your damaging potential. It's way to expensive to get from the beginning if you don't have any money yet. You best setup for the fight will look like this:
- Osmumten's Fang
- Avernic Defender
- Torva Helm
- Torva Platebody
- Torva Platelegs
- Ferocious Gloves
- Primordial boots
Obviously, the entire Torva set is extremely expensive but if we're looking at max potential and melee damage, this is the way to go.
TOA Range Gear Progression
For your range gear, it follows pretty much the same pattern as the melee build. For your helmet, you'd want to start with the Serpentine helm which you'll work your way towards turning into a Neitiznot Faceguard, with the Torva Helm being the ultimate goal. However, it's worth noting that the Serpentine Helm is pretty much a good buy from beginning to end for ranged progression.
The weapon is going to start with the Dragon Crossbow as this is the cheapest but still relatively powerful ranged weapon at the early stages of ToA. You're eventually going to want to convert it to an Armadyl Crossbow, then into a Bow of Faerdhninen (c). The ultimate goal is the Twisted Bow as it offers the best ranged damage for the susceptible bosses within the Tombs of Amascut Raid.
For the rest of your gear, you're going to want to start with the Armadyl set which you can then upgrade to a Crystal set once you have the budget for it. As of this year, the best set of ranged armor in the game is the Masori Set. It provides you with superb Ranged attack and overall ranged bonuses for your character. It's also pretty expensive and quite hard to work for considering that it requires Level 80 Ranged and Level 30 Defence to equip. The setup should look something like this:
- Twisted Bow
- Masori Mask
- Masori Chaps
- Masori Body
- Ferocious Gloves
- Primordial boots
Again, this entire setup isn't easy to build but it's worth it for the sake of making the Raid easier. If the entire Masori set is too expensive for you or if you want to get more defense bonuses instead of ranged attack bonuses, you can switch the Masori Body for an Armadyl Armor instead.
TOA Magic Gear Progression
Magic is the least important of all the combat types for ToA but it's still worth investing some money into. For this build, here's how the final setup should look:
- Tumeken's Shadow
- Elidinis' ward
- Ancestral Hat
- Ancestral Robe Top
- Ancestral Robe Bottom
- Barrows Gloves
The cheapest yet still effective set for ToA should consist of a full Mystic Set partnered with a Trident of the Seas. This build costs only a few hundred thousand gold and is easily achievable at this point in the game. Once you have the full Mystic set, your next upgrade should be focused on getting the Occult Necklace for even more Magic damage. What's great about the Occult Necklace is that it's relatively cheap considering how high a bonus it gives for your magic damage. Your next upgrade should then be a Tormented Bracelet which can give you magic damage modifier.
Once you've gotten the Tormented Bracelet, your next goal should be to acquire a full Ahrim's Set for even more magic damage. This will be your last armor set to work for before getting the ultimate set for ToA magic builds, which is the Ancestral Set.
The weapons should be your last priority for your gear progression. After using your Trident of the Seas, it would be best to shift your focus on getting the Sanguinesti Staff instead. Jumping to the Tumeken's Shadow immediately is way too big of a budget jump and it's not advisable for ToA gear progression. You could end up spending a considerable amount of time stuck on the Trident of the Seas by doing this.
Bursting or barraging strategies aren't really recommended for ToA so just focus on getting the staff instead. We're saying this beforehand because some players prefer getting the Kodai Wand or Master Wand for switches but it's not that efficient for any of the bosses.
For your off-hand, don't bother with the Book of the Shadows and then just jump to Elidini's Ward instead. Get the fortified version if you can but it isn't really necessary.
ToA Rewards
Why go through all of this trouble to get the Tombs of Amascut? The rewards of course. Here's a look at the ToA drop table.
Item | Quantity | Rarity | Price |
Ancient remnant | 1 | Always[d 1] | Not sold |
Battlestaff | 1–46 (noted) | 3 × 1/27 | 8,130–373,980 |
Blood essence | 1–6 | 3 × 1/27 | 105,446–632,676 |
Breach of the scarab | 1 | 1/180[d 2][d 3] | Not sold |
Cache of runes | 1 | 3 × 1/27 | Not sold |
Cactus spine | 1–85 (noted) | 3 × 1/27 | 1,620–137,700 |
Clue scroll (elite) | 1 | Varies | Not sold |
Coins | 1,126–51,285 | 3 × 1/27 | 1,126–51,285 |
Coconut milk | 1–46 (noted) | 3 × 1/27 | 251–11,546 |
Cursed phalanx | 1 | Always[d 1] | Not sold |
Death rune | 57–2,564 | 3 × 1/27 | 8,607–387,164 |
Diamond | 2–128 (noted) | 3 × 1/27 | 3,288–210,432 |
Dragon dart tip | 11–512 | 3 × 1/27 | 25,509–1,187,328 |
Dragon med helm | 1–12 (noted) | 3 × 1/27 | 58,467–701,604 |
Dragonstone | 1–85 (noted) | 3 × 1/27 | 10,985–933,725 |
Elidinis' ward | 1 | 1/8[d 2] | 4,892,457 |
Emerald | 4–205 (noted) | 3 × 1/27 | 1,576–80,770 |
Eye of the corruptor | 1 | 1/180[d 2][d 3] | Not sold |
Fossilised dung | 1 (noted) | Always[d 1] | Not sold |
Gold bar | 4–205 (noted) | 3 × 1/27 | 520–26,650 |
Gold ore | 12–569 (noted) | 3 × 1/27 | 1,656–78,522 |
Jewel of the sun | 1 | 1/180[d 2][d 3] | Not sold |
Lily of the sands | 1–46 (noted) | 3 × 1/27 | 2,181–100,326 |
Lightbearer | 1 | 1/3.429[d 1] | 2,132,870 |
Magic seed | 1–7 | 3 × 1/27 | 90,391–632,737 |
Mahogany logs | 6–284 (noted) | 3 × 1/27 | 2,406–113,884 |
Masori body | 1 | 1/12[d 2] | 53,465,387 |
Masori chaps | 1 | 1/12[d 2] | 40,644,335 |
Masori crafting kit | 1 | Always[d 1] | Not sold |
Masori mask | 1 | 1/12[d 2] | 6,937,314 |
Menaphite ornament kit | 1 | Always[d 1] | Not sold |
Osmumten's fang | 1 | 1/3.429[d 1] | 9,186,276 |
Potato cactus | 4–205 (noted) | 3 × 1/27 | 184–9,430 |
Ranarr seed | 1–28 | 3 × 1/27 | 25,144–704,032 |
Raw manta ray | 2–113 (noted) | 3 × 1/27 | 2,996–169,274 |
Raw shark | 4–205 (noted) | 3 × 1/27 | 2,372–121,565 |
Remnant of akkha | 1 | Always[d 1] | Not sold |
Remnant of ba-ba | 1 | Always[d 1] | Not sold |
Remnant of kephri | 1 | Always[d 1] | Not sold |
Remnant of zebak | 1 | Always[d 1] | Not sold |
Ruby | 3–170 (noted) | 3 × 1/27 | 2,394–135,660 |
Sapphire | 5–256 (noted) | 3 × 1/27 | 1,355–69,376 |
Snapdragon seed | 1–23 | 3 × 1/27 | 42,558–978,834 |
Soul rune | 28–1,282 | 3 × 1/27 | 8,064–369,216 |
Thread of elidinis | 1 | 1/10–1/3.33; 1/50[d 1] | Not sold |
Toadflax seed | 1–36 | 3 × 1/27 | 775–27,900 |
Torstol seed | 1–23 | 3 × 1/27 | 5,452–125,396 |
Tumeken's guardian | 1 | Varies[d 4] | Not sold |
Tumeken's shadow (uncharged) | 1 | 1/24[d 2] | 1,097,959,722 |
There are a lot of endgame gear here, including the Masori Set, Tumeken's Shadown, and more. The journey you make farming ToA is definitely going to be worth it.
Extra Tips For ToA
The Tombs of Amascut is no joke. The gear progression guide above should make it easier on your end but for even more things to consider, here are three tips to keep in mind.
Stick To The Right Gear


Unfortunately, most of the builds and items here are non-negotiable. You really need to work hard to make the entire raid easier. Below, you'll find the most recommended items and setups for all combat types. Each of the items will be ranked from most to least effective.
Melee | Ranged | Magic |
Head:
Neck:
Back:
Body:
Legs:
Weapon:
Shield:
Hands:
Boots:
Ring:
Special Attack:
| Head:
Neck:
Back:
Body:
Legs:
Weapon:
Shield:
Ammo/Spell:
Hands:
Ring:
| Head:
Neck:
Back:
Body:
Legs:
Weapon:
Shield:
Hands:
Ring:
|
Don't hesitate to create your own builds for the quest but at least make sure that you're considering the items above.
Consider Your Invocations Before Choosing Gear
One of the crucial aspects of the raid are the Invocations. This increases the level of the raid, and your loot from the end as well. It would be smart to consider your build before picking any of the Invocations. Just to give you an idea, here are the invocations below.
Invocation | Details | Raid lvl modifier | Category |
Try Again | You can finish a raid in ten attempts. If yourr team wipes during a challenge, the attempt is considered unsuccessful; however, if the team wipes right before the challenge is over, it won't be considered a failure. In the Attempts category, there can only e a single current invocation. | +5 | Attempts |
Persistence | You can finish the raid in five attempts. | +10 | Attempts |
Softcore Run | You can finish the the raid in three attempts. | +15 | Attempts |
Hardcore Run | You can only finish the raid in one attempt. | +25 | Attempts |
Walk for It | It would take you 40 minutes to finish the raid, including breaks for each Path. The raid level will drop by 20 if it is not successful. (The timer starts when you enter the first Path and stops when the Warden runs out of health during the last stage of the battle.) The Time Limit category allows for just one active invocation. | +10 | Time Limit |
Jog for It | You need 35 minutes to complete the raid. The raid level will drop by 30 if it is unsuccessful. | +15 | Time Limit |
Run for It | You onlyu have 30 minutes to complete the raid. The raid level will drop by 40 if it is unsuccessful. | +20 | Time Limit |
Sprint for It | You have 25 minutes to finish the raid. The raid level will drop by 50 if it is unsuccessful. | +25 | Time Limit |
Need Some Help? | There will be at least one supply of each item in the 66% reduction in the number of goods that the Helpful Spirit offers. Though it has a different name, the reduction might or might not happen. For example, you can still receive an unaffected Power option (2 salt + 1 adrenaline), but there's a chance that it will be lowered (1 salt + adrenaline). The category of Helpful Spirit allows for the activation of only one invocation. | +15 | Helpful Spirit |
Need Less Help? | The number of items available from the Helpful Spirit will be lowered to 33%, and there will only be one supply of each kind. | +25 | Helpful Spirit |
No Help Needed | There will be a minimum of one supply of each kind, and the helpful spirit's number of products will be lowered to 10%. | +40 | Helpful Spirit |
Walk the Path | This invocation causes other paths to become higher level as you complete others. All of the paths in ToA can be leveled up to four times but the rate at which they increase is random. Although the increase is random, it will follow this pattern:
As the level increases, so to will the HP and damage of the enemies inside the oath. The first level increase will see an 8% increase on their stats while the next levels will see a 5% increase only. Apart from this, there are new mechanics being introduced with each boss at a cap of 4 levels.
The chat box will show, "You hear a mysterious rumbling coming from the Path of [Menaphite Pantheon god]," when a path levels up. | +50 | Paths |
Pathseeker | Once you enter the riad, all paths will level up. The Path Level category allows for a single active invocation. | +15 | Path Level |
Pathfinder | As soon as you enter the raid, all paths will level up twice. | +40 | Path Level |
Pathmaster | As soon as you enter the raid, all pathways will level up three times. | +50 | Path Level |
Quiet Prayers | During the raid, protection prayers will be 10% less effective. | +20 | Prayer |
Deadly Prayers | 20% of the damage is depleted in prayer | +20 | Prayer |
On a Diet | Food is no longer allowed for you to consume during the raid, but you can still use health-restoring potions like Saradomin brews. If this invocation is active, you will also no longer be able to purchase silk dressings or honey locusts. | +15 | Restoration |
Dehydration | Health-restoring potions is no longer an option for you. | +30 | Restoration |
Overly Draining | Special attack energy is used in 100% of special attacks. You can temporarily cut the cost to 50% by consuming liquid adrenaline. | +15 | Restoration |
Lively Larvae | During Kephri's Mass Incubation attack, there will be four instead of two dark brown eggs thrown. | +5 | Kephri |
More Overlords | During Kephri's shield healing phases, another scarab is summoned. A Spitting Scarab is summoned by the second, and a Soldier Scarab by the first. | +15 | Kephri |
Blowing Mud | Kephri's Dung Strike attack now targets two players instead of just one. For solo encounters, this invocation has no effect. | +10 | Kephri |
Medic! | When Kephri's shield is not healing, she will call forth hordes of scarabs. Swarms like this move 50% more slowly. | +15 | Kephri |
Aerial Assault | Kephri's auto-attack will deal more damage and have a greater attack range, measuring three by three tiles instead of just one. This invocation also applies to Kephri's Phantom in the third phase of the encounter with Elidinis' Warden, and to the Bomber Scarabs that arrive during the shield healing phase. | +10 | Kephri |
Not Just a Head |
| +15 | Zebak |
Arterial Spray | Zebak's blood magic will be more healing and have a wider range. This invocation cannot be activated until Not Just a Head is enabled. | +10 | Zebak |
Blood Thinners | This summons three Blood Clounds instead of only one. To make this invocation active, Not Just a Head needs to be activated. | +5 | Zebak |
Upset Stomach | The spread of Zebak's acid pools will be expanded from 3x3 to 5x5, while the water in the jugs will be decreased from 5x5 to 3x3. | +15 | Zebak |
Double Trouble | Akkha will simultaneously launch two special attacks. | +20 | Akkha |
Keep Back | In addition to his magic and ranged attacks, Akkha will also employ melee, which lands right before the projectile attack without any animation. | +10 | Akkha |
Stay Vigilant | Rather than switching between attack and protection prayers at predetermined intervals, Akkha will do so at random. The third phase of the battle with Elidinis' Warden also applies to Akkha's Phantom while using this invocation. | +15 | Akkha |
Feeling Special? |
| +20 | Akkha |
Mind the Gap! | Unles you are standing at the northern or southern edges of the room, you will fall into the pit and perish when Ba-Ba knocks you back to the bottom at 66% and 33% health. | +10 | Ba-Ba |
Gotta Have Faith | The amount of additional damage dealt by energy blasts from open sarcophagi in Ba-Ba's room is determined by the your remaining prayer points. | +10 | Ba-Ba |
Jungle Japes | When Ba-Ba's baboons die, they will leave a banana peel on the ground. If you stepped on it, you will be stunned for three seconds and will take a small amount of damage. | +5 | Ba-Ba |
Shaking Things Up | A 3x3 (+1 tile to the north, west, east, and south) will sustain damage from Ba-Ba's slam attack, whereas a 5x5 (+1 tile to the north, west, east, and south) will sustain damage. | +10 | Ba-Ba |
Boulderdash | The rolling boulders of Ba-Ba spawn twice as quickly. | +10 | Ba-Ba |
Ancient Haste | The Wardens will charge more quickly in the first stages of their fight. | +10 | The Wardens |
Acceleration | The obelisk charges faster and the Wardens attack faster during the second phase of the fight. | +10 | The Wardens |
Penetration | The obelisk will cause extra damage to successful strikes and mpomentarily disable overhead prayers during the second phase of the Warden's battle. | +10 | The Wardens |
Overclocked | One tick is added to the slam attack during the last phase of the Wardens' fight. | +10 | The Wardens |
Overclocked 2 | The Wardens' last phase of combat is a slam assault that is executed two ticks faster. This invocation cannot be activated unless Overclocked is active. | +10 | The Wardens |
Insanity | The following are used in the last stages of the Wardens' battle:
This invocation cannot be activated until Overclocked 2 is active. | +50 | The Wardens |
Blazing Tombs I | For the most in tune with their league relics, an additional obstacle. Minimum Raid level 300 is required. Raid level is raised by 200. | +200 | Trailblazer Reloaded League |
Blazing Tombs II | An additional challenge for the most adept at using their League relics. At least Raid level 300 is needed. Raid level is raised by 200. | +200 | Trailblazer Reloaded League |
Pick Your Raid-Only Supplies Properly
You can get your hands on a handful of amazing support items while doing the Tombs of Amascut. Much like your gear, it's very important that you choose your raid supplies well.
Item | Effect |
Honey locust | Stacks in the inventory. Heals 20 hitpoints (with th eability to overheal) and replenishes prayer points equivalent to a prayer potion dosage. Administered automatically during wipes, unless the “On a Diet” invocation is active. |
Ambrosia | Contains two doses. Provides a full recovery of hitpoints, run energy, prayer points, and antidote++. Cannot be used if the invocation for “Dehydration” is enabled.
|
Blessed crystal scarab | Has 2 purposes. Restores eight Prayer points nine times, every four ticks, or 2.4 seconds. This takes 40 ticks or 24 seconds, to restore a total of 72 Prayer points. |
Liquid adrenaline | Has 2 doses. Cuts the cost of special attacks in half for the next 150 seconds. |
Nectar | Contains 4 doses. Heals hitpoints (with the ability to overheal), depletes magic, attack, strength, defense, and ranged. Cannot be consumed in the event that the “Dehydration” invocation is active.
|
Silk dressing | Has 2 purposes. Heals five hitpoints 20 times in five ticks or three seconds. In 100 ticks, or 60 seconds, this results in a healing of 100 hitpoints overall. Not available if the invocation "On a Diet" is turned on. |
Smelling salts | Has 2 purposes. 25% more run energy is restored, and attack, strength, defense, ranged, and magic are all increased. For eight minutes, the battle boost is renewed every 15 seconds. |
Tears of elidinis | Has 4 doses. Affects party members in a 3x3 area and restores prayer points and combat stats.
|
Time For The Raid
ToA is going to be difficult regardless of your build but the gear progression above should at least make things easier for you and your party in the long run.
As much as we'd hate to say it, most of the builds above are non-negotiable and you really have to invest a ton of money for it. If you're lacking the time to farm, reach out to RPGStash for help! We can help you do farm runs so that you can get the best builds.
If you want to start taking on a different challenge next, why not try to follow this OSRS optimal quest guide to get everything done?
FAQs
FAQ 1: What is the best gear setup for OSRS Tombs of Amascut (ToA) raids in 2025?
The best ToA gear setups in OSRS will, of course, depend on what your combat style is. It's going to be these:
- Melee - Full Torva set with Osmumten's Fang and an Avernic Defender
- Ranged - Full Masori Set with Twisted Bow
- Magic - Full Ancestral Set with Tumeken's Shadow
FAQ 2: What's the ideal gear progression path for Melee, Ranged, and Magic in ToA?
Melee Progression:
- Start with: Dragon Dagger / Abyssal Dagger + Serpentine Helm + Guthan's or Torag's Platebody
- Upgrade to: Zamorakian Hasta → Ghrazi Rapier → Osmumten's Fang
- Helm upgrades: Serpentine Helm → Neitiznot Faceguard → Torva Helm
- Armor upgrades: Bandos Chestplate → Torva Platebody / Platelegs
- Final setup: Full Torva set + Osmumten's Fang + Avernic Defender + Ferocious Gloves + Primordial Boots
Ranged Progression:
- Start with: Dragon Crossbow + Serpentine Helm + Armadyl or Blessed D'hide gear
- Upgrade to: Armadyl Crossbow → Bow of Faerdhinen (c) → Twisted Bow
- Armor upgrades: Armadyl Set → Crystal Set → Full Masori Set
- Final setup: Twisted Bow + Masori Mask/Chaps/Body + Ferocious Gloves + Primordial Boots
Magic Progression:
- Start with: Trident of the Seas + Full Mystic Set
- Upgrade path: Occult Necklace → Tormented Bracelet → Full Ahrim's Set
- Weapon upgrades: Trident of the Seas → Sanguinesti Staff → Tumeken's Shadow
- Final setup: Tumeken's Shadow + Ancestral Hat/Top/Bottom + Elidinis' Ward + Barrows Gloves
FAQ 3: How do invocations affect gear choices in Tombs of Amascut?
Invocations make the raid harder overall but it also increases the reward potential making it a must for most players.
Just keep in mind that this can actually affect which gear is best used for ToA. More difficult Invocations of course, mean you need more optimized gear.
FAQ 4: What are the most valuable rewards from the Tombs of Amascut raid?
The best rewards are Tumeken's Shadow, the Masori Set, Elidinis' Ward, Osumten's Fang, and Lightbearer ring. These are the most expensive drops from the raid.
FAQ 5: What supplies should I bring for a successful ToA run?
The best supplies for a ToA run should include Ambrosia, Liquid Adrenaline, Smelling Salts, and Silk Dressing. For your items, just bring stamina potions, antipoison, Saradomin brews, and high-healing food.
![OSRS Gold (1M) [⏱️ 5-10 Min via In-Game Trade]](/img/tmp/product_mini_2_2939.jpg?time=1781837695)
![OSRS Services [Achievements, Fire Cape, Infernal Cape, Minigames, PvM, Raids, Quests]](/img/tmp/product_mini_2_52597.jpg?time=1781837695)

![Tumeken's Shadow (uncharged) [OSRS Item]](/img/tmp/product_mini_2_52348.jpg?time=1781837695)
![Ancestral Robe Top [OSRS Item]](/img/tmp/product_mini_2_4169.jpg?time=1781837695)