RS3 Melee Guide, 1-99 and Beyond in All Melee Combat Stats
14.06.2025 - 19:33:24
Game Guides , RS3 Guides , RS3 Skills, Quests, Gameplay , Runescape

With all the monsters and dangers in RS3, you'll need to defend yourself with all that you got. And one of the best ways to do so is with Melee weapons.
Melee training can be hard in RS3 as you'll be put directly in front of monsters and more dangers just to get the skill up. We get that you want to make leveling melee as efficient as possible, so we're going to help you out with this guide on Melee training in RS3.
If you don't have the time to train or to grind for any amazing gear, we'll help you out. Our store has great deals on RS gold, items, and services. We'll cut down on the grind so that you can focus on enjoying the game.
What Is Melee In RS3?
Melee training involves 3 stats:
- Attack: Ability to hit more accurately and wield better weapons.
- Strength: Ability to hit higher.
- Defence: Ability to block damage and wear better gear.
You can train these stats individually by going into your combat options and choosing attack, strength or defence. Alternatively you can choose shared experience and train them slowly but at the same time.
Melee Weaknesses
Almost every monster in Runescape 3 has a certain weakness. We will be focusing on the ones that have a weakness against melee attacks. These monsters are split into 3 categories:
- Weak to stab
- Weak to slash
- Weak to crush
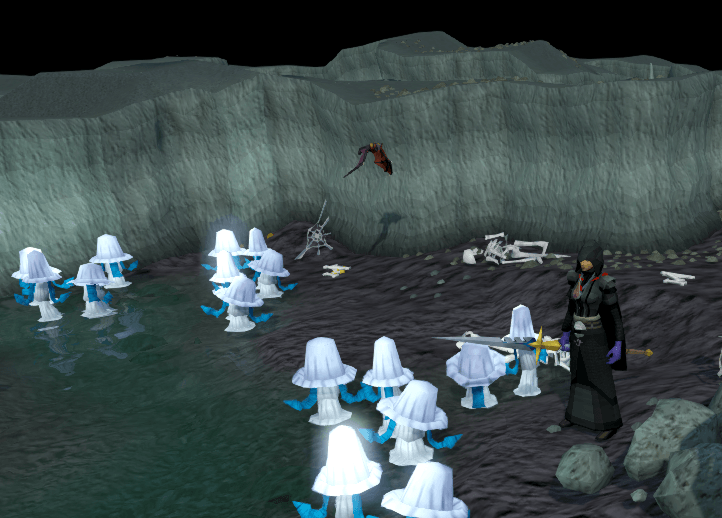
You can easily see the weakness by looking at the monster's health bar interface. There you should see an icon indicating its weakness. You should always use the weapon that the monster is weak to. By doing so you will be hitting more, thus gaining more experience per hour.
Healing
In combat, you won't be the only one who is dealing damage. Over time you will accumulate damage and will need to heal. There are a few ways to go about negating this damage:
- Using food: This is the most common way of dealing with damage. Bring some decent food into the fight and use it when necessary.
- Using Rejuvenate and Regenerate: Rejuvenate is an ultimate skill that will heal you for 40% of your total health and regenerate is an ability which can be used outside of combat to convert your adrenaline into health. Alternatively you can use Guthix's Blessing if you have access to it.
- Guthans: This is a mid tier armour set that grants a special effect to the player when worn.(You must wear the full set!) Your successful attacks have a 25% chance of healing you. The heal you recieve is the same as the damage you dealt when the ability triggered.
- Soul split: This is high level prayer that requires you to have ancient curses unlocked. When turned on it heals you for 10% of the damage dealt. This is the ultimate way of healing yourself while casually training.
- Saradomin Godsword: Saradomin godsword requires level 75 attack to wield. Base version of the sword has a special attack that consumes 50% adrenaline and deals 75-275% ability damage and restores life points by half of the damage dealt and prayer points by 2.5% of it.
You can use this godsword on the Saradomin altar in Commander Zilyana's boss room to gain a passive healing effect. This however removes the ability to use the special attack of the weapon and makes the weapon untradable. It gains the passive effect that heals the user 3% of their maximum health and prayer points with each successful hit. This effect has a 25% chance to activate.
- Vampyrism Aura and Scrimshaw: You can activate a scrimshaw of vampyrism or vampyrism aura to gain a passive lifesteal effect on each successful hit.
- Healing Familiars: Alternatively if you have the required Summoning level, you can summon a bunyip which heals you passively or a unicorn stallion which heals you whenever you use a scroll.
Potions
Potions are consumables that will greatly enhance your overall combat experience. They will boost your stats, which increases your damage and reduces the amount of damage you take. They are totally worth their cost and you should use the best ones available to you.
It is highly recommended to get 96 Herblore to create overloads.
Relic Powers
These powers are unlocked through the Archaeology skill, and when activated, provide the player with a passive effect.
Relic Power | Effect | Archeology Level |
Font of Life | Increases maximum health by 500. | 5 |
Berserker's Fury | Increases your damage, the lower your health is. This effect can go up to +5.5% damage increase. This does not stack with Dharok's armour set. | 56 |
Death Ward | Reduces the damage you take by 5% when your life points are below 50%, this effect increases to 10% damage reduction when your health is below 25%. | 81 |
Fury of the Small | All of your basic abilities generate 1% more adrenaline. | 97 |
Persistent Rage | Your adrenaline will not drain outside of combat. | 98 |
Heightened Senses | Your maximum adrenaline is increased by 10%. | 105 |
Conservation of Energy | After using an ultimate ability, regain 10% of your adrenaline back. | 118 |
Inspire Awe | 2% exp boost to your combat skills. | 119 |
Equipment
Choosing the right equipment for the right task is pretty important and it changes massively depending on the state of your account and which activity you want to partake in.
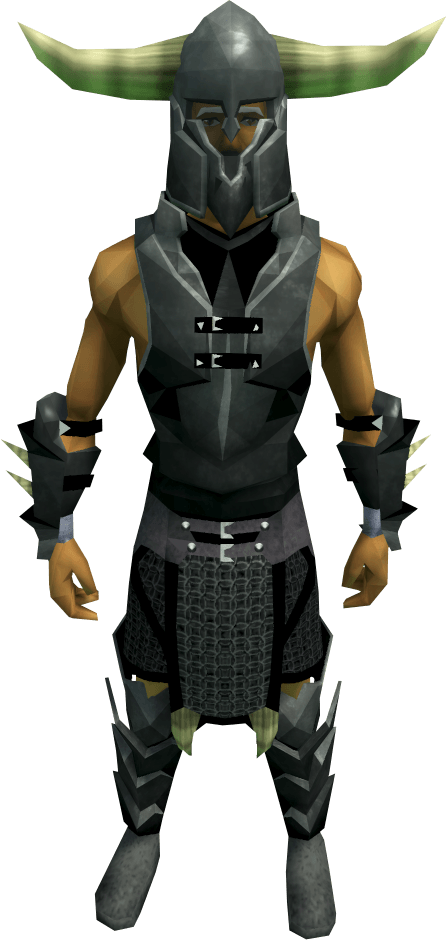
Generally speaking you would want to have power armour sets, these armour sets provide a lower defensive bonus compared to their counterparts of the same tier but they provide a strength bonus which increases your damage overall. Getting these armor sets however, will require a lot of RS 3 gold.
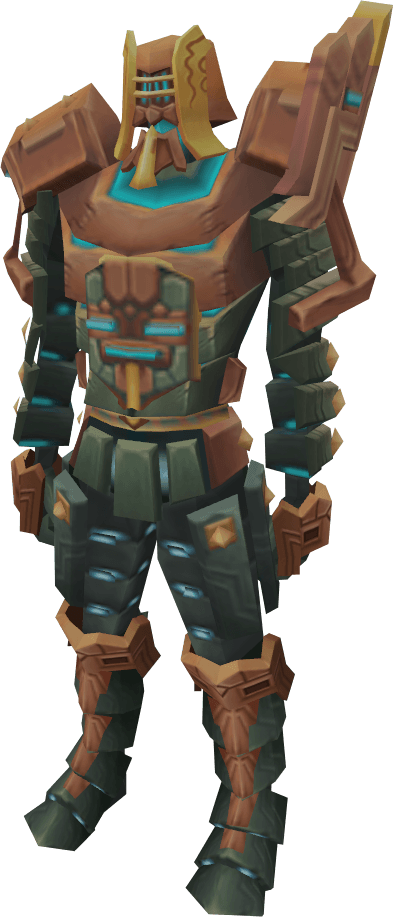
Here is the best in slot melee power armour and jewellery in game:
Slot | Item |
Head | Trimmed masterwork helm |
Body | Trimmed masterwork platebody |
Legs | Trimmed masterwork platelegs |
Hands | Trimmed masterwork gloves |
Feet | Trimmed masterwork boots |
Cape | Igneous Kal-Zuk |
Neck | Essence of Finality amulet (or) |
Ring | Ring of death (i) |
Erethdor's grimoire |


Wearing the armour and jewellery listed above will provide you with a total of 1759 armour, 25 prayer bonus and 236.7 bonus strength.
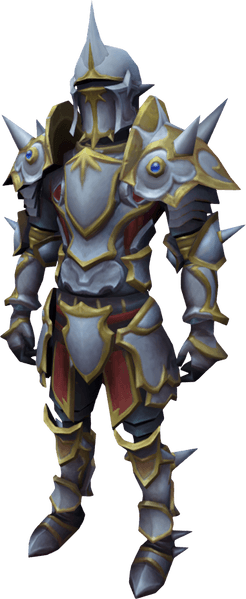
Now let's take a look at the best in slot tank armour in the game:
Slot | Item |
Head | Achto Teralith helmet |
Body | Achto Teralith cuirass |
Legs | Achto Teralith leggings |
Hands | Achto Teralith gauntlets |
Shield | Malevolent kiteshield |
Feet | Achto Teralith boots |
Cape | Superior reefwalker's cape |
Neck | Amulet of defence |
Ring | Superior leviathan ring |
Full charged Defender's insignia |
While levelling up, check your skill guide regularly to figure out what is the best gear for your account. Alternatively you can check wiki to see everything more clearly.
Visit our Runescape Guide
1-99 RS3 Melee P2P Combat Training
Make sure to setup your ability bar properly for the best results! First up, we're going to talk about the best training methods if you're training Melee on a P2P account.
Levels 1-40
Monster | Location | Level | EXP |
Troll chucker | Burthorpe Troll Cave | 1 | 30 Combat, 10 Constitution EXP |
Chicken | North of Lumbridge | 1 | 24.9 Combat, 8.2 Constitution EXP |
Levels 40-50
Monster | Location | Level | EXP | Notes |
Flesh Crawler | Stronghold of security level 2, southeastern room | 40 | 232 Combat, 76 Constitution EXP | Great AOE monster, as there are multiple enemies. |
Moss giant | Moss Giant Island Varrock Sewers | 51 | 136 Combat, 44 Constitution EXP | |
Ghoul | North of Canifis | 64 | 138 Combat, 45 Constitution EXP |
Levels 50-70
Monster | Location | Level | EXP |
Fire giant | Waterfall Dungeon | 85 | 404 Combat, 133 Constitution EXP |
TzHaar-Xil | TzHaar City | 86 | 297 Combat, 98 Constitution EXP |
Hellhound | Taverley Dungeon | 92 | 361 Combat, 119 Constitution EXP Extremely good method up to level 99. |
Abyssal walker, leech, guardian | The Abyss | 72 77 79 | 183, 211, 233 Combat, 60, 69, 76 Constitution EXP respectively. Extremely good method up to level 99. |
Levels 70-80+
Monster | Location | Level | EXP |
Abyssal demon | Slayer Tower | 98 | 661 Combat, 218 Constitution EXP Extremely good method up to level 99. |
Levels 80-90+
Monster | Location | Level | EXP | Notes |
Frost Dragon | Asgarnian Ice Dungeon resource dungeon | 112 | 1085 Combat, 358 Constitution EXP | Requires 85 Dungeoneering. |
Corrupted Scorpion | Sophanem Slayer Dungeon | 98 | 462 Combat, 152 Constitution EXP | Requires 88 Slayer. |
Vyrelord | Darkmeyer | 98 | 661 Combat, 218 Constitution, 300 firemaking, 420 prayer EXP | Blisterwood weapons required. River of blood recommended Sunspear recommended. Morytania legs 4 recommended. 92 Prayer recommended. |
Spiritual warrior | God Wars Dungeon | 98 | 661 Combat, 218 Constitution EXP | Requires 68 Slayer. |
Spiritual mage | God Wars Dungeon | 98 | 661 Combat, 218 Constitution EXP | Requires 83 Slayer. |
Levels 90-99
Monster | Location | Level | EXP | Notes |
Arch-Glacor | Glacor Front at Senntisten | 7000 | 10533 Combat, 3476 Constitution EXP | Do 0 mechanic kills for fast kills but less loot. |
General Graardor | God Wars Dungeon | 624 | 3204 Combat, 1057 Constitution EXP | 95 Prayer recommended. |
K'ril Tsutsaroth | God Wars Dungeon | 650 | 5136 Combat, 1694 Constitution EXP | 95 Prayer recommended. |
1-99 RS3 F2P Melee Training
Level 1 to 20
Monster Name | Location(s) | Combat Level | Life Points | Experience | Requirements | Recommendations |
Troll brute, Troll shaman, Troll chucker | Burthorpe Troll Cave, north of Burthorpe | 1 | 250 | 12.5 (and 4.1 Life Points) | None | Bronze/Iron 2h sword or fast attack weapon |
Warped cockroach, Corpse spider | Lumbridge Catacombs | 1, 4 | 500, 600 | 25, 30 (8.2-9.9 Life Points) | None | Bronze/Iron 2h sword or fast weapon (e.g., Mace) |
Chicken | Various Lumbridge farms | 2 | 250 | 12 (and 4 Life Points) | None | Bronze/Iron 2h sword or fast weapon |
Cow calf, Cow | Cow pen east of River Lum | 4 / 6 | 1100 | 50 / 25.5 (16 / 8.4 Life Points) | None | Best 2h sword available |
Goblin | Stronghold of Security | Varies | 50-400 | 65 (and 21 Life Points) | None | Best 2h sword for your Attack level |
Advantages / Disadvantages
Advantages | Disadvantages |
Very low defence, high kill speed | Often crowded |
Fast respawn rates | |
Chickens have low damage output | |
Cows provide cowhides for profit | |
Goblins are weak and easy to kill | Occasionally crowded |
Level 20 to 30
Monster Name | Location(s) | Combat Level | Life Points | Experience | Requirements | Recommendations |
Giant rat | Stronghold of Security | 9 | 1650 | 82.5 (27.2 Life Points) | None | Best 2h sword available |
Minotaur | Stronghold of Security | 15 | 2000 | 100 (33 Life Points) | None | Best 2h sword available |
Crawling hand | Burthorpe Slayer Cave | 11 | 1750 | 87.5 (28.8 Life Points) | Level 5 Slayer | Best 2h sword available |
Level 30 to 40
Monster Name | Location(s) | Combat Level | Life Points | Experience | Requirements | Recommendations |
Hobgoblin | Hobgoblin Peninsula | 15, 18 | 2000 | 133-150 (33-38 Life Points) | None | Best 2h sword available |
Corpse archer | Lumbridge Catacombs | 18 | 2350 | 117.5 (38.7 Life Points) | The Blood Pact | Mithril mace/warhammer |
Level 40 to 50
Monster Name | Location(s) | Combat Level | Life Points | Experience | Requirements | Recommendations |
Hill giant | Edgeville Dungeon, Resource Dungeon | 26 | 4500 | 225 (74.2 Life Points) | 20 Dungeoneering (resource dungeon) | Brass key, swordfish for food |
Flesh Crawler | Stronghold of Security (Second level) | 26 | 4650 | 232.5 (76.7 Life Points) | Access to SoS | Dual Adamant daggers/swords |
Giant spider | Stronghold of Security (Third level) | 29 | 4500 | 225 (74.2 Life Points) | Access to SoS | Dual Adamant maces/warhammers |
Moss giants | Varrock Sewers, Crandor | 40 | 6400 | 320 (105.6 Life Points) | Partial Dragon Slayer | Rune/Gravite 2h sword |
Advantages / Disadvantages
Advantages | Disadvantages |
Good drops (big bones) | Moss giants: hits hard |
Weak to specific damage types | Flesh Crawlers often crowded |
Semi-AFK (giant spiders) | Giant spider drops nothing |
Level 50 to 70
Monster Stats
Monster Name | Location(s) | Combat Level | Life Points | Experience | Requirements | Recommendations |
Hill giant | Edgeville Dungeon, Resource Dungeon | 26 | 4500 | 225 (74.2 Life Points) | 20 Dungeoneering (optional) | Brass key, swordfish for food |
Moss giants | Varrock Sewers, Crandor | 40 | 6400 | 320 (105.6 Life Points) | Partial Dragon Slayer | Rune/Gravite 2h sword |
Ankou | Stronghold of Security (Level Four) | 54 | 6150 | 307.5 (101.4 Life Points) | Partial Stronghold of Security | Rune/Gravite 2h sword |
Advantages / Disadvantages
Advantages | Disadvantages |
Decent drops | Ankou not weak to melee |
Level 70+
Monster Stats
Monster Name | Location(s) | Combat Level | Life Points | Experience | Requirements | Recommendations |
Clan Wars (white portal) | Gamers' Grotto (W3) | N/A | N/A | Up to 160,000 exp/hr | None (high stats needed) | Full rune, prayer switching required |
Poison spider | Lava Maze Dungeon | 53 | 3700 | 185 (34.2 Life Points) | None | Rune/Gravite 2h sword |
Giant spider | Stronghold of Security (Third level) | 29 | 4500 | 225 (74.2 Life Points) | Access to SoS | Rune/Gravite 2h sword |
Ice giant, warrior | Asgarnian Ice Dungeon | 54, 56 | 6300, 8150 | 315, 407.5 (103.9, 134.4 LP) | None | Rune/Gravite 2h sword |
Ankou, Ghost | Stronghold of Security (Level Four) | 61, 46 | 7250, 5300 | 362.5, 291 (119.6, 87.4 LP) | Partial SoS | Rune/Gravite 2h, Ghost hunter gear |
Deadly red spider | Varrock Sewers, Karamja Dungeon | 95 | 6150 | 307.5 (101.4 Life Points) | None | Crush weapon (Rune mace + Gravite off-hand) |
Hellhound | Forinthry dungeon, Wilderness Crater | 92 | 3300 | 165 (154.4 Life Points) | None | Rune/Gravite 2h sword, Protect Item prayer |
Advantages / Disadvantages
Advantages | Disadvantages |
Very high XP rates (up to 200k/hr Ankou) | High damage taken—bring Swordfish/Lobster |
Weaknesses exploitable for 100% hit rate (e.g., Crush) | Some areas in Wilderness (PvP risk) |
Drops prayer-recharging items (Twisted bird skull) | No valuable drops from some monsters |
Respawns are fast, many are AFK-friendly | Prayer switching required for Clan Wars XP efficiency |
Quests That Reward Melee Combat XP
Aside from training against monsters, you're also going to want to do a few quests to get some melee combat XP. Below are your options for both P2P and F2P.

Attack Experience Rewards
Quest Name | XP Reward | F2P/P2P |
The Blood Pact | 100 | F2P |
A Shadow over Ashdale | 300 | F2P |
In Search of the Myreque | 600 | P2P |
Mountain Daughter | 1,000 | P2P |
A Fairy Tale I - Growing Pains | 2,000 | P2P |
In Aid of the Myreque | 2,000 | P2P |
Tai Bwo Wannai Trio | 2,500 | P2P |
The Fremennik Trials | 2,812 | P2P |
Death Plateau | 3,000 | P2P |
Underground Pass | 3,000 | P2P |
Heroes' Quest | 3,075 | P2P |
Vampire Slayer | 4,825 | F2P |
Quiet Before the Swarm | 4,000 | P2P |
TokTz-Ket-Dill | 5,000 | P2P |
Tree Gnome Village | 11,450 | P2P |
Fight Arena | 12,175 | P2P |
Waterfall Quest | 13,750 | P2P |
The Grand Tree | 18,400 | P2P |
Monkey Madness | 20,000 / 35,000 | P2P |
The Mighty Fall | 80,000 | P2P |
Strength Experience Rewards
Quest Name | XP Reward | F2P/P2P |
The Blood Pact | 100 | F2P |
A Shadow over Ashdale | 300 | F2P |
In Search of the Myreque | 600 | P2P |
In Aid of the Myreque | 2,000 | P2P |
Tai Bwo Wannai Trio | 2,500 | P2P |
The Fremennik Trials | 2,812 | P2P |
Underground Pass | 3,000 | P2P |
Heroes' Quest | 3,075 | P2P |
Scorpion Catcher | 6,625 | P2P |
Roving Elves | 10,000 | P2P |
Haunted Mine | 22,000 | P2P |
Monkey Madness | 20,000 / 35,000 | P2P |
The Mighty Fall | 80,000 | P2P |
King of the Dwarves | 55,000 | P2P |
Path of Glouphrie | 30,000 | P2P |
Forgiveness of a Chaos Dwarf | 30,000 | P2P |
Dealing with Scabaras | 7,000 | P2P |
The Chosen Commander | 20,000 | P2P |
Knight Waves Training Grounds | 20,000 | P2P |
Waterfall Quest | 13,750 | P2P |
Defence Experience Rewards
Quest Name | XP Reward | F2P/P2P |
The Blood Pact | 100 | F2P |
A Shadow over Ashdale | 300 | F2P |
In Search of the Myreque | 600 | P2P |
In Aid of the Myreque | 2,000 | P2P |
Nature Spirit | 2,000 | P2P |
What Lies Below | 2,000 | P2P |
The Fremennik Trials | 2,812 | P2P |
Heroes' Quest | 3,075 | P2P |
Between a Rock... | 5,000 | P2P |
Olaf's Quest | 12,000 | P2P |
Holy Grail | 15,300 | P2P |
Dragon Slayer | 18,650 | F2P |
King's Ransom | 33,000 | P2P |
Clockwork Syringe | 19,000 | P2P |
Salt in the Wound | 45,000 | P2P |
Defender of Varrock | 10,000 | P2P |
Dimension of Disaster | 10,000 | P2P |
Constitution Experience Rewards
Quest Name | XP Reward | F2P/P2P |
A Shadow over Ashdale | 300 | F2P |
A Soul's Bane | 500 | P2P |
In Search of the Myreque | 600 | P2P |
Song from the Depths | 700 | P2P |
Nature Spirit | 2,000 | P2P |
Fur 'n' Seek | 2,500 | P2P |
The Fremennik Trials | 2,812 | P2P |
Heroes' Quest | 3,075 | P2P |
Recipe for Disaster | 4,000 | P2P |
Grim Tales | 5,000 | P2P |
Royal Trouble | 5,000 | P2P |
Witch's House | 6,325 | P2P |
Missing My Mummy | 7,000 | P2P |
Dream Mentor | 15,000 | P2P |
Salt in the Wound | 17,500 | P2P |
Mourning's Ends Part I | 25,000 | P2P |
Firemaker's Curse | 76,000 | P2P |
Missing, Presumed Death | 50,000 | P2P |
Quests Offering XP in Multiple Melee Skills
Quest Name | XP Reward Details | F2P/P2P |
Monkey Madness | 35,000 XP to two melee stats; 25,000 XP to the other two | P2P |
Ritual of the Mahjarrat | 3 lamps granting 80,000 XP each to any skill | P2P |
The Brink of Extinction | 275,000 XP in Attack, Strength, Defence, Magic, or Ranged | P2P |
Temple at Senntisten | 2 lamps granting 20,000 XP each in any combat skill | P2P |
While Guthix Sleeps | 4 lamps granting 100,000 XP each in any skill over level 65 | P2P |
The World Wakes | 3 lamps granting 100,000 XP each in any skill over level 75 | P2P |
Slayer
Slayer is the most preferred method of training combat stats. It is recommended for you to start doing slayer after reaching base 70+ melee stats.

With slayer you can craft a slayer helmet, which boosts your accuracy and damage greatly when doing slayer assignments. This helmet out performs any other helmet in the game when you are on a task. Furthermore in Anachronia, you can unlock the Tier 3 Slayer Lodge and place your helmet on a stand to always gain its passive effect on tasks without wearing the helmet.
- EXP/H: Anywhere between 50K - 2M EXP
Start Practising Your Melee In RS3
This is the end of our Melee guide, hope you found it useful and may you get your desired stats using it! If you're looking to improve your Prayer in RS3 next, we've also got a guide for that so check it out.
FAQs
What's the fastest way to train Melee combat in RS3?
The fastest route to 99 Melee (Attack, Strength, Defence) is through aggressive AoE combat with the best gear you can wield. Ideal methods include:
- Levels 1-30: Troll Brutes, Lumbridge Catacombs, or early Slayer tasks.
- 30-70: Giant Spiders (Stronghold of Security), or Deadly Red Spiders.
- 70-99: Abyssal Lords (Archaeology unlocked), ED3 Trash Runs, Vyrewatch Sentinels, or Slayer with aggression potions.
For max efficiency:
- Use revolution++ combat mode.
- Bring Aggression potions, Prayer (Turmoil/Berserker), and Enhanced Excalibur.
- Gear up with Power armor like Bandos → Torva.
Best XP/hour: AFK Abyssal Lords with aggression pots on DXP.
What are the best training locations for AFK Melee XP?
AFK-friendly spots are king for casual and efficient grinders:
- Giant Spiders (lvl 50-80): Stronghold of Security. Low risk, fast spawn.
- Abyssal Lords (lvl 115+): Can AFK with high gear and Soul Split.
- Fungal Mages (Polypore Dungeon): Great XP, medium AFK, low cost.
- Vyrewatch Sentinels (Darkmeyer): Consistent XP + Blood Shard drops.
- ED3 Trash Runs: Group or solo, great XP and money.
All these benefit massively from Aggression Potions, Looting Auras, and Prayer switching.
Can you train Melee through Slayer in RS3?
Absolutely. Slayer is one of the best ways to train Melee while making money and gaining secondary skills. Perks:
- Consistent XP in all combat stats.
- High GP/hr with drops like whips, keys, and totems.
- Bossing Tasks for elite Slayer monsters like Nihils or Ripper Demons.
- Slayer masks and VIP tickets speed task selection and bonuses.
Recommended Slayer Masters:
- Chaeldar (lvl 75+)
- Duradel (lvl 100+)
- Laniakea (lvl 120 Slayer or with boost)
Slayer integrates XP with GP, Reaper tasks, and comp requirements.
What are the best weapons and armor for Melee training?
Top-tier XP requires strong gear. Here's the gear progression by level:
- 1-50: Steel → Rune weapons, Ironman options.
- 50-70: Dragon weaponry → Barrows gear.
- 70-85: Bandos armor + Abyssal Whip or Godswords.
- 85-99: Chaotic Weapons, Drygores, then T92 like Zaros Godsword or Masterwork Spear of Annihilation.
- Tank vs Power: Power armor gives more XP; Tank offers survivability.
Perks help too:
- Aftershock and Precise boost DPS.
- Equilibrium and Biting increase crits and base hits.
Use Invention perks, Adrenaline urns, and Adrenaline potions for rapid kills.
What boosts should I use for faster Melee training?
Boosts greatly accelerate combat XP gain. Stack these for max speed:
- Brawling Gloves (Melee): Double XP in Wilderness.
- Bonus XP + DXP: Stack for massive returns.
- Wisdom/Maniacal Auras: XP boost and/or crit chance.
- Aggression Potions: Auto-aggro mobs for easy AoE clearing.
- Penance Aura: Regenerates Prayer during fights.
- Scrimshaw of Vampyrism: Great for healing during AFK.
- Salve Amulet (e): Huge boost vs undead, esp. for Vyres/Barrows.
Training Dummies also provide passive XP while doing other things. And don't forget to use combat familiars like Steel Titans when active.
![RS3 Gold (1M) [⏱️ 5-10 Min via In-Game Trade]](/img/tmp/product_mini_2_2940.jpg?time=1782935078)

![Santa Hat [RS3 Rare]](/img/tmp/product_mini_2_109.jpg?time=1782935078)

![TokHaar-Kal-Mor(The Necromancy kiln cape) [RS3 Service]](/img/tmp/product_mini_2_60046.jpg?time=1782935078)