Created - 27.04.2024 Updated - 17.06.2025
Runescape 3 Necromancy is the latest combat edition to the game. With a history of having only 3 combat skills, the addition of adding the 4th one spiced things up quite a bit. Necromancy is currently the most overpowered combat skill. It came out later than almost every boss and monster in the game so those creatures are not designed to handle this style of attack. To get the most out of Necromancy and to completely destroy your enemies let's dive into how to get your best in slots for this skill.
Necromancy Weapons & Perks
Necromancy is a pretty straight forward skill in a lot of ways. As of now there are no weapon variants, there are only upgrades to the same type of equipment so unlike other combat styles, you do not need to compare the power of your upgrades. You can upgrade your Necromancy weapons every 10 levels.
Main-Hand
Except for the tier 10 weapon all of the weapons Necromancy level requirement is the same as their tier. You should always use the highest tier you can use.
Tier | Weapon | Cost | Notes |
10 | Death guard (level 1 weapon) | 60 GP | Obtained after completing the Necromancy tutorial quest. |
20 | Death guard | 6K | Upgraded version of the previous tier. Can be crafted after completing the “Kili Row” quest. |
30 | Death guard | 7K | Upgraded version of the previous tier. Can be crafted after completing the “Kili’s Knowledge 1” quest. |
40 | Death guard | 8K | Upgraded version of the previous tier. Can be crafted after completing the “Kili’s Knowledge 2” quest. |
50 | Death guard | 12K | You will need to craft this item at least once in order to wield it. Can be crafted after completing the “Kili’s Knowledge 3” quest. |
60 | Death guard | 33K | You will need to craft this item at least once in order to wield it. You can make this process faster by buying the previous tier from a player, and upgrading it. Can be crafted after completing the “Kili’s Knowledge 4” quest. |
70 | Death guard | 1.2M | You will need to craft this item at least once in order to wield it. You can make this process faster by buying the previous tier from a player, and upgrading it. Can be crafted after completing the “Kili’s Knowledge 5” or “Kili’s Knowledge 5 (power)” quest. |
80 | Death guard | 1.7M | You will need to craft this item at least once in order to wield it. You can make this process faster by buying the previous tier from a player, and upgrading it. Can be crafted after completing the “Kili’s Knowledge 6” or “Kili’s Knowledge 6 (power)” quest. |
90 | Death guard | 1.9M | You will need to craft this item at least once in order to wield it. You can make this process faster by buying the previous tier from a player, and upgrading it. Can be crafted after completing the “Kili’s Knowledge 7” or “Kili’s Knowledge 7 (power)” quest. |
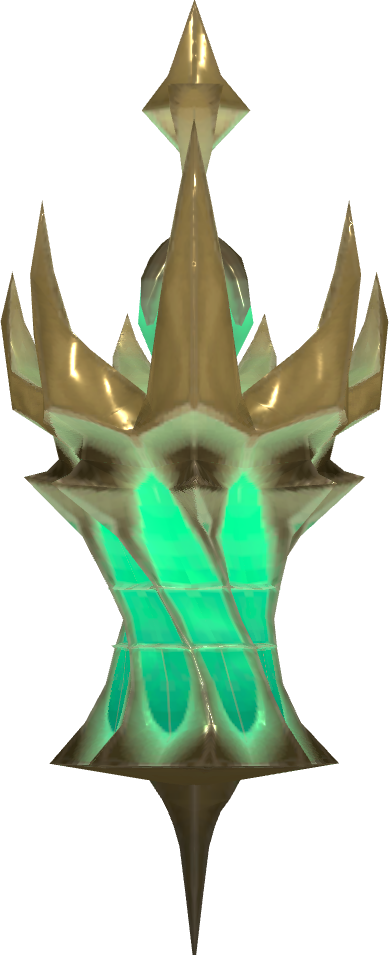
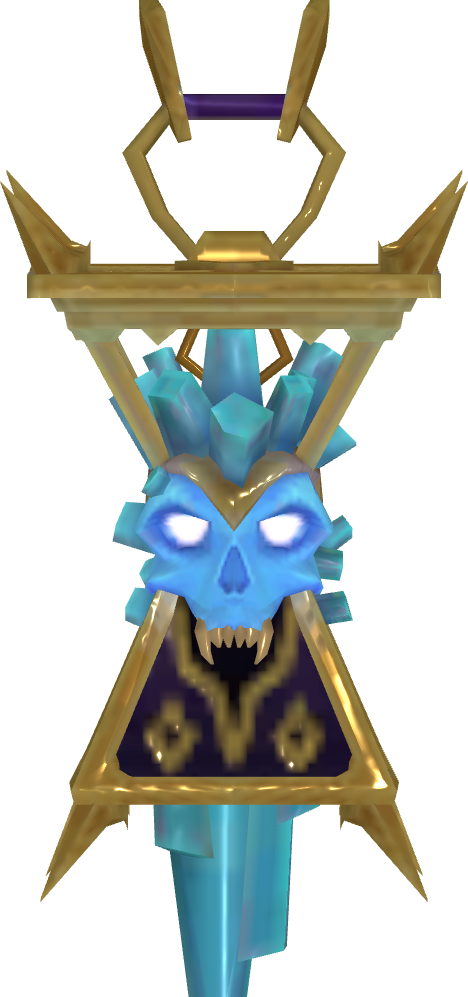
95 | Omni guard | 556M | Dropped by Rasial, the first Necromancer. Currently the strongest Necromancy weapon in the game. Can be augmented. Using 30% adrenaline you can cast the weapons special attack: |
Off-Hand
Except for the tier 10 off-hand all of the off-hands Necromancy level requirement is the same as their tier. You should always use the highest tier you can use.
Tier | Weapon | Cost | Notes |
10 | Skull lantern (can be used at level 1) | 60 GP | Obtained after completing the Necromancy tutorial quest. |
20 | Skull lantern | 4K | Upgraded version of the previous tier. Can be crafted after completing the “Kili Row” quest. |
30 | Skull lantern | 5K | Upgraded version of the previous tier. Can be crafted after completing the “Kili’s Knowledge 1” quest. |
40 | Skull lantern | 5K | Upgraded version of the previous tier. Can be crafted after completing the “Kili’s Knowledge 2” quest. |
50 | Skull lantern | 9K | You will need to craft this item at least once in order to wield it. Can be crafted after completing the “Kili’s Knowledge 3” quest. |
60 | Skull lantern | 24K | You will need to craft this item at least once in order to wield it. You can make this process faster by buying the previous tier from a player, and upgrading it. Can be crafted after completing the “Kili’s Knowledge 4” quest. |
70 | Skull lantern | 668K | You will need to craft this item at least once in order to wield it. You can make this process faster by buying the previous tier from a player, and upgrading it. Can be crafted after completing the “Kili’s Knowledge 5” or “Kili’s Knowledge 5 (power)” quest. |
80 | Skull lantern | 1.6M | You will need to craft this item at least once in order to wield it. You can make this process faster by buying the previous tier from a player, and upgrading it. Can be crafted after completing the “Kili’s Knowledge 6” or “Kili’s Knowledge 6 (power)” quest. |
90 | Skull lantern | 1.9M | You will need to craft this item at least once in order to wield it. You can make this process faster by buying the previous tier from a player, and upgrading it. Can be crafted after completing the “Kili’s Knowledge 7” or “Kili’s Knowledge 7 (power)” quest. |
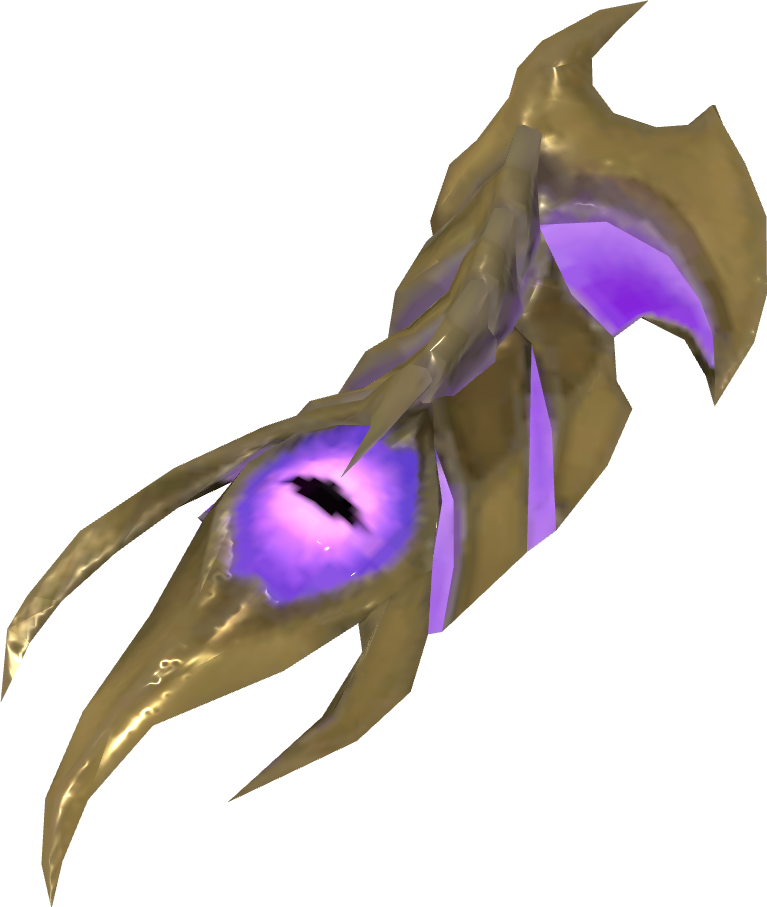
95 | Soulbound lantern | 790M | Dropped by Rasial, the first Necromancer. Currently the strongest Necromancy weapon in the game. Can be augmented. It has a passive effect that increases your maximum number of Residual Souls by 2. |
Upgrade Materials
Tier | Material | Quantity of Materials |
Main-Hand | Off-Hand |
20 | Lesser ensouled bar | 1 | 1 |
30 | Lesser ensouled bar | 1 | 1 |
40 | Lesser ensouled bar | 2 | 2 |
50 | Lesser ensouled bar | 3 | 3 |
60 | Ensouled bar | 4 | 4 |
Bone rune | 50 | 50 |
70 | Ensouled bar | 4 | 4 |
Bone rune | 50 | 50 |
80 | Greater ensouled bar | 3 | 3 |
Miasma rune | 25 | 25 |
90 | Greater ensouled bar | 5 | 5 |
Spirit rune | 50 | 50 |
Bone rune | 50 | 50 |
Flesh rune | 50 | 50 |
Miasma rune | 50 | 50 |
Invention Perks
Here are the perks that you need to know:
Precise: Your minimum damage is increased by 1.5%, this number goes up with each rank.
Ruthless: Whenever you kill an enemy your damage will increase by 0.5%, this effect stacks up 5 times.
Aftershock: After dealing 50K damage, this perk will deal an additional 40+ ability damage to the area, this damage increases with rank.
Eruptive: This perk increases your ability damage by 0.5%, this number goes up with rank.
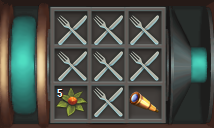
Basic Perks

End-Game Perks
Alternatively you can do the following
Main hand tier 90: Flanking 4 or Aftershock 4, Precise 2 (AoE)
Off-hand tier 90: Eruptive 4, Ruthless 3 (AoE)
Getting the best in slot PvM Necromancer gear in Runescape 3 costs a lot of gold, you can especially get unlucky with the Invention perks and waste millions upon millions on resources. If you want to jump straight into Runescape 3’s end game with the best possible setup consider buying gold on our website here.
Necromancy Armours & Perks
There are two types of armour for any given combat style in this game, one is a tank armour which focuses more on the defensive stats and the other is a power armour which has less defence but more offensive stats. This is especially true for Necromancy. While training Necromancy you will be required to complete some quests which unlock the weapons and the gear for you. Starting at level 70 Necromancy armour you can choose between a tank armour upgrade or a power armour upgrade. Both perform really well against all scenarios, however if you know what you are doing during high level encounters, you should always go with the power armour.
Tier | Armour | Cost | Notes |
10 | Deathwarden armour (Level 1) | 250 GP | Reward from the Necromancy tutorial quest. |
20 | Deathwarden armour | 12K | Defence requirement of 20. Upgraded version of the previous tier. Can be crafted after completing the “Kili Row” quest. |
30 | Deathwarden armour | 16k | Defence requirement of 30. Upgraded version of the previous tier. Can be crafted after completing the “Kili’s Knowledge 1” quest. |
40 | Deathwarden armour | 20K | Defence requirement of 40. Upgraded version of the previous tier. Can be crafted after completing the “Kili’s Knowledge 2” quest. |
50 | Deathwarden armour | 39K | Defence requirement of 50. You will need to craft this item at least once in order to wield it. Can be crafted after completing the “Kili’s Knowledge 3” quest. |
60 | Deathwarden armour | 864K | Defence requirement of 60. You will need to craft this item at least once in order to wield it. You can make this process faster by buying the previous tier from a player, and upgrading it. Can be crafted after completing the “Kili’s Knowledge 4” quest. |
70 | Deathwarden armour | 1.9M | Defence requirement of 70. You will need to craft this item at least once in order to wield it. You can make this process faster by buying the previous tier from a player, and upgrading it. Can be crafted after completing the “Kili’s Knowledge 5” or “Kili’s Knowledge 5 (power)” quest. |
80 | Deathwarden armour | 3.8M | Defence requirement of 80. You will need to craft this item at least once in order to wield it. You can make this process faster by buying the previous tier from a player, and upgrading it. Can be crafted after completing the “Kili’s Knowledge 6” or “Kili’s Knowledge 6 (power)” quest. |
90 | Deathwarden armour | 24.5M | Defence requirement of 90. You will need to craft this item at least once in order to wield it. You can make this process faster by buying the previous tier from a player, and upgrading it. Can be crafted after completing the “Kili’s Knowledge 7” or “Kili’s Knowledge 7 (power)” quest. |
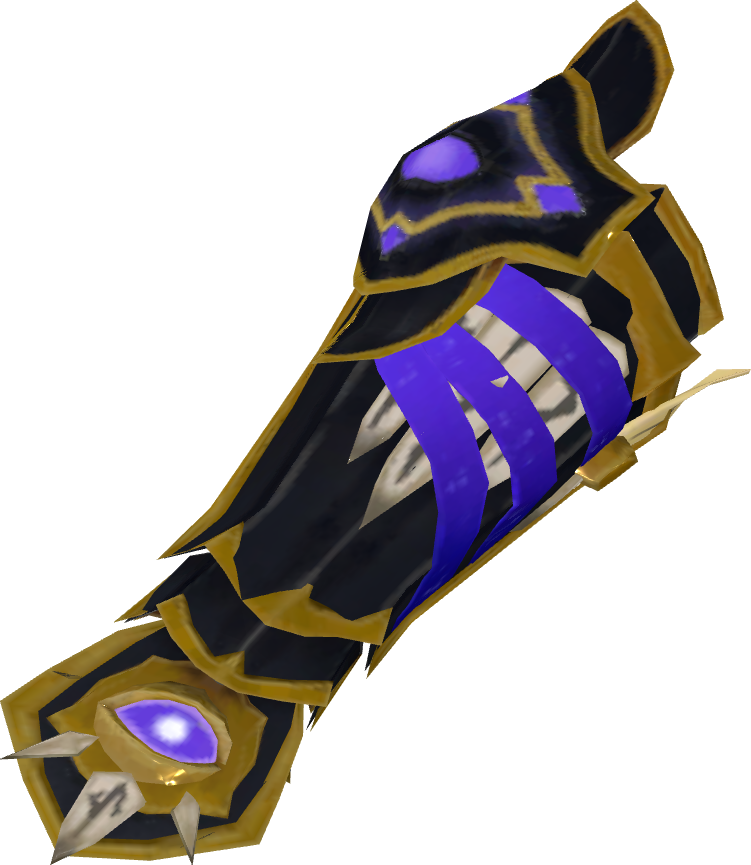
95 | Robes of the first Necromancer | 649M | Defence requirement of 95. Dropped by Rasial, the first Necromancer. Currently the strongest Necromancy armour in the game. When wearing at least 2 pieces, it will increase the basic attack damage of your conjured spirits by 7%. When wearing 4 pieces, it will increase the duration of your conjured spirits by 5%. |
Upgrade Materials
Tier | Material | Quantity of Materials for Full Set |
20-60 | Lesser ensouled cloth | 28 |
Ensouled cloth | 7 |
Lesser ensouled thread | 10 |
Ensouled thread | 5 |
Spirit runes | 225 |
70 | Hermodic plate | 5 |
Ensouled cloth | 12 |
Ensouled thread | 10 |
Bone runes | 100 |
80 | Hermodic plate | 10 |
Greater ensouled cloth | 7 |
Greater ensouled thread | 5 |
Miasma rune | 125 |
90 | Hermodic plate | 15 |
Greater ensouled cloth | 12 |
Greater ensouled thread | 10 |
Spirit runes | 125 |
Bone runes | 125 |
Flesh runes | 125 |
Miasma runes | 125 |
Invention Perks
Perks that you need to know:
Crackling: Deal 50% of your ability damage to a creature per rank. 60 second cooldown.
Biting: Adds 2% critical strike chance to your weapon per rank.
Invigorating: Increases adrenaline gainage with auto-attacks.
Enhanced Devoted: Grants a chance to make protection prayers reduce the damage to 1.
Relentless: Grants a chance to not use adrenaline when using, threshold, ultimate and special attack abilities.
Devoted: Grants a chance to trigger the effects of devotion.
Impatient: 9% chance per rank to add 3% extra adrenaline when using basic abilities.
Mobile: Reduces the cooldowns of Dive, Bladed Dive, Barge, Dreater Barge, Escape and Surge.
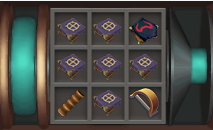
Basic Perks


End Game Perks


Capes

Cape | Style Bonus | Notes |
Obsidian cape | 13.4 Hybrid | Strongest tradable range and magic cape. |
Cape of legends | 17.3 Hybrid | Requires Legends’ Quest |
Spirit cape | 17.3 Hybrid | Requires 50 Defence, Summoning, Dungeoneering. Costs 45K Dungeoneering tokens. Reduces the familiar’s special moves cost by 20%. |
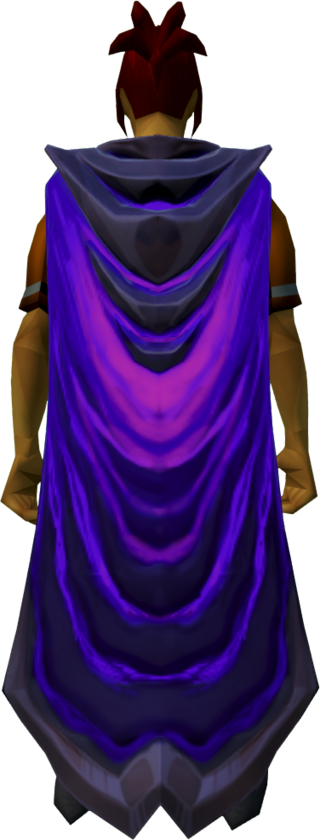
Skill Cape | 21.6 Hybrid | Requires level 99 in a skill. If you have 99 Necromancy, you should use the Necromancy cape. |
Max cape | 31.5 Hybrid | Requires level 99 in all skills. Can be imbued with 3 skill cape perks. |
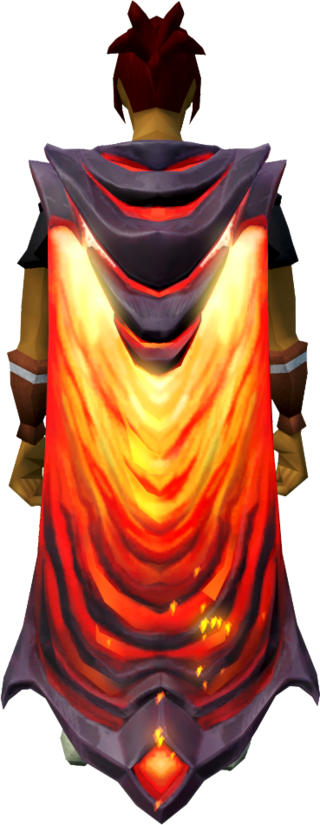
Tokhaar-Kal-Mor | 33.5 Necromancy | Reward for beating the Fight Kiln with mostly Necromancy damage. |
Igneous Kal-Mor | 43 Necromancy | Requires 90 crafting to make. The crafting materials can be obtained only from beating TzKal-Zuk without using checkpoints. Reduces adrenaline cost of Death skulls to 60%. Death skulls bounce an additional two times. |
Igneous Kal-Zuk | 43 Hybrid | Requires 90 Crafting. Requires completing a flawless hard mode run against Zuk. Grants effect of its constituent capes. |
Pocket Slot
Pocket Item | Style Bonus | Cost | Hourly Cost | Notes |
Holy wrench | None | N/A | N/A | Requires the completion of the quest “Rum Deal”. Increases the number of Prayer points restored by potions. |
Adrenaline urn | None | N/A | N/A | Obtained as a drop from Kal'gerion demons, this item accumulates charges when the player's adrenaline surpasses 100%. Upon exiting combat, these charges are utilized from the urn instead of draining the player's adrenaline. Notably, this functionality operates from both the pocket slot and the inventory. |
Blood essence | None | 312,109 - 376,648 | Varies | Requires the completion of the quest River of Blood. Must be charged with congealed blood. |
God book | 5 | 57,907 - 392,051 | 16,885 - 117,096 | Requires level 30 Prayer and completion of Horror from the deep. Created by filling a damaged book with corresponding god pages. When charged with pages, it grants special effects. |
Illuminated god book | 7 | 57,907 - 392,051 | 16,885 - 117,096 | Upgraded variant of the god book, requires, One Piercing Note. |
Erethdor's grimoire | 7 | 217,539,374 | 6,239,072 | When charged with torn grimoire pages, it grants 12% critical hit chance and increases the critical hit cap to 15K. |
Scripture | 8 | 23,059,797 - 320,732,953 | 13,032 - 999,100 | Has different versions, “Ful” being the best one. Each version has a different power when activated. |
Necklaces
Necklaces | Style Bonus | Cost | Hourly Cost | Notes |
Reaper Necklace | 36.8 Hybrid | 56M | 37K | After every effective strike, you gain a bonus of 0.1% to your chance of hitting, capped at a maximum of 3%. This bonus persists for up to 54 seconds following your most recent strike. Once equipped, the item becomes untradable. It wears down over time and requires onyxes for recharging. It can be upgraded by a ornament kit, this increases the style bonus by 2.
|
Conjurer’s raising amulet | 44.1 Hybrid | 830K | - | |
Amulet of Souls | 46.3 Hybrid | 56M | 37K | Has a 50% chance to increase soul split heals for 25-50%. Protection prayers block 10% more damage. Repairs with onyxes. Can be further upgraded with an ornament kit, this increases the style bonuses by 2.
|
Essence of Finality amulet | 56 Hybrid | 258M | 512K | Has the effects of amulet of souls and reaper necklace. After sacrificing your weapon, you can special attack whilst using any weapon of the same style. Becomes permanently untradable. Must be repaired with alchemical hydrix dust. Can be upgraded with the essence of finality ornament kit. This increases the bonuses by 3.
|
Rings
Rings | Style Bonus | Cost | Hourly Cost | Notes |
Ring of vigour | 12 Hybrid | 50K Dungeoneering token | - | Requires level 62 Attack and Dungeoneering. When an ultimate ability or a special attack is used, it consumes 90% of the adrenaline instead of 100%.
|
Luck of the Dwarves | 17.3 Hybrid | 78M | - | |
Sixth-Age circuit | 21 Hybrid | - | - | |
Asylum Surgeon Ring | 21 Hybrid | - | - | Requires level 85 Defence. Requires the completion of the Broken Home quest and all 3 replay challenges. Grants 10% chance to prevent adrenaline loss when using threshold abilities and 40% chance to save 25% of a special attack’s cost. Can be upgraded with 10k Teci, this increases the bonuses by 2.4.
|
Ring of Death | 25.2 Hybrid | 56M | 37K | Has a 50% chance to restore 5% adrenaline when a target is killed. Instead of dying, you’re teleported to your spawn with all your items when you die. Costs 15% charge. Can be recharged with onyxes. Can be upgraded to with 15K Teci, Increases its style bonuses by 2.5.
|
Reaver’s ring | 27.7 Hybrid | 149M | - | Created by combining 10 Berserk rings and a Heart of the berserker. Requires level 70 Crafting. Has a 5% critical hit chance and -5% accuracy.
|
Aura Slot
Aura Slot | Cost | Tiers | Duration | Cooldown | Notes |
Vampyrism aura | 5k Marks of War | 2 | 1 Hour | 3 Hours | Heal for 5% of the damage you deal. |
Dark magic aura | 12.5K Marks of War | 3 | 1 Hour | 3 Hours | Has a chance to inflict corrupting damage. |
Mahjarrat aura | 1K Reaper points or 3 Bonds | 5 | 1 Hour | 23 Hours | Increases damage dealt by 5%. |
Penance Aura | 23K Loyalty points | 2 | 1 Hour | 3 Hours | Gain prayer points equal to 5% of the damage you receive. |
Inspiration aura | 23K Loyalty points | 2 | 1 Hour | 3 Hours | Your attacks that hit generates an additional 0.5% adrenaline. |
Invigorate aura | 5K-115K Loyalty points | 1-4 | 1 Hour | 3 hours | Retain 2.5% of your adrenaline after using an ultimate ability. |
Action Bar
Since necromancy is a new skill there are not that many different skill bars, so you really can’t go wrong with yours! Nevertheless here are two different ability bars as recommendations.
Basic Bar

Advanced Bar

Familiars
Storage
Spirit terrorbird - 52 Summoning, 12 storage slots.
War tortoise - 67 Summoning, 18 storage slots.
Pack yak - 96 Summoning, special move sends items to your bank, has 30 storage slots.
Pack mammoth - 99 Summoning, has 32 storage slots. It’s special move will heal you using the food stored in his storage.
Damage Enhancer
Blood/Shadow/Smoke/Ice nihil - 87 Summoning
Blood reaver - 73 Summoning, deals damage to the enemy when the player character is healed.
Kal’gerion demon - 90 Summoning, 1% forced critical strike chance.
Ripper Demon - 96 Summoning, Increases your damage by 0-5% depending on your target's lost health. Special move deals 200%-320% of ripper demons max hit to the target. This familiar is the strongest in game even without using the special move scrolls.
Tank
Bunyip - 68 Summoning, passively heals you.
Unicorn stallion - 88 Summoning, special move heals you.
Hellhound - 45 Summoning, tanks 20% of any damage dealt to the player.
Archaeology Relics
Basic
Requires level 70 Archeology.
Shadow’s Grace: Cooldown of Surge, Escape, Bladed Dive and Barge is reduced by 50% but they no longer generate adrenaline.
Berserker’s Fury: Your damage increases up to 5.5% the lower your life points are.
Font of life: Increases maximum health by 500.
Intermediate
Requires level 97 Archegology.
Advanced
Requires level 120 Archeology.
Best combination is Conservation of energy, Berserker’s fury and Font of life.
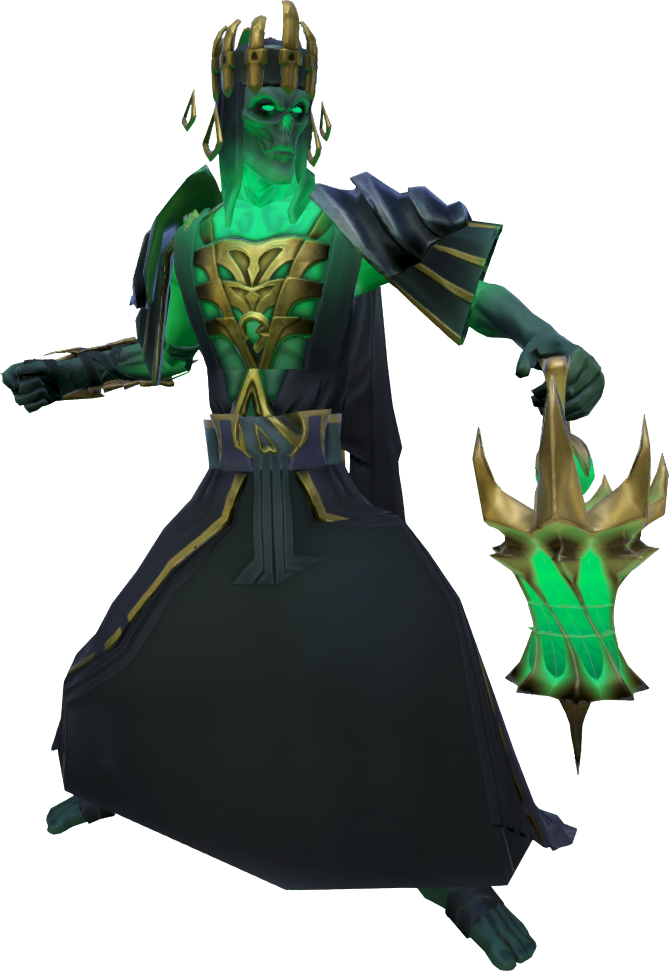
Best In Slot Necromancy Gear
First Necromancer robes
Omni Guard
Souldbound lantern
Essence of finality (or)
Reaver’s ring
Igneous Kal-Zuk
Scripture
Invigorate aura
The total cost of this, including the perks comes out to be around 3B. If you just want to get to the end game and enjoy Runescape 3 to its fullest, consider buying gold on our website, with cheap rates!


![RS3 Gold (1M) [⏱️ 5-10 Min via In-Game Trade]](/img/tmp/product_mini_2_2940.jpg?time=1784660996)

![Santa Hat [RS3 Rare]](/img/tmp/product_mini_2_109.jpg?time=1784660996)

![TokHaar-Kal-Mor(The Necromancy kiln cape) [RS3 Service]](/img/tmp/product_mini_2_60046.jpg?time=1784660996)