Valorant 2024 Strategy Guide: How To Play Every Controller
04.05.2024 - 14:33:41
Game Guides

Knowing your way around Controllers in Valorant is a good idea as these Agents can make things harder for the opposing team. There are currently 6 Agents in Valorant with this distinction - Brimstone, Viper, Omen, Astra, Harbor, and Clove. This guide gives you a quick overview on these agents, as well as how you can use them more effectively.
But first, let’s talk about the Controller role.
What Are Controllers For In Valorant?
Controllers are effective at controlling the map. They can block enemy vision, hold chokepoints, and even force enemies into traps. It’s close to a support role in Valorant but this is more focused on setting up defenses rather than supporting teammates directly.
As is the nature of their role, Controllers are some of the most complex Agents in the game right now.
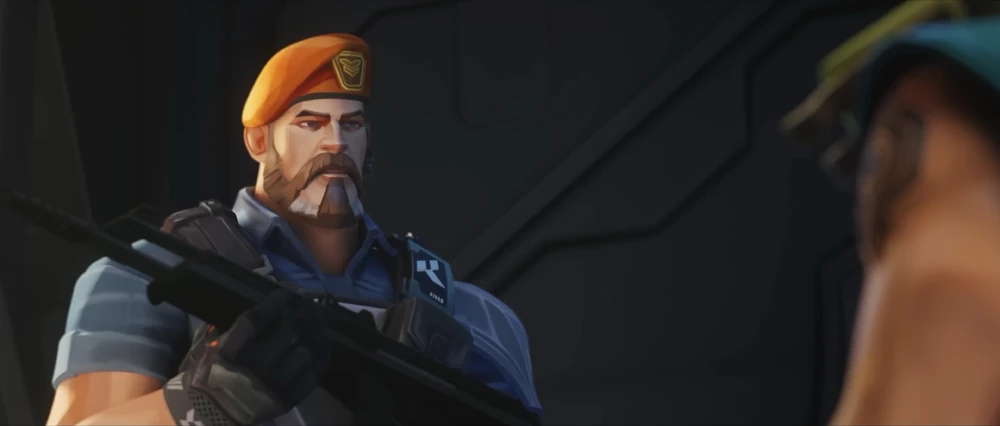
Brimstone
Best Maps: Bind, Fracture, Haven
Attack: Try to block the enemy’s vision using smoke. This can help delay spike defuses and give your teammates the chance to engage first.
Defense: Use Brimstone’s skills to make it harder for enemies to push.
Brimstone is one of the easiest Agents to use in the game right now. That’s mainly because his Sky Smoke is relatively easy to use. As it is one of his most important skills, it’s best to carry it around with you at all times as it can be used whether you're attacking or defending the point.
His damage potential is also pretty good compared to other Controllers in the game as his three combat abilities don’t just control an area, they can deal consistent damage over time as well.
Perhaps his weakness is that some of his abilities can be limiting. Sky Smoke for instance, requires short range and can be very expensive to maintain as it doesn’t recharge. The smoke-up time is also relatively small.
If you have Stim Beacon activated, you can use it to easily push your way into certain sites. Ideally, you’d want to use Brimstone on maps like Bind, Haven, and Fracture, where there are some tight spaces so that you can get the most out of your Beacon. Before engaging, it’s best to use Sky Smokes to block the enemy’s vision from various angles. Doing this will make enemies act more cautiously.
Once Sky Smokes are up, throw down the Stim Beacon and head straight into the site before the enemy gathers their bearings. Stim Beacon provides a fairly decent movement speed bonus so it will be easier for your team to charge into a point.
As much as possible, only use Orbital Strike after the spike has been planted. If you use it before, it’s likely that the enemy will just hold off on attacking before moving forward to avoid Orbital Strike. As this ability deals constant damage, it’s very likely to push back any enemy advances. When using this ability, it’s mostly used to control the playing field rather than to take out enemies.
Viper
Best Maps: Bind, Breeze, Split
Attack: Use Viper’s abilities to limit enemy movement and to control the area post-plant.
Defend: You can use Snake Bite for when the enemy advances to limit their attacks. Use Poison Cloud and Toxic Screen to deny vision.
Viper is best used in maps with long corridors because Toxic Screen is rather long. This makes it very easy to control a huge portion of the map with this skill alone. Another great thing about Viper is that you can easily enable or disable any of her smoke abilities on command, albeit with a small delay. This gives her more control over her screens as compared to other Controllers.
The problem with Viper is that she isn’t as versatile as other Controller Agents. For starters, her Toxic Screen is a one-time use ability and it can’t be repositioned once used. Once enemies get through it, it’s essentially useless so proper placement is a must to get the most out of it.
Additionally, her utility abilities recharge rather slowly. It’s also quickly depleted if you have an orb or a wall active. Viper heavily relies on patience and proper use of skills but once mastered, she’s quite the force to be reckoned with.
Viper’s Ultimate is very powerful. In most cases, players use it and wait for enemies to come inside before they start killing them. You can catch enemies off-guard by playing outside of the pit. Cast the ability, bait the enemies inside, and then step outside once they step in. This can cause enemies to panic as they try to run after you while taking damage from your gun and the Pit simultaneously.
Viper can also use Poison Cloud and Snake Bite to render any defuses worthless. First, you’ll have to use Poison Cloud on the spike once it’s planted. Once that’s done, head back to a safe spot where you can launch a Snake Bite for any enemy that tries to take on the Spike.
Omen

Best Maps: Split, Ascent, Haven
Attack: Use Dark Cover to cover any vantage points and then disrupt any incoming defenders using Paranoia. From the Shadows can also be used to gain intel on enemy position.
Defend: Use Dark Cover to prevent enemies from coming in and then use Paranoia to fight back any pushing enemies. Shrouded Step can be used to surprise enemies from behind.
Omen is very capable of easily scouting the enemies because of his abilities and he’s the best at this out of all the Controllers in Valorant. This can be a downside too as come Omen users find themselves scouting too much only to realize later on that they’re too far from their allies to be of help.
What’s great about Omen is that he has a very long range for his smoke however. A common strategy would be to lurk the enemies from afar and then use his smoke abilities to support allies. His blind has a huge radius making it viable for defense. While most of his abilities are great, Shrouded Step can be problematic when not used properly as the audio queue can give off your location to enemies.
Like Viper, Omen lacks a lot of versatility in his kit. In most cases, his playstyle will require you to snoop around the enemy and that’s it. He isn’t a good option in maps where Controllers are required to do more than just scouting.
Omen’s Ultimate ability isn’t that great compared to other Controller’s Ultimates but if you use it properly, it can easily overwhelm enemies. That said, the best way to use it is during a spike clutch situation. From the Shadows can be used to steal the spike from the enemy just in case you lose it during a team fight. Once you have the bomb, run to the opposite bomb location and then plant it there. Throughout the course of this, it’s likely that the enemy will try to chase after you so there’s a chance for your teammates to press the attack.
Shrouded Step can also be used to fool the enemy by taking advantage of its audio queue. To do this, use the ability and place the teleporter right in front of you instead of far away. Enemies could hear the sound and think that you’re going behind them. Use this as an opportunity to flank them instead.
Astra

Best Maps: Sunset, Split, Lotus
Attack: Nebula can be used to obscure the enemy’s light of sight. Gravity Well can then be used to make it harder for defenders to hold a point.
Defend: Nebula and Gravity Well are perfect abilities to hold choke points. The rest of Astra’s abilities can then be used to isolate enemies that stray too far from their team.
One of Astra’s main assets is her Star ability. As she can pick how to use it and where to place it rather efficiently, it becomes a versatile tool that can be used in many situations. This is one of the best and most versatile Skills in all of the Controllers in the game. When used effectively, it can turn the tides rather well.
She also has the ability to create an impassable wall. With the right use, enemies can be blocked off from the spik or it can be used to cut off enemies with their allies as well. The only way to go through the wall is to either wait it out or risk pushing through without knowing what’s on the other side.
Like Omen, Astra can be used to lurk around but because of the nature of her abilities, she’s always in a safer spot because of the distance she can put between her and the enemy team.
What’s challenging about Astra is that you need to be careful with her skills. Her utility ability for instance, is only best used whenever you’re in a very safe position as she’s vulnerable while using it. Stars can also be seen on the ground before being activated so enemies can pretty much avoid it when necessary. However, this can be a smart means to dupe the enemies into traps as well. Astra is on the more difficult end of the Controller spectrum but if you master her, you’ve got an Agent that can help you rise through the ranks.
A good way to use Stars is in post-plant scenarios. Simply drop a plant near the spike once it’s planted, and use a Gravity Well to draw enemies away from the star. Make sure to place the Star on top of the spike so that enemies are forced to go near it when trying to defuse the spike.
Understanding the layout of maps pretty well is helpful in putting Cosmic Divide to good use. Since enemies are completely cut off from the other side of the wall, you can effectively disrupt any plans that they have in motion if you use it properly. The ability can also be used to prepare an ambush on the other side.
Harbor
Best Maps: Sunset, Breeze, Pearl
Attack: Use Reckoning to take control of the site and force enemies out of the area. High Tide can be used as a means to cut off enemy advances.
Defend: Make High Tide more effective by cutting the enemy’s line of sight before having your allies push through for the spike.
When playing as Harbor, it’s most likely that you’re going to rely heavily on Cove compared to his other skills. If you have a good knowledge of a map’s layout, you can easily block off choke points using Cove. As the health of Cove is rather large, you’ll have time to attack enemies while they’re focused on destroying this.
Harbor has one of the best wall abilities in the game but the problem is that it can be challenging to use. A lot of players try to master this skill first as its utility is incomparable to other walls in the game when used. It’s not that easy to use this especially when you’re in the middle of a gunfight.
His Ultimate ability is rather underrated but we believe that it’s up there when compared with the Ultimates of other Controllers. Aside from displacing enemies, Reckoning can also help you locate where the enemies are through the lighting strikes that drop down. This might not be good in areas with high walls however.
The only downside to using Harbor is mastering his abilities. All of them are hard to master and this essentially makes him one of the hardest Controllers to use in the game On the other hand, Harbor is a menace on attack and defense in the right hand. We highly suggest taking your time to practice how to use his abilities as it’s worth the effort.
Reckoning is an excellent ability for clearing angles in a map. The best way to use this is on attack. First, try to gain control over a site to clear out any potential threat. Then, use Reckoning to cover the deeper angles to take full control of the area. Enemies are left with the choice of either retreating or charging at you. The latter is of course dangerous when you have allies alongside you.
Clove
Best Maps: Ascent, Bind, Breeze
Attack: Use Ruse to easily block the enemy’s line of sight. Make sure that these are placed properly as you can still manipulate them after dying but only within a set distance.
Defend: Majority of Clove’s skills are better for the attack but you can still use Meddle and Ruse as a means to defend.
Clove is the latest Agent to be added to the game. One of the reasons she’s unique is that she can still manipulate smoke even after she dies. However, you can only do so at a set distance which means smoke placement and choosing where to die are very important things to consider if you want to help your team even after death.
The downside to Clove is that most of her skills are self-centered, meaning that they don’t do much to help her allies. In fact, the only ability that directly helps your allies is Ruse. This is an excellent ability however as it lets you provide smoke for your allies even when you’re dead. Since you can only do this if your body is near enough to the smoke, it’s very important that you be very strategic when it comes to where you place Ruse. Make sure it’s in an area where there’s going to be a gunfight.
Meddle is an excellent way to delay enemy pushes. It’s very likely that they’ll try to move out of the area once you drop this ability as they wouldn’t want to be hit with the debuffs that it brings.
While an excellent ability, Not Dead Yet is very situational and it’s best used in clutch situations only.
Take Control Of The Battlefield
Controllers are some of the most impactful Agents in Valorant. With the right mastery of their abilities, you and your teammates can have more control over how the battle goes. The strategies above are just the tip of the iceberg and it’s up to you to explore how to make these Agents even more effective.

![Competitive Ready Account [0-2 Agents]](/img/tmp/product_mini_2_51709.jpg?time=1785089710)
![Competitive Ready Account [100k+ BE | Unranked]](/img/tmp/product_mini_2_51883.jpg?time=1785089710)
![Fresh Account | 0 match played [0-2 Agents]](/img/tmp/product_mini_2_51718.jpg?time=1785089711)
![Diamond Ranked Account | EP10 [0-2 Agents]](/img/tmp/product_mini_2_51715.jpg?time=1785089711)