


OSRS Ultimate Hueycoatl Boss Guide
14.10.2024 - 11:35:15
Game Guides , OSRS Guides , OSRS PvM , Runescape

Hueycoatl is one of Old School RuneScape's most exciting mid-level bosses, sitting atop the frozen peak of Darkfrost and offering solid loot, accessible entry requirements, and a genuinely engaging multi-phase fight. Whether you're a newer player looking to branch into bossing or a seasoned PvMer looking to fill your collection log slots, this guide has everything you need.
In this complete Hueycoatl boss guide, we cover how to get there, the minimum and recommended stats, the best gear setups from budget to best-in-slot, and a full breakdown of every mechanic across all four phases. We also cover the full drop table and whether you're better off soloing or grouping up. Let's get into it!
Quick Overview
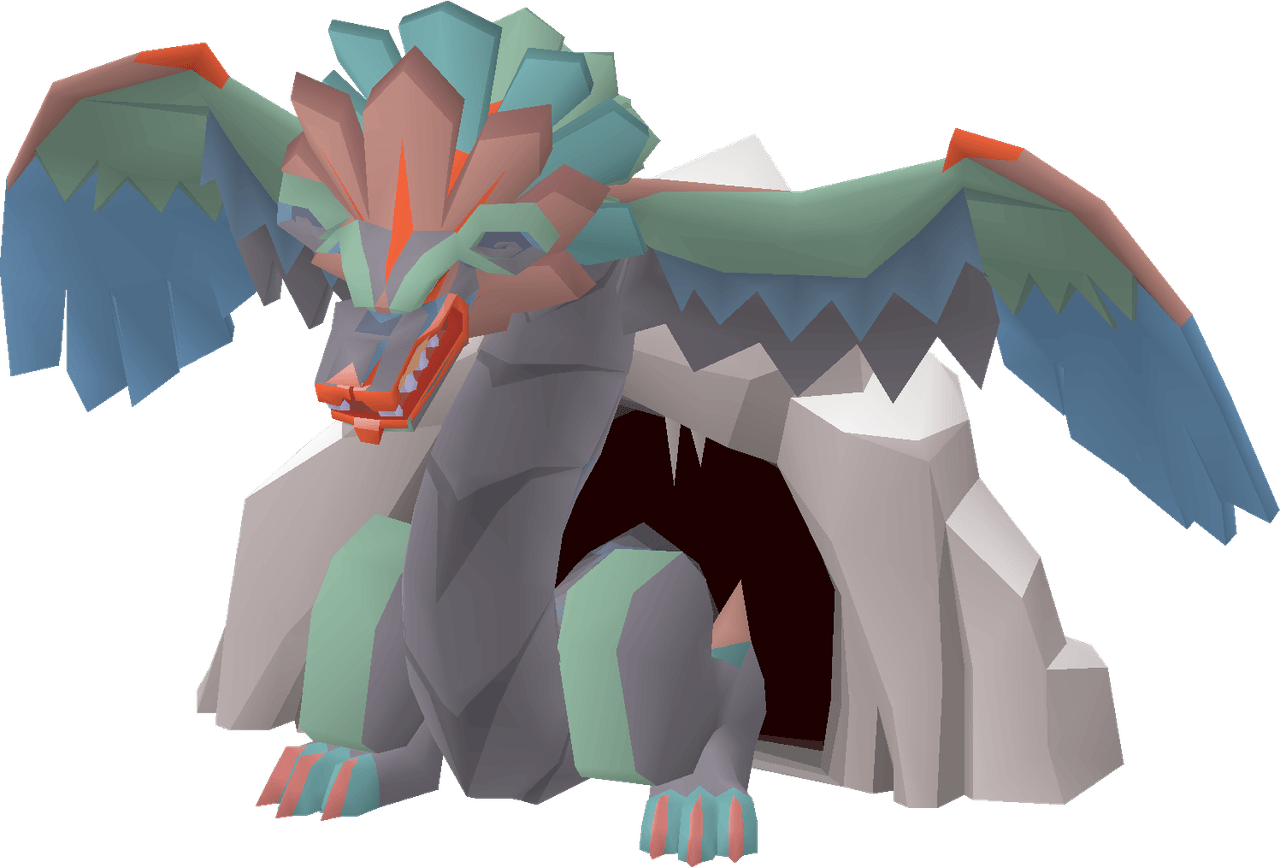
Hueycoatl is a mid-level boss located on top of Darkfrost Mountain, accessible after completing the quest Children of the Sun. The fight is designed as a group encounter, but is very much soloable, and solo kills are actually better for loot, making it a great boss to farm either way.
The fight plays out across four distinct phases: clearing the tails on the mountain climb, burning down the main body to 50% health, dealing with the tail shockwave phase, and finishing off the boss in a chaotic final phase where every attack comes at you faster. The core mechanics to get comfortable with are the Rain Fire prayer switches, dodging Runic Symbols on the ground, and the Shockwave tile skips in the tail phase.
Hueycoatl is weak to crush attacks, so melee is the way to go. The Scythe of Vitur handles most of the fight, while the Dragonhunter Lance is your best option specifically against the body.
The drop table is genuinely worth farming, three uniques with solid drop rates, reliable regular loot, and the Dragon Hunter Wand sitting at around 14.7M as the headline drop. Groups of 3 will get the most kills per hour, but solo is the better choice if you're after specific loot or combat tasks.
How To Get To Hueycoatl
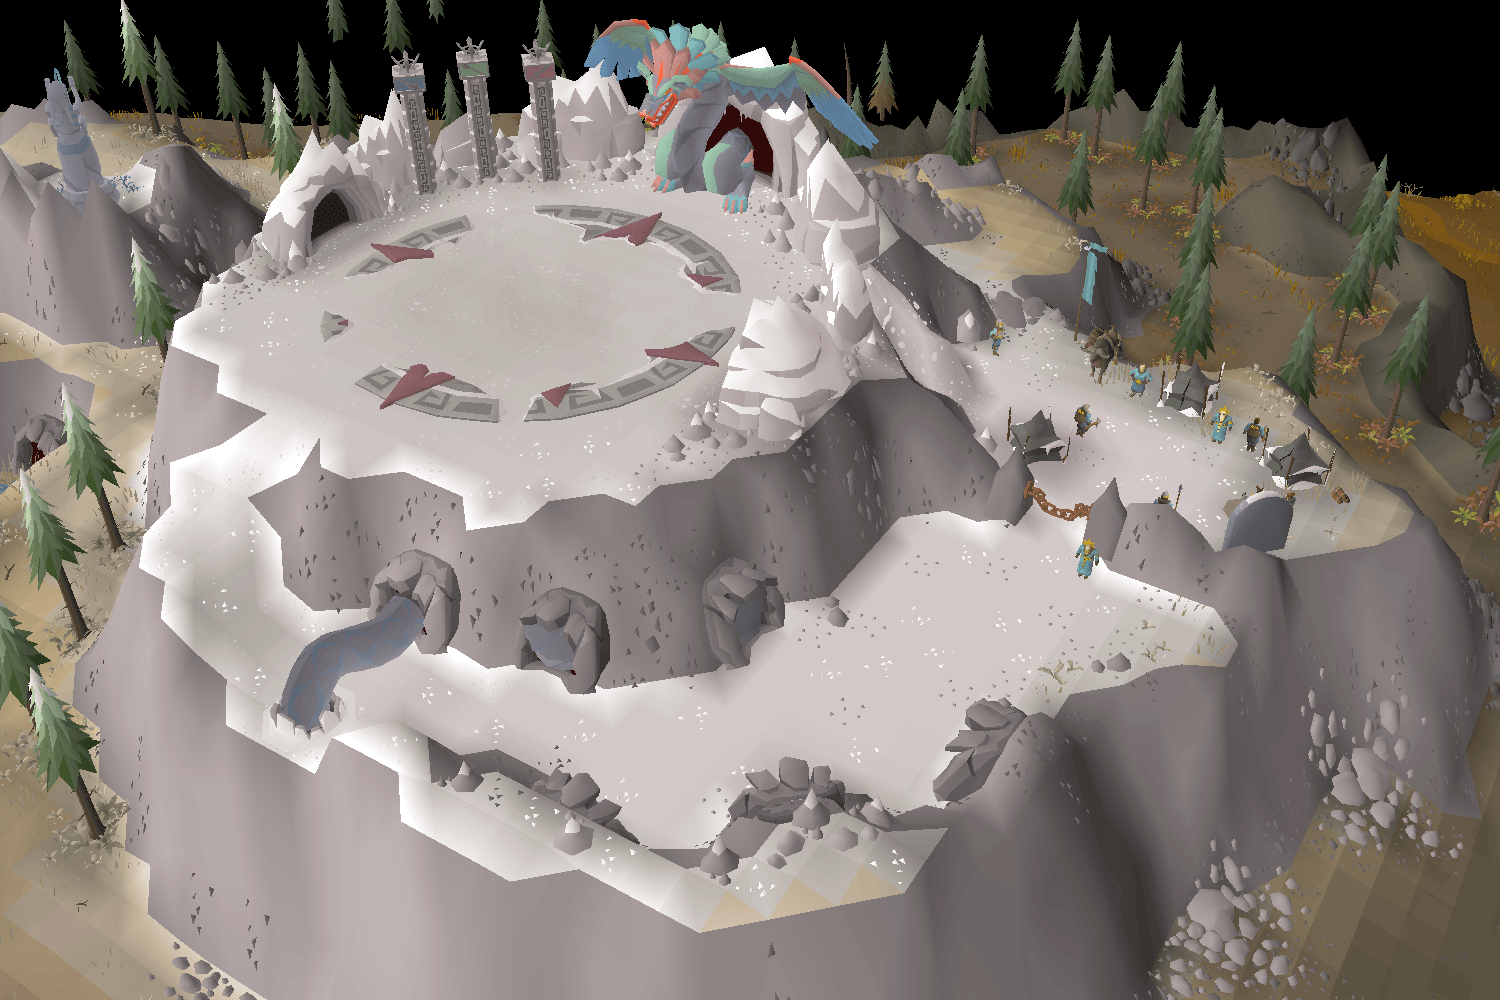
Hueycoatl can be found on top of the mountain called Darkfrost. Here are the three top ways of reaching this place:
Pendant of Ates
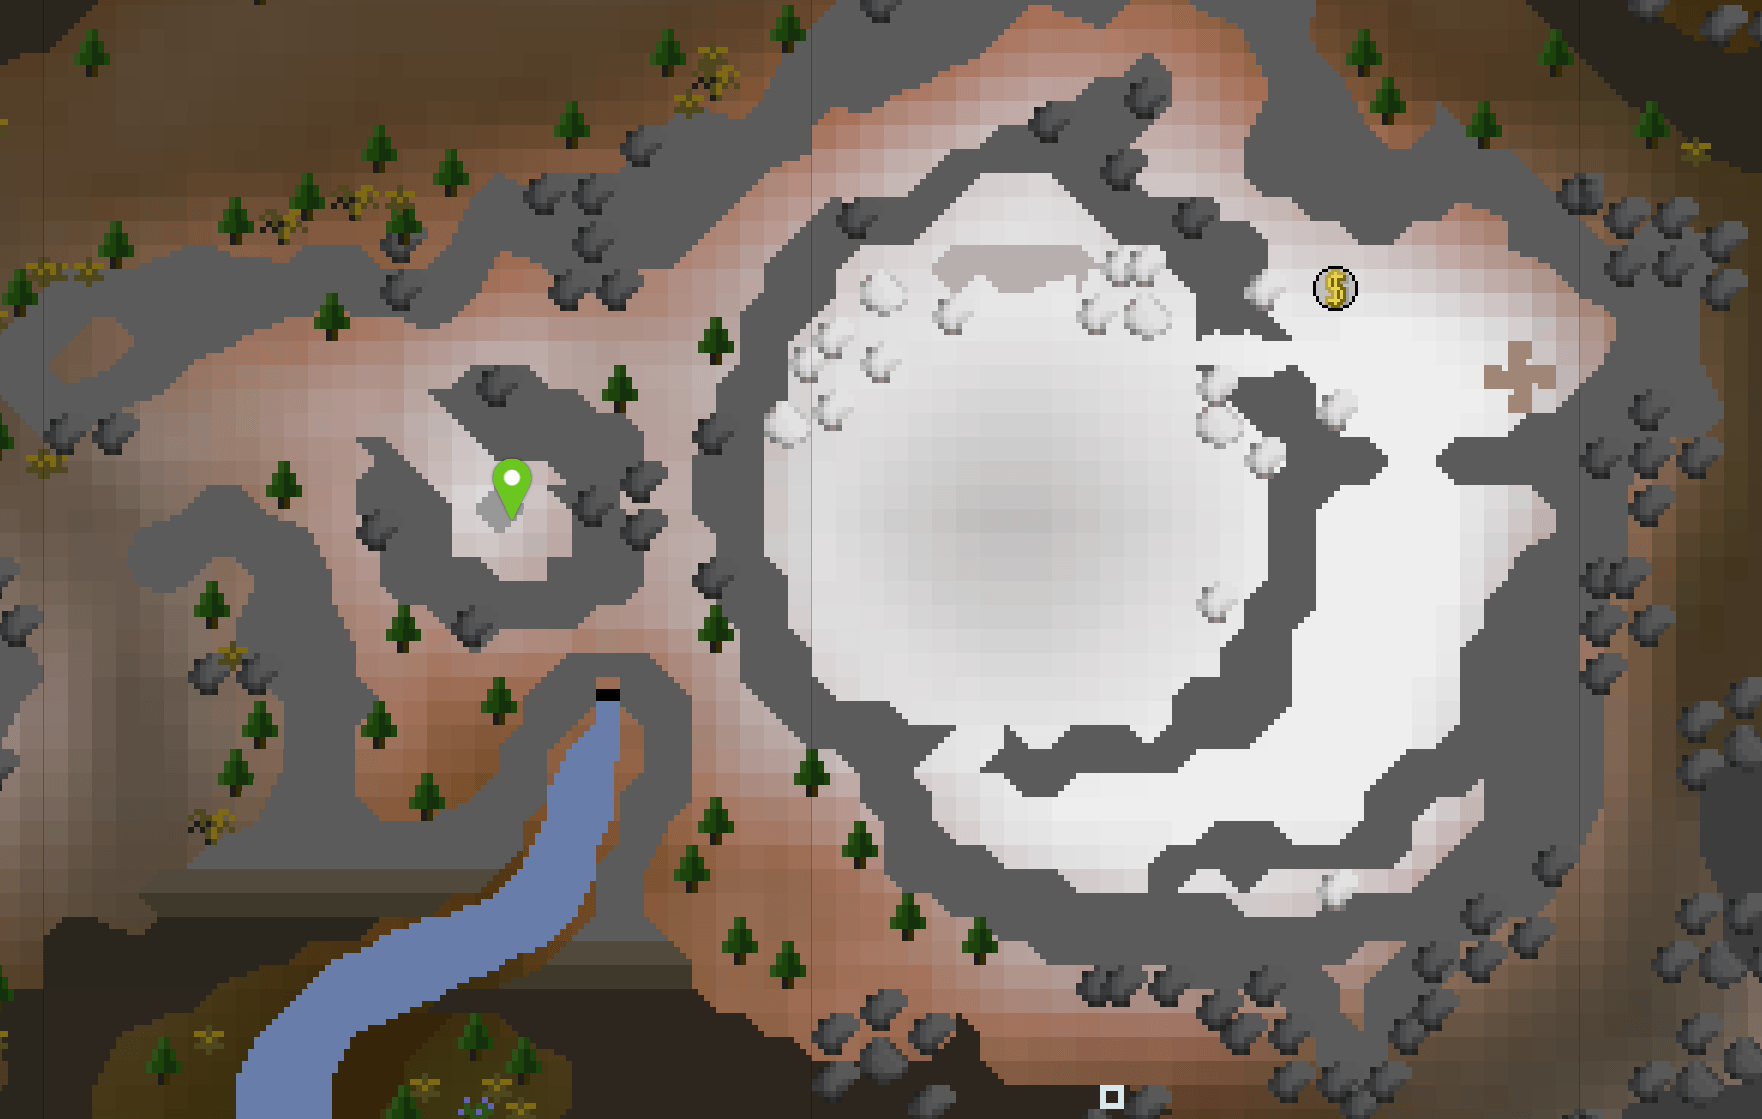
Using a pendant of Ates is the fastest way to reach Hueycoatl. To get a Pendant of Ates, you must first complete “The Heart of Darkness” quest and farm frost naguas or Amoxliatl until you get a pendant. Once you have a pendant, you can charge it using frozen tears, which are also dropped by the same creatures or can be bought from the Grand Exchange.
Once you have a charged pendant, travel to the Darkfrost manually and activate the statue of Ates there, which allows you to teleport to that statue with your pendant anytime.
Quetzal Transport System
Using the Quetzal Transport System to teleport to the Quetzacalli Gorge, heading north through the gate, and following the path up the mountain is the second-best way to reach Hueycoatl. To use this system, you must first complete the quest “Twilight’s Promise. There are two effective ways to reach this system:
- Teleporting to Civitas Illa Fortis using either the spell which requires level 54 Magic or a teleport tablet, and heading towards the Quetzal nearby.
- Completing Hunter contracts and creating a Quetzal whistle, which allows you to use the system from anywhere in the game, anytime you like. Just like any enchanted jewellery.
Skill Requirements
Hueycoatl is a mid level boss, meaning its requirements are easy to get. You only need to complete the quest Children of the Sun to access this boss fight. If you haven’t done that quest already, you can check out our guide on it by clicking here!
Below are the minimum and recommended skill levels to start farming this boss. Obviously, like with any PVM activity, the higher the stats, the faster the kills.
| Skills | Minimum | Recommended |
| Attack | 60 | 78 |
| Strength | 60 | 80 |
| Defence | 60 | 75 |
| Hitpoints | 70 | 85 |
| Prayer | 43 | 70 |
| Magic | 70 | 90 |
Gear Guide
The most effective way to kill this boss is by using melee with crush weapons.
Best-in-Slot Gear
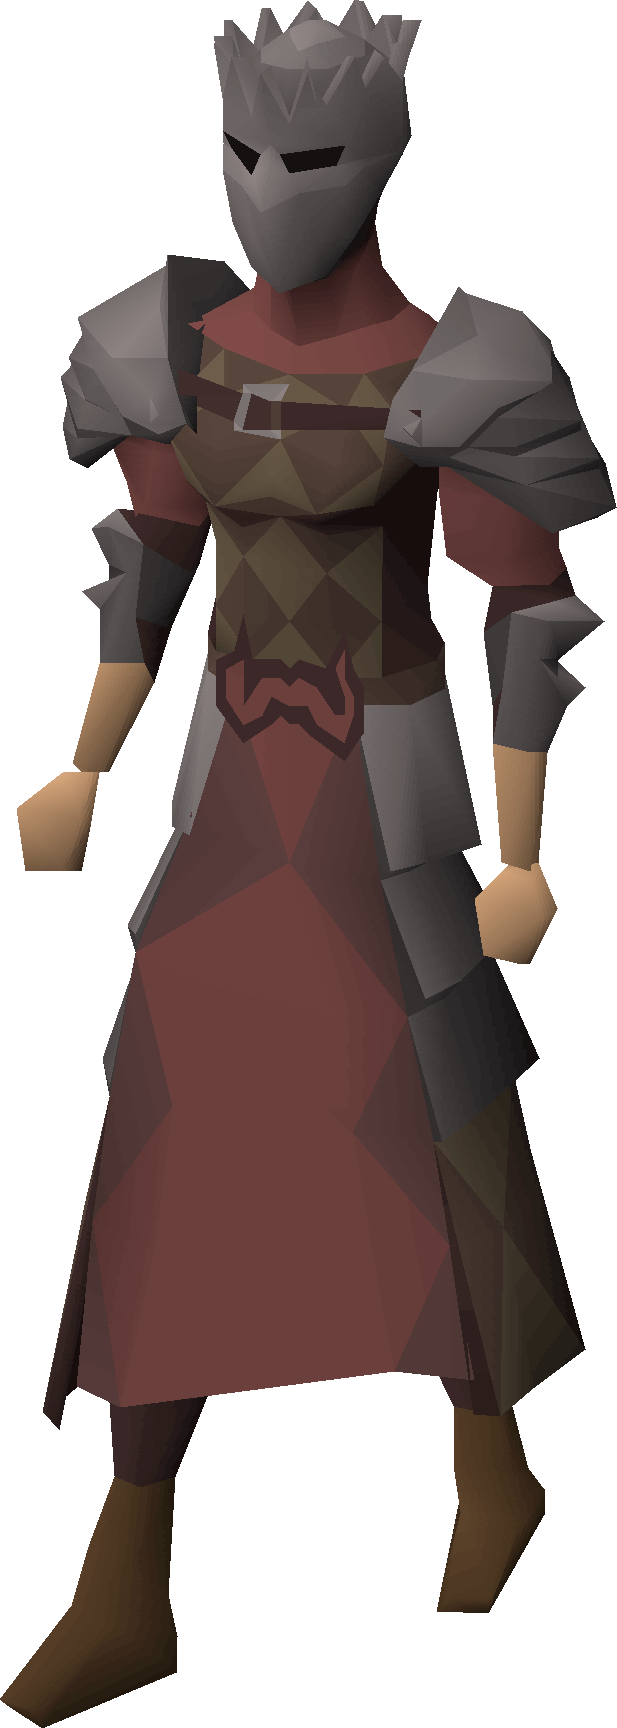
Since the boss is weak to crush attacks, you just set your weapon's attack style to crush. Scythe of Vitur is best against everything other than the body, whereas the dragonhunter lance is best against the body.
| Slot | Item | Price |
| Helmet | Inquisitor’s great helm | 46M |
| Amulet | Amulet of Rancour | 62M |
| Cape | Infernal cape | - |
| Body | Inquisitor’s hauberk | 92M |
| Legs | Inquisitor’s plateskirt | 84M |
| Weapon | Scythe of Vitur/Dragon Hunter Lance | 1.4B/64M |
| Shield | Avernic Defender | 36M |
| Ammo | Ghommal’s lucky penny/Rada’s Blessing 4 | - |
| Gloves | Ferocious Gloves | 13M |
| Boots | Avernic Treads (Max) | 254M |
| Ring | Ultor Ring | 126M |
| Special Attack | Dragon claws | 42M |
Mid-Tier Gear
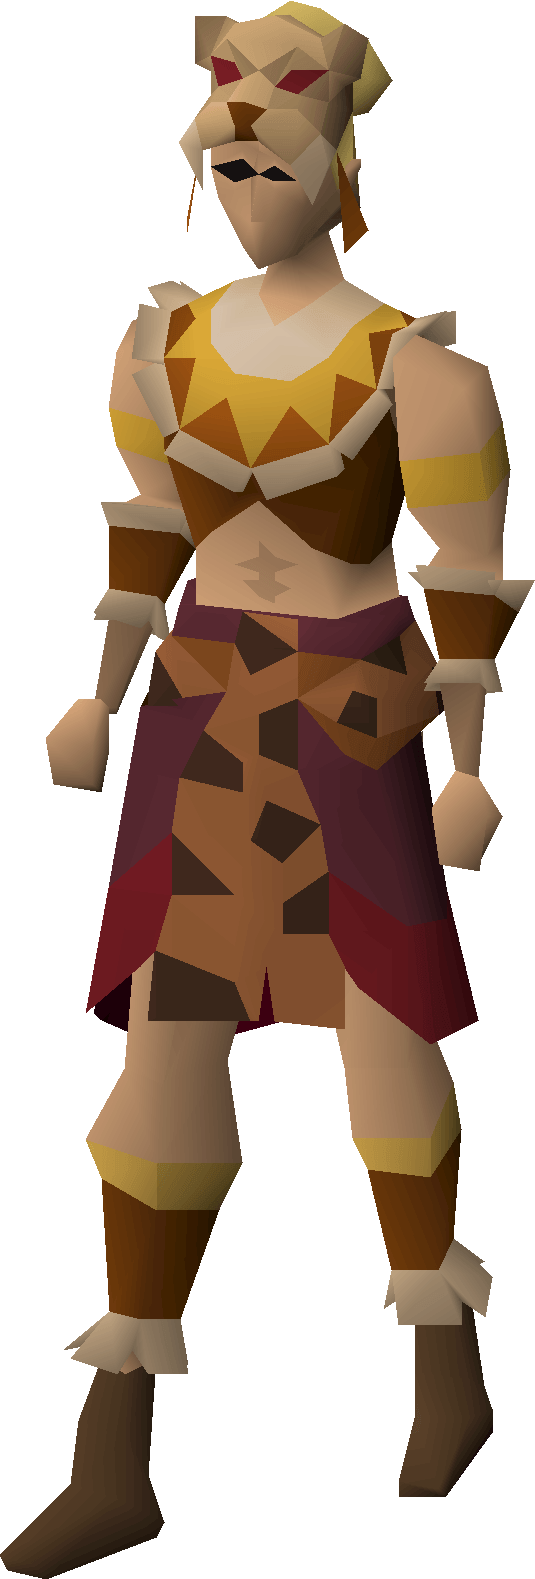
| Slot | Item | Price |
| Helmet | Blood moon helm | 854K |
| Amulet | Amulet of fury | 2.6M |
| Cape | Fire cape | - |
| Body | Blood moon chestplate | 4.6M |
| Legs | Blood moon tassets | 10M |
| Weapon | Dual macuahuitl | 6.6M |
| Shield | - | - |
| Ammo | God blessing | 4-5K |
| Gloves | Barrows gloves | 104K |
| Boots | Dragon boots | 254K |
| Ring | Berserker ring (i) | 3.2M |
| Special Attack | Burning claws | 6.3M |
Budget Gear
| Slot | Item | Price |
| Helmet | Helm of Neitiznot | 49K |
| Amulet | Amulet of glory | 11K |
| Cape | Fire cape | - |
| Body | Mixed hide top | 15K |
| Legs | Proselyte cuisse | 5.5K |
| Weapon | Sarachnis cudgel | 227K |
| Shield | Dragon defender | - |
| Ammo | God blessing | 4-5K |
| Gloves | Combat bracelet | 12K |
| Boots | Rune boots | 7K |
| Ring | Tyrannical ring (i) | 263k |
| Special Attack | Dragon mace | 29K |
Having good gear directly affects your kills per hour. If you don’t have access to huge sums of gold and you don’t want to be stuck farming this boss with budget gear, consider checking out our OSRS Gold Store for fast and secure OSRS gold deliveries.
Inventory
Here is an inventory setup that will make your kills more effective:
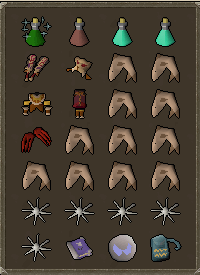
You don’t need to worry about supplies as much since there is a bank at the base camp, which allows you to resupply after each kill.
- 1 Divine super combat potion
- 1 Prayer regeneration potion (optional)
- 2-3 Prayer potions
- Blood Moon Armour Switch. It is advisable to use a fast weapon that hits multiple times against the tails. Bringing along a full set of blood moon armour makes killing the tails more efficient due to the set effect.
- Food such as sharks and karambwans. You can use karambwans to combo heal if you ever find yourself in a sticky situation.
- Book of the Dead and Thrall Runes to summon thralls.
- In rune pouch: Blood, fire, cosmic and death runes.
- Soul runes are for using the death charge to restore your special attack.
Hueycoatl Mechanics
Runic Symbols
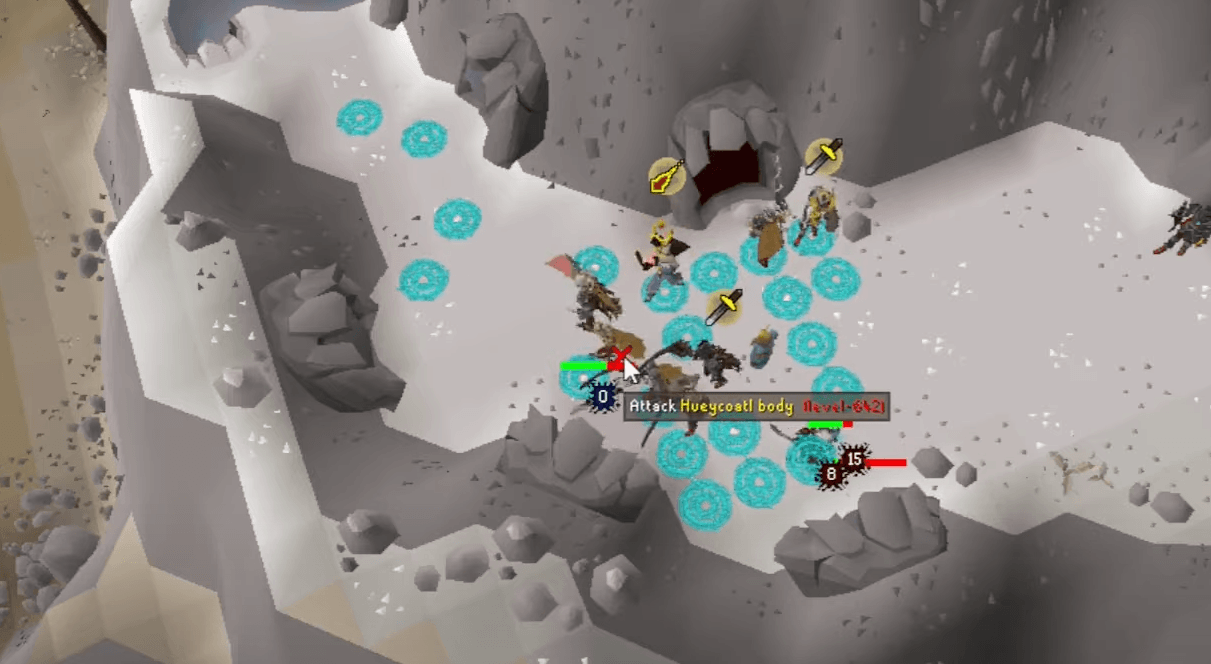
During the fight, Hueycoatl will occasionally spawn blue symbols on the ground. After a few seconds, these symbols deal damage to whoever is standing on them and disappear. To avoid this, simply walk to a tile which does not have a symbol.
Rain Fire
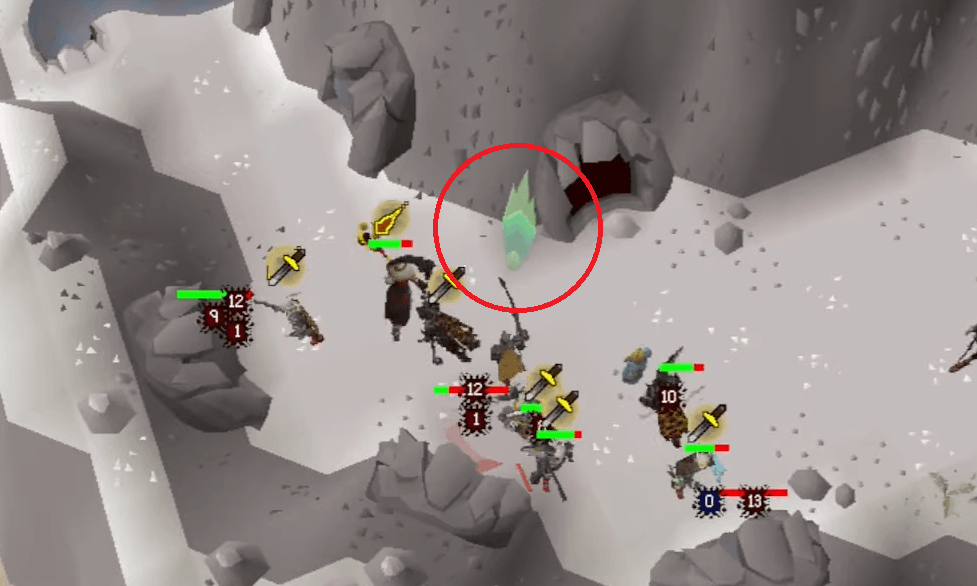
This is Hueycoatl’s primary attack. Every once in a while, you will notice a projectile falling onto your character. 3 different projectiles can spawn and hit your character. Depending on the colour of the projectile, change your protection prayers to avoid taking any damage from this attack.
- If a red projectile spawns, use protect from melee.
- If a green projectile spawns, use protect from ranged.
- If a blue projectile spawns, use protect from magic.
Shockwave
Once you bring the boss's main body down to 50% health, it will begin performing a shockwave attack with its tail. Initially, these shockwaves occur each time the tail changes position, but even after you destroy the tails, the shockwave attacks will continue.
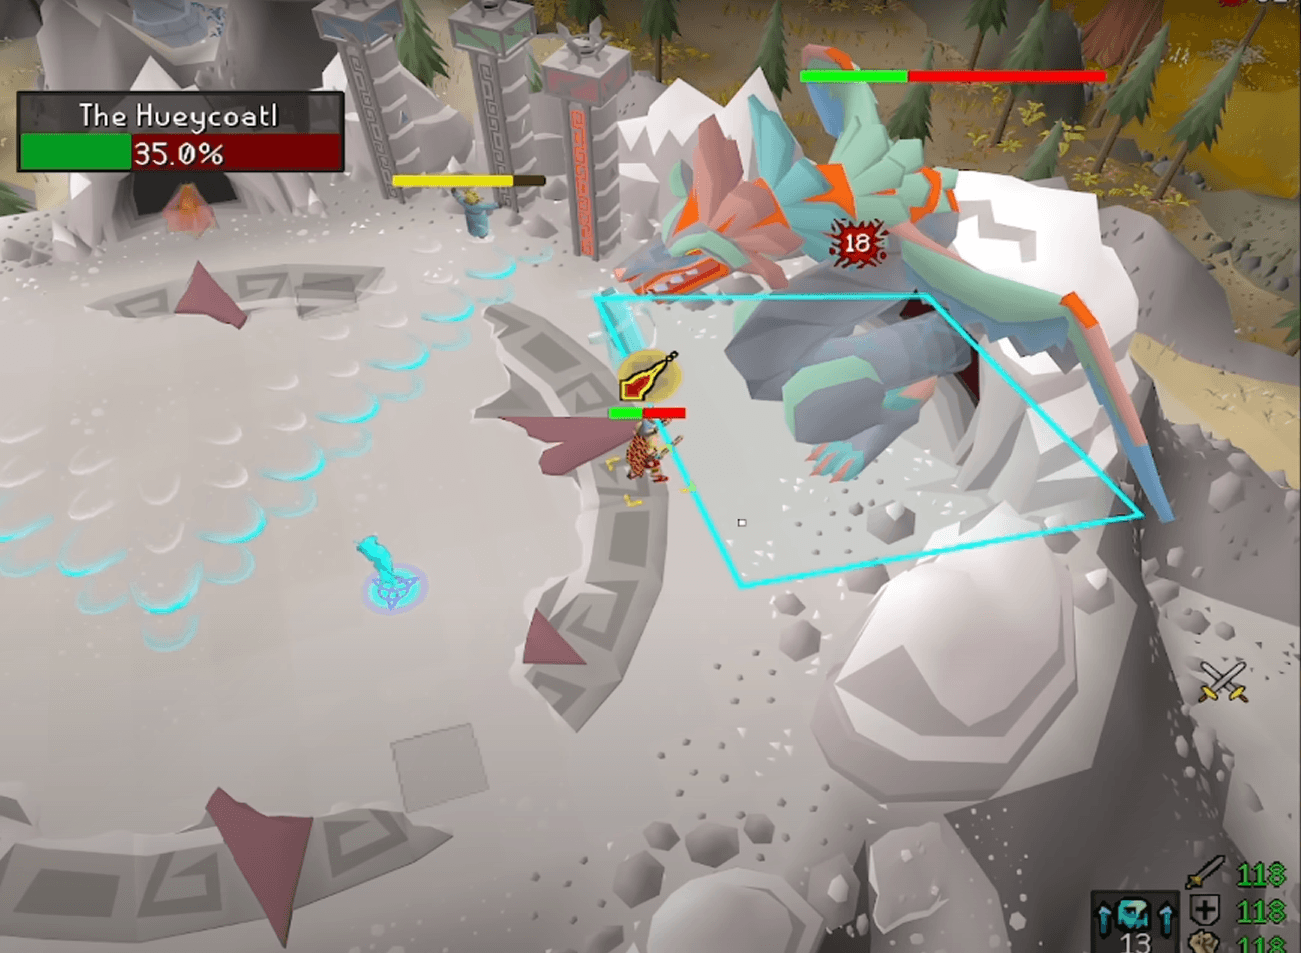
You can do the tile skip method to dodge this attack, but this requires perfect timing. To simplify it, you can run diagonally at the shockwave, and depending on your luck, you will dodge the attack completely. If you want to do it 100% of the time, here is how:
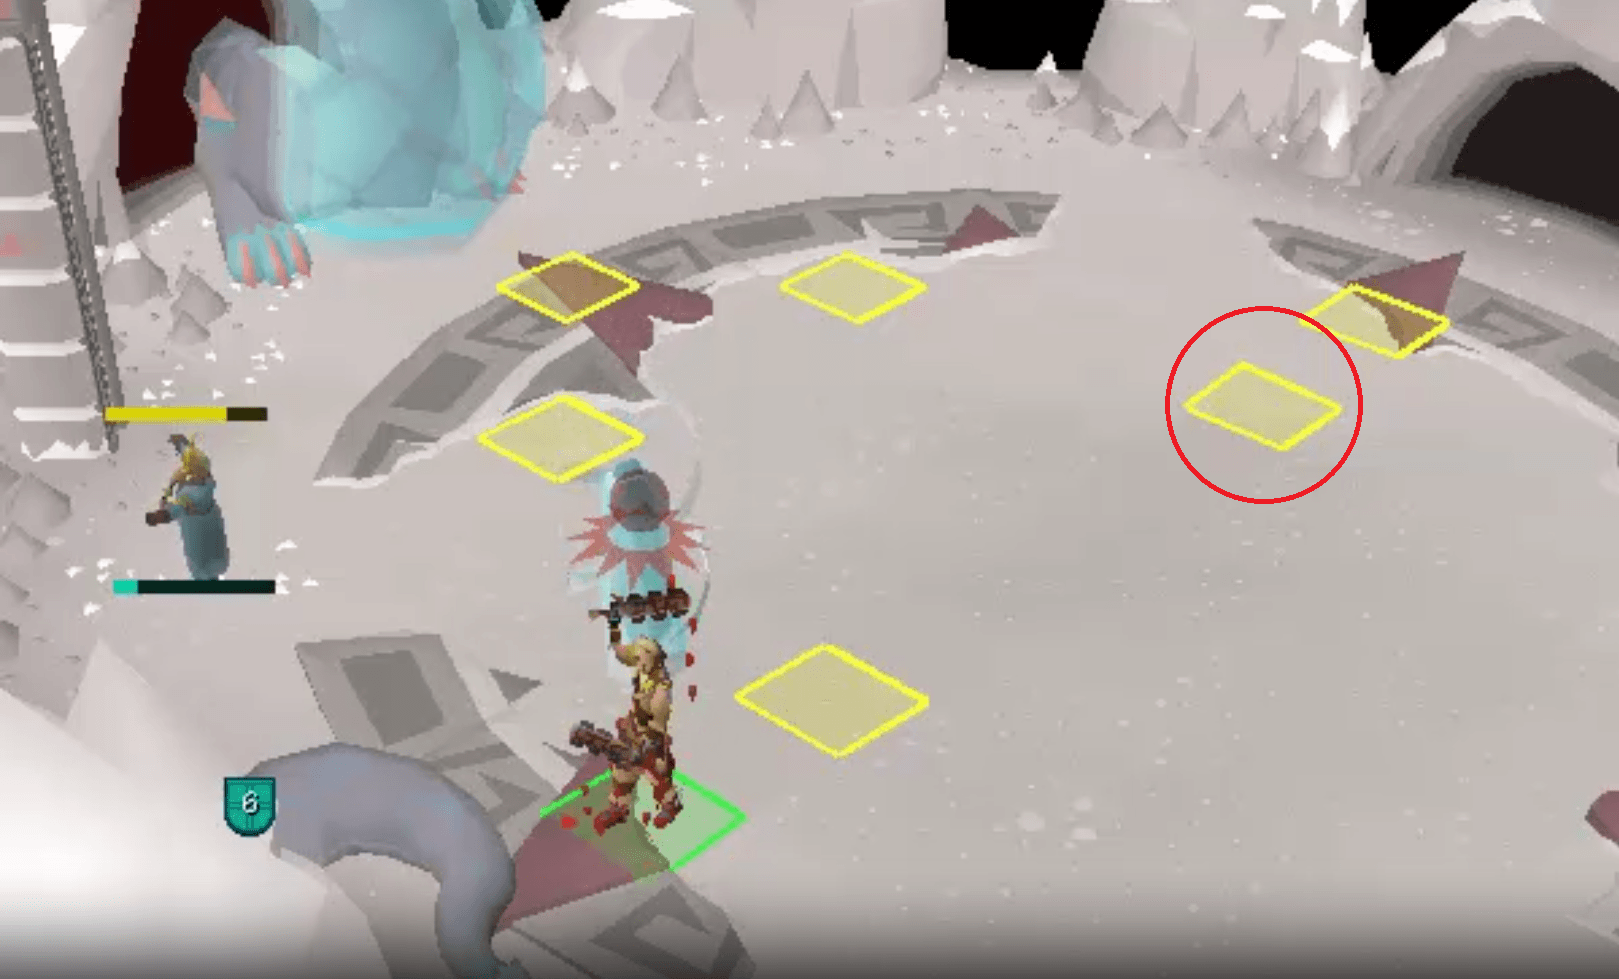
If you are killing the western tail and the eastern one spawns, immediately click this tile shown below, and when the tail emerges from the cave, click on it to dodge the shockwave.
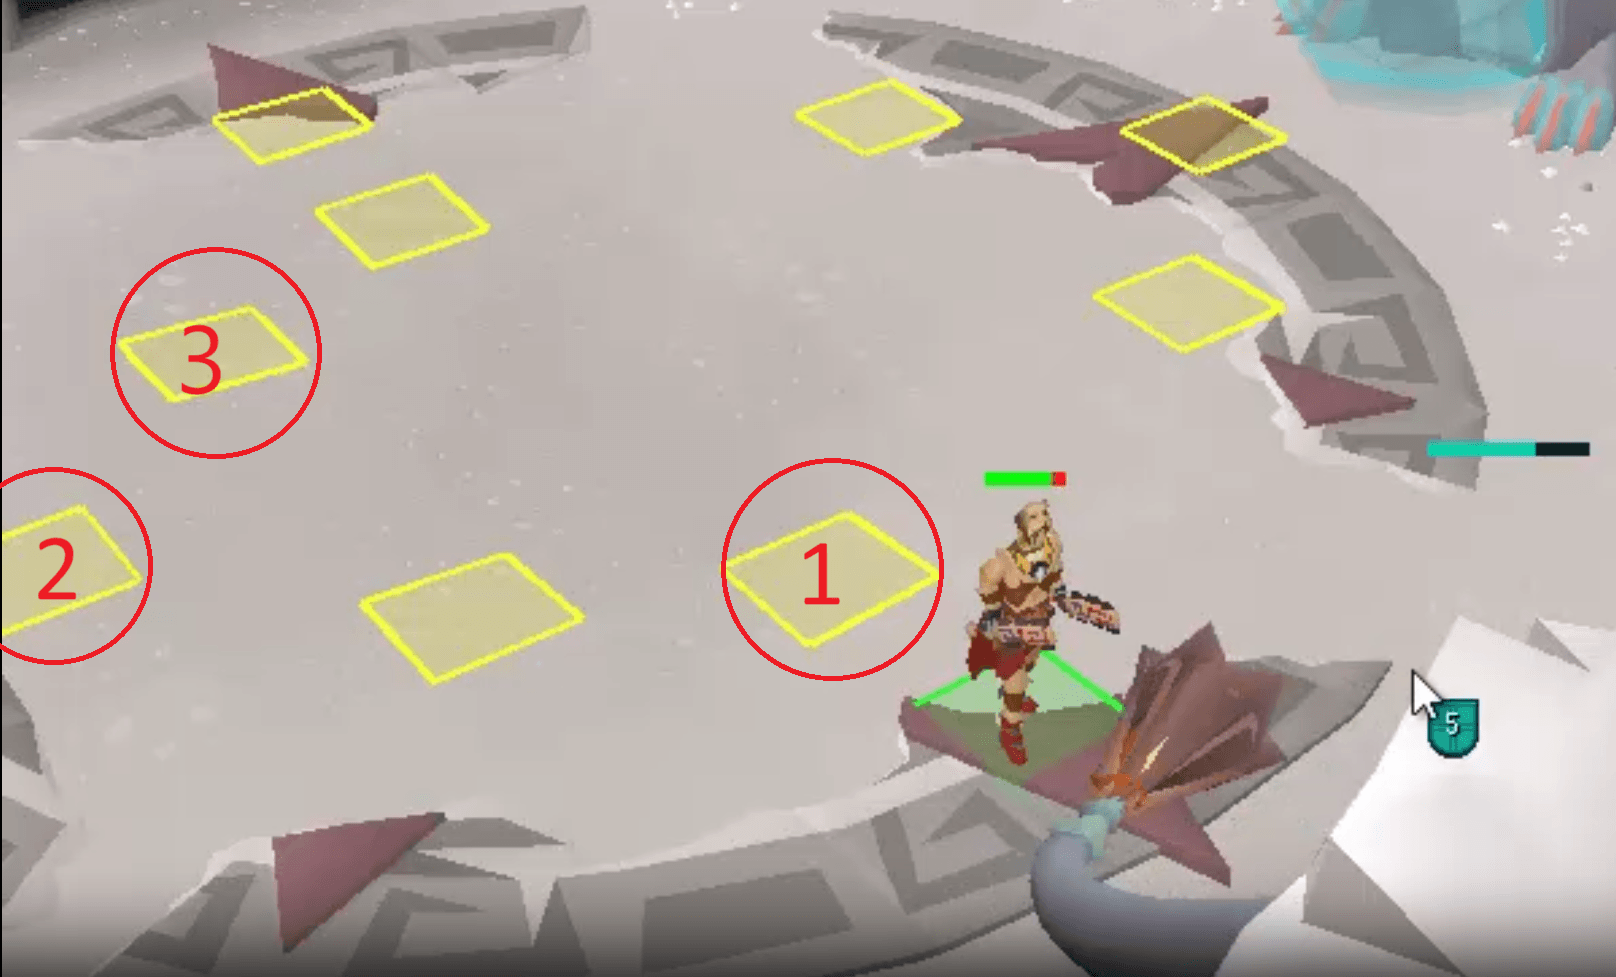
If you are killing the eastern tail, and it retracts to spawn from the west, click the highlighted tiles in order, as shown below:
If you are at the last phase and a shockwave appears, click one of the tiles shown below. Click the eastern tile if the shockwave is coming from the east and the western tile if the shockwave is coming from the west.
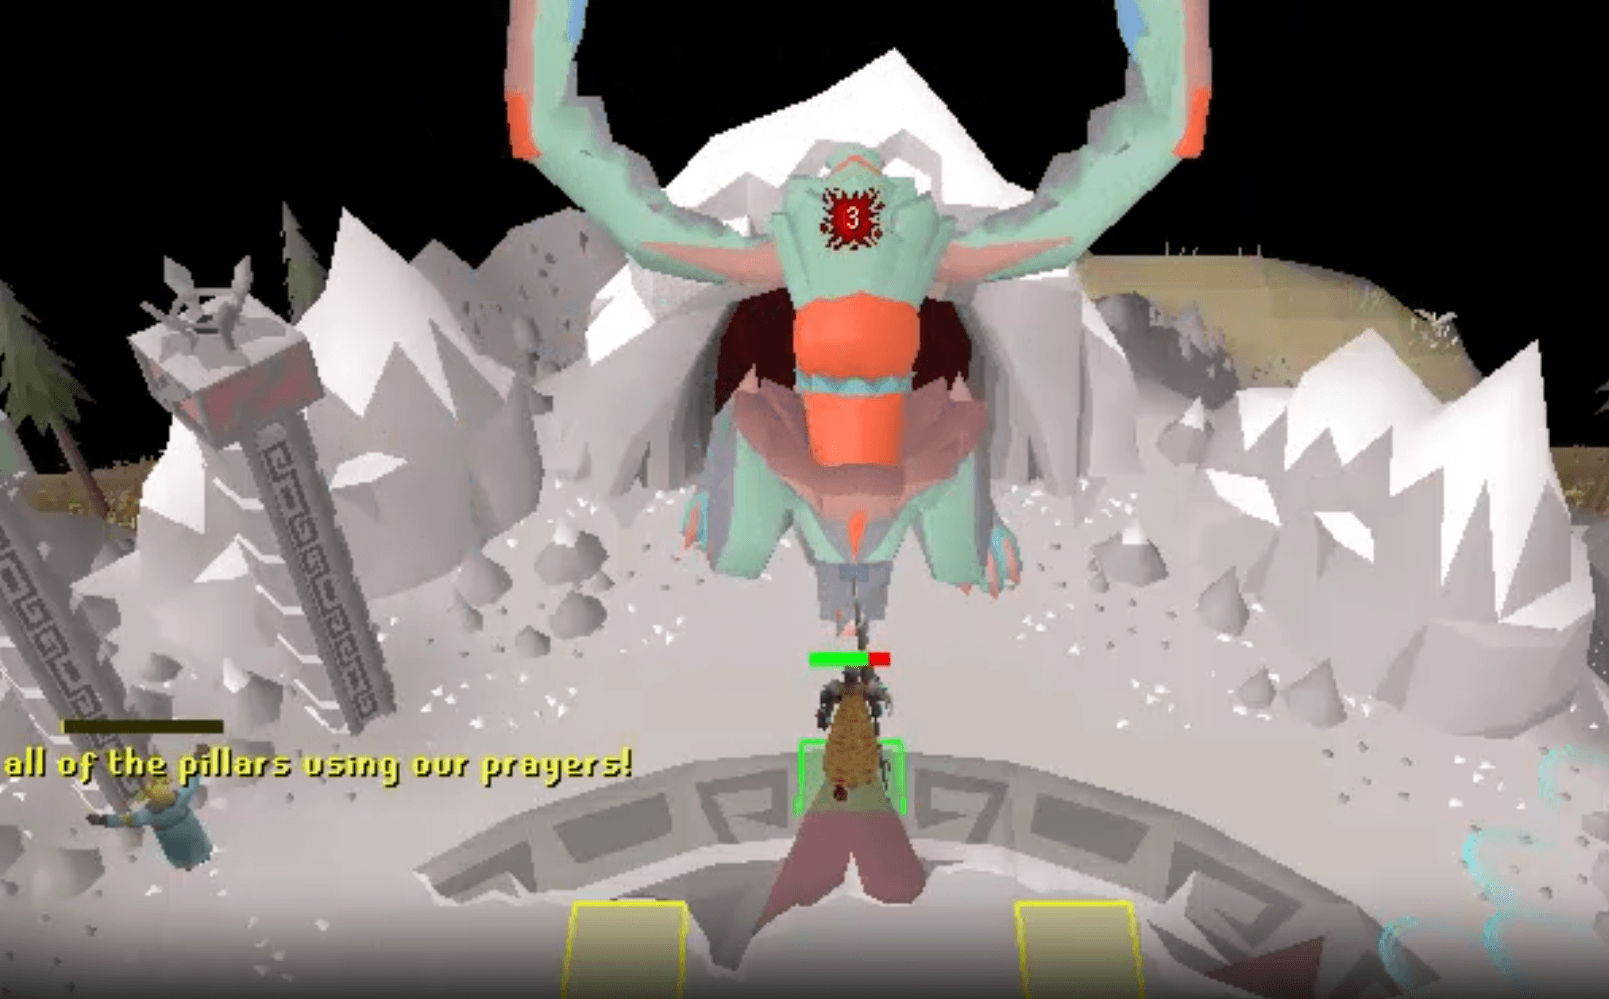
It takes some time to get used to using these highlighted tiles. So experiment with the timings, and with practice, you will be able to achieve perfection and never take damage from this attack ever again.
Pillars
This mechanic is designed specifically for groups with at least three players. When you engage the final boss, the seer will begin chanting. There are three pillars, each representing a different attack style. These pillars charge based on the protection prayers used by the players. If all three pillars are fully charged, the entire team receives a 30% damage buff. So if you are in a team of 6 people, 2 players should keep praying range, another 2 magic and the last 2 melee. This will quickly charge up the pillar! After it is charged up, every player should continue praying in a balanced manner to keep the pillars up and running.
If you are doing a solo kill, this mechanic is impossible to do, so you should focus on switching prayers to dodge Hueycoatls' rain attacks instead.
Solo vs Group
Hueycoatl is designed as a group encounter, but that does not mean you can’t solo it. In fact, soloing can be more beneficial if you have an account that is fit to do it effectively. A group kill is more relaxed and faster, and is good for racking up your Hueycoatl kc, but solo kills are better for getting more loot and completing some of the specific combat tasks. Whichever way you want to go about doing it is up to you.
The best way to farm Hueycoatl is in a group of 3. This will maximise the kills per hour while also being profitable.
Hueycoatl Solo Guide
First Phase
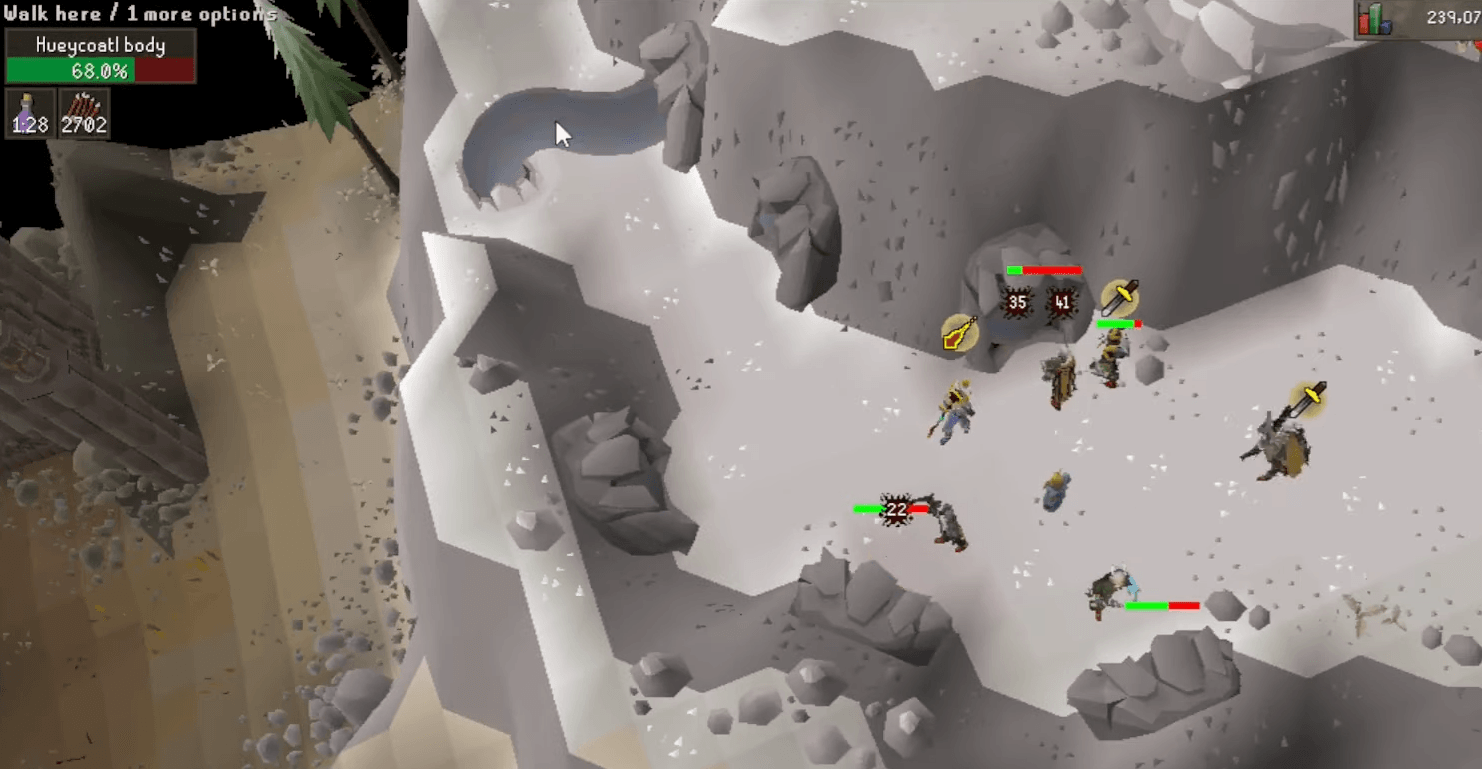
Once you start the climb, switch to your dual-hitting weapons if you have them, and start hitting the tails. You must clear all 4 caves before you can move up the mountain. During this time, spawn your thrall and keep a lookout for any runic or rain attacks to dodge them accordingly.
Second Phase
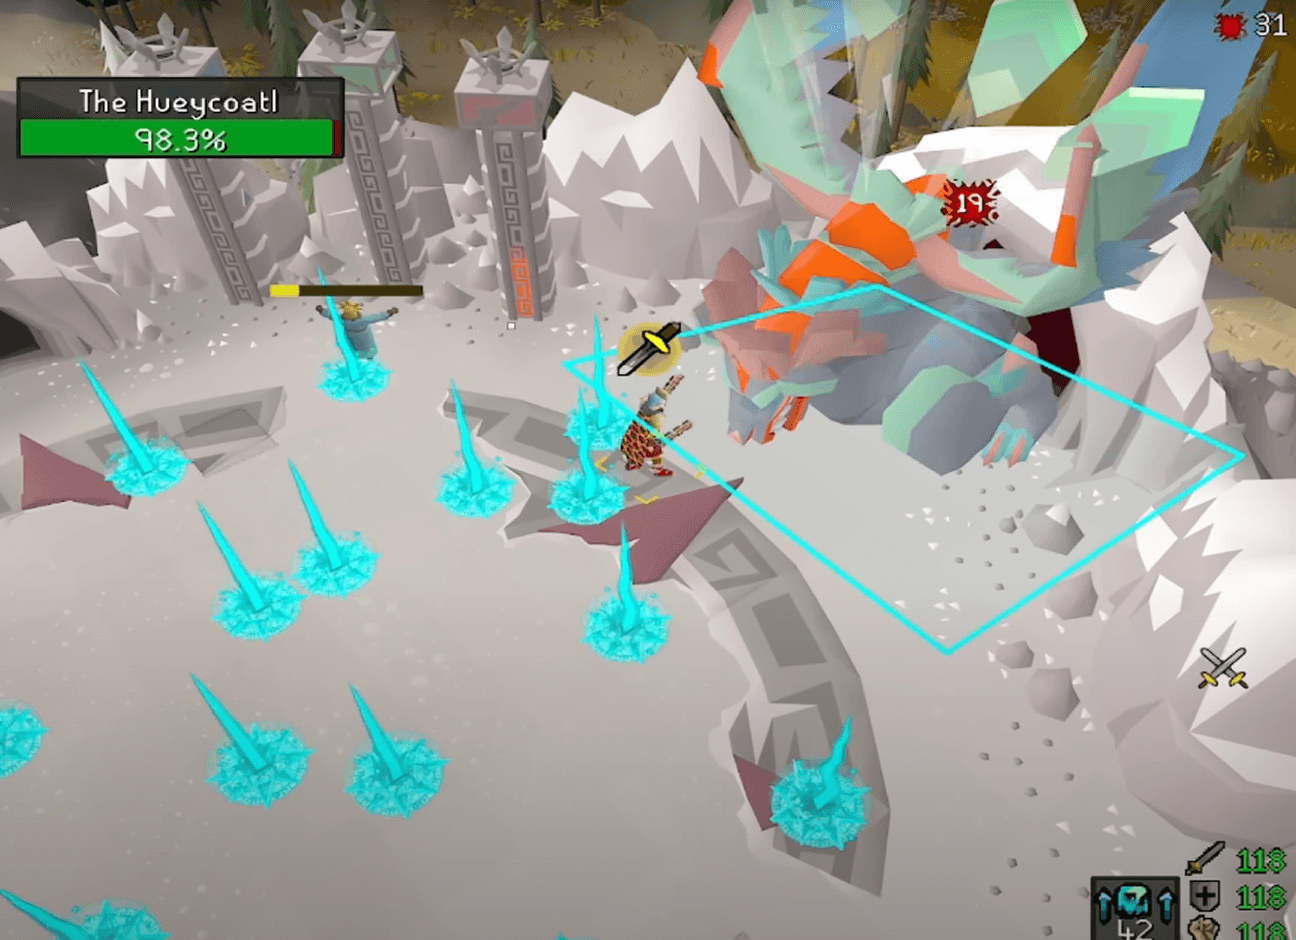
After clearing the way, you can start attacking the main body. This part is pretty straightforward. Use your best damage-dealing crush weapon and keep hitting the boss until it reaches 50% health. During this time, you will continue to dodge its runic and rain attacks.
Third Phase
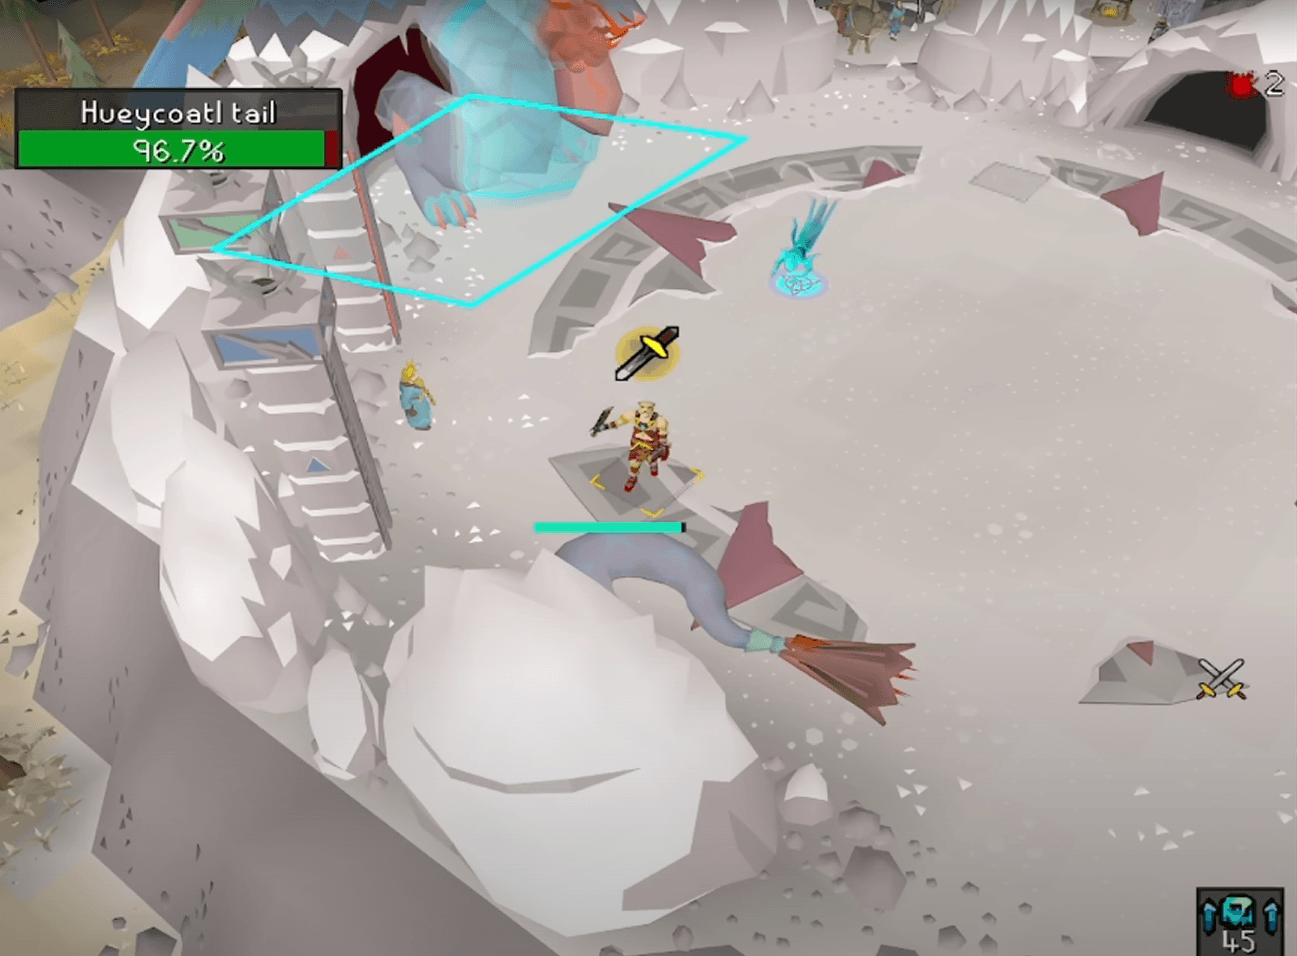
This phase is the tail phase. In this phase, you should avoid falling below 40 health to avoid any unintended death. You will notice that there are two cave openings on the east and the west side of the boss arena. After Hueycoatl reaches 50% health he will cast a barrier around its main body, and its tail will pop out from these caves. As the tail pops out, it will send a shockwave across the entire area. Either tank this hit or do a tile skip to completely dodge it. After that, equip your dual-hitting weapon and start killing the tails. After around 20 seconds, the tail will switch locations, and with each location change, there will be another shockwave attack. Continue hitting the tails until they are dead to move on to the final phase.
Fourth Phase
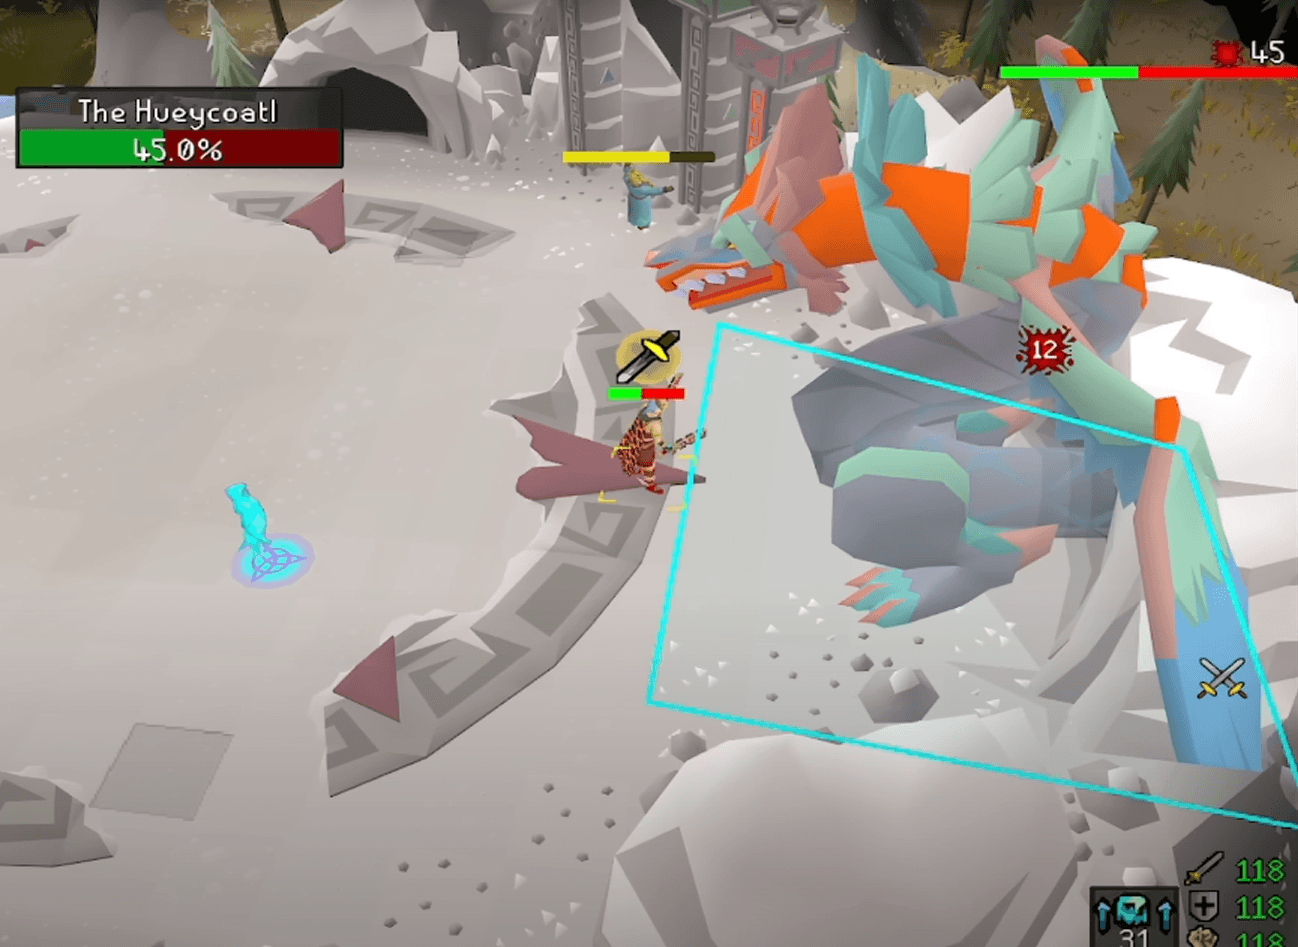
This is the final and the hardest phase. In this phase, Hueycoatl will use every attack it has and in faster intervals. You should stay on your toes and be ready to dodge the attacks as they come your way. The shockwaves will continue to spawn from each of the caves, around every 15 seconds. Keep dodging, praying and hitting until the boss is dead and don’t forget to use your death charge before it dies to restore your special attack!
The most important part of this boss battle is not to panic. Hueycoatl has pretty slow and repetitive attacks, so even if you take damage, just relax and focus on the next attack!
Hueycoatl Group Guide
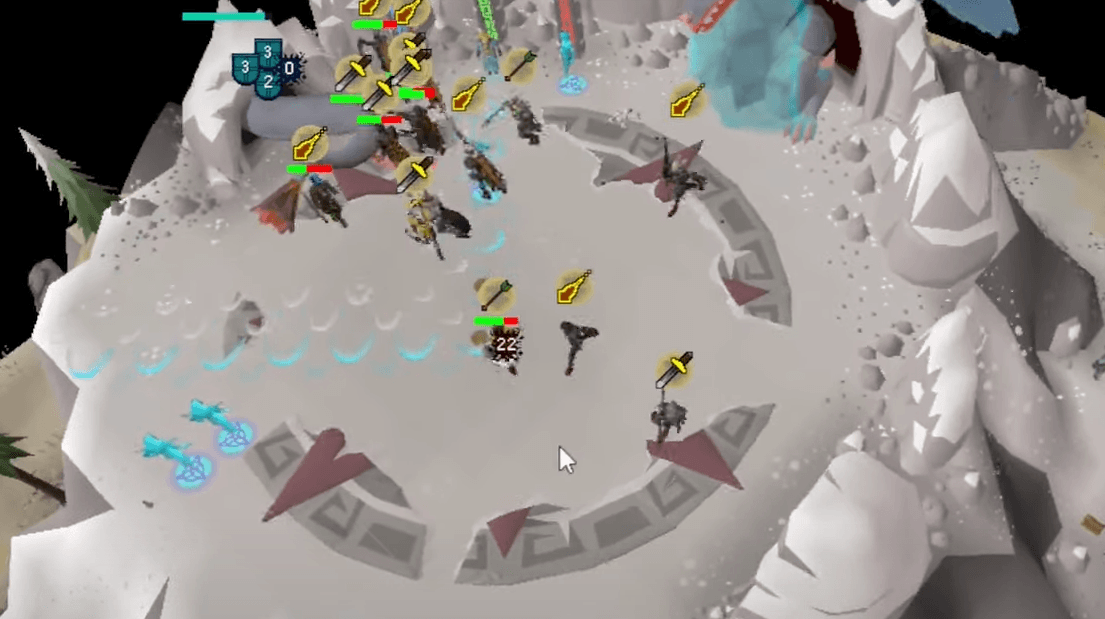
The group version of the fight is pretty similar, with the only difference being the pillar mechanics. Because of this, having a group of only 3 players is recommended for the best group experience.
First Phase
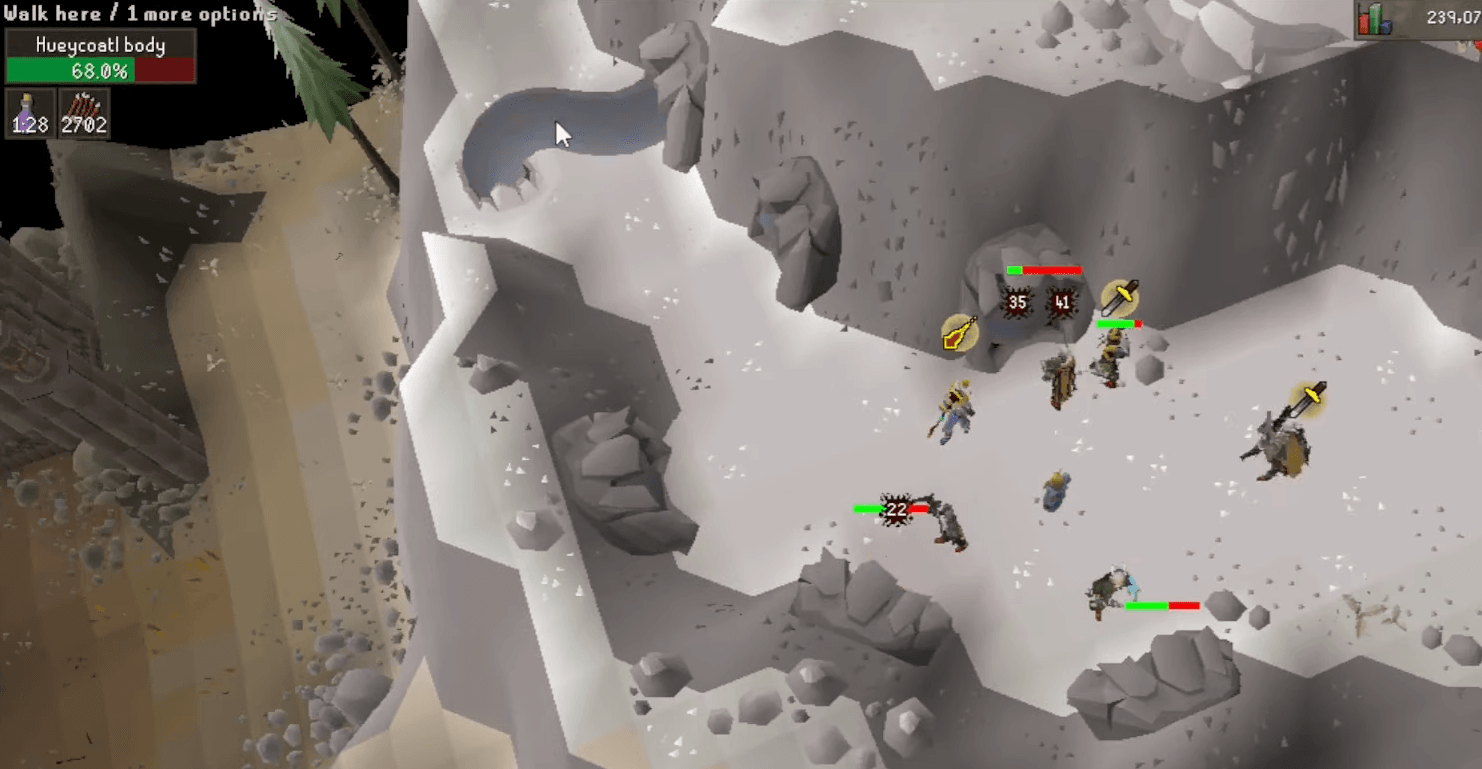
Once you start the climb, switch to your dual-hitting weapons if you have them, and start hitting the tails. You must clear all 4 caves before you can move up the mountain. During this time, spawn your thrall and keep a lookout for any runic or rain attacks to dodge them accordingly.
Each player will receive an attack only visible to them, so don’t get tricked by what your party members are praying against; simply focus on what you are seeing on your screen. This will be the case for all rain attacks throughout the fight.
Second Phase
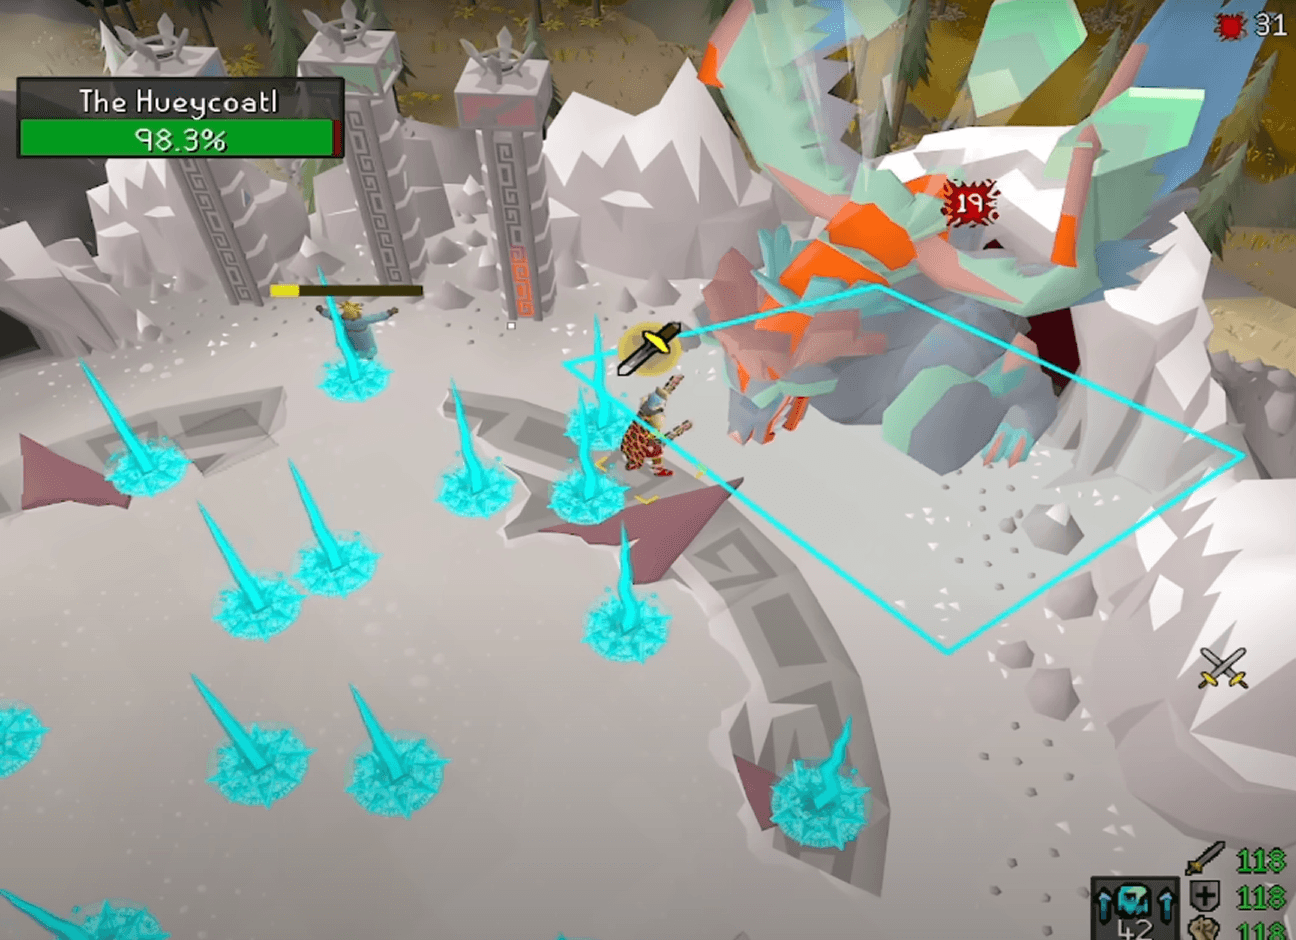
After clearing the way, you can start attacking the main body. This part is pretty straightforward. Use your best damage-dealing crush weapon and keep hitting the boss until it reaches 50% health. During this time, you will continue to dodge its runic and rain attacks.
Also, during this time, have each one of your team members pick a protection prayer and keep it on for the duration of the fight. You can switch this prayer whenever an attack flies your way, but otherwise always have your selected prayers up to charge the pillars. As mentioned before, this will provide a 30% damage boost to you and your friends, so it will speed up this final phase of the fight greatly.
Third Phase
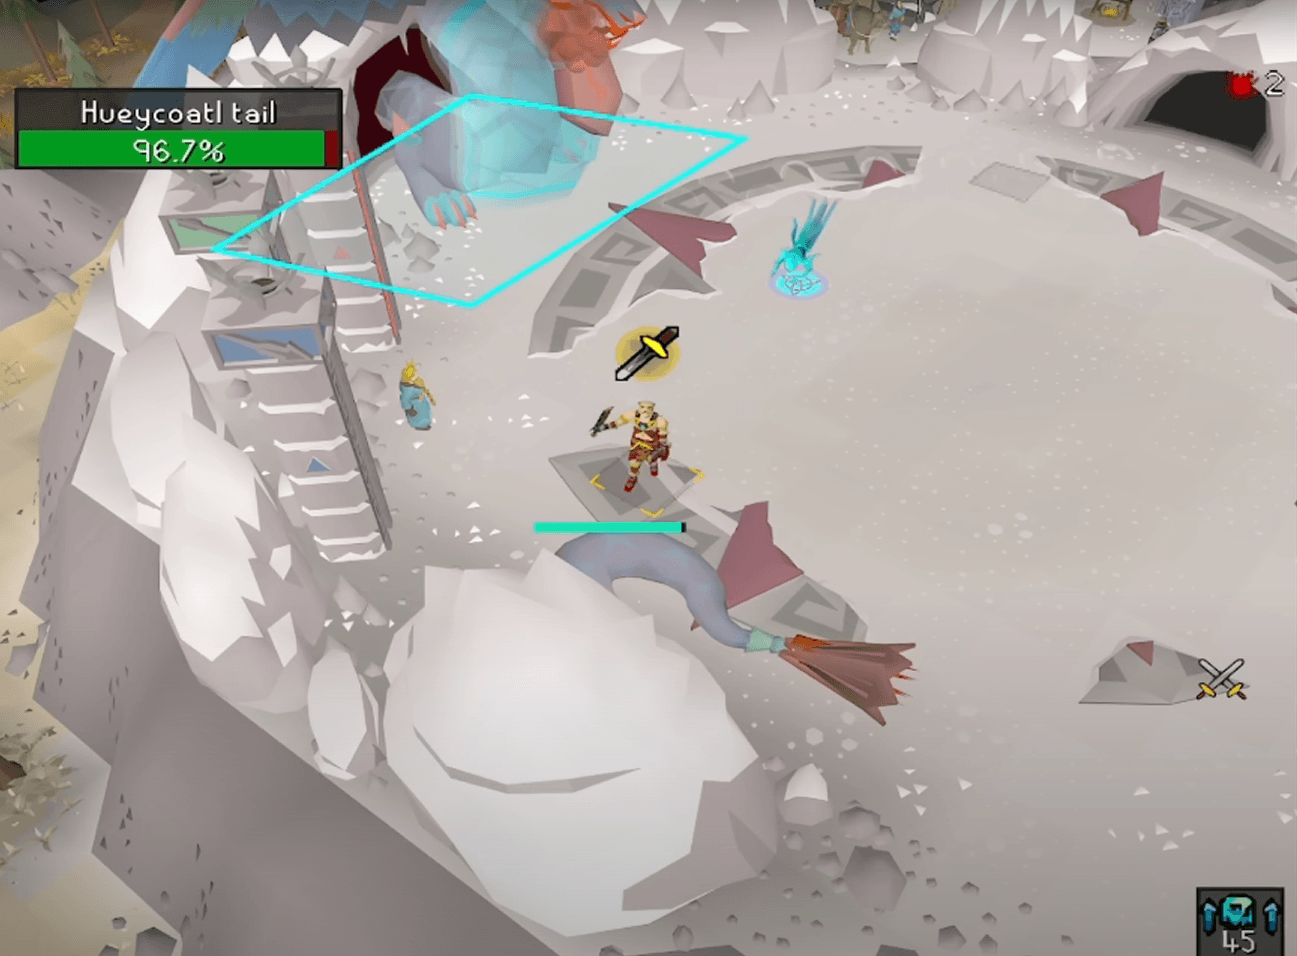
This phase is the tail phase. In this phase, you should avoid falling below 40 health to avoid any unintended death. You will notice that there are two cave openings on the east and the west side of the boss arena. After Hueycoatl reaches 50% health he will cast a barrier around its main body, and its tail will pop out from these caves. As the tail pops out, it will send a shockwave across the entire area. Either tank this hit or do a tile skip to completely dodge it. After that, equip your dual-hitting weapon and start killing the tails. After around 20 seconds, the tail will switch locations, and with each location change, there will be another shockwave attack. Continue hitting the tails until they are dead to move on to the final phase.
Fourth Phase
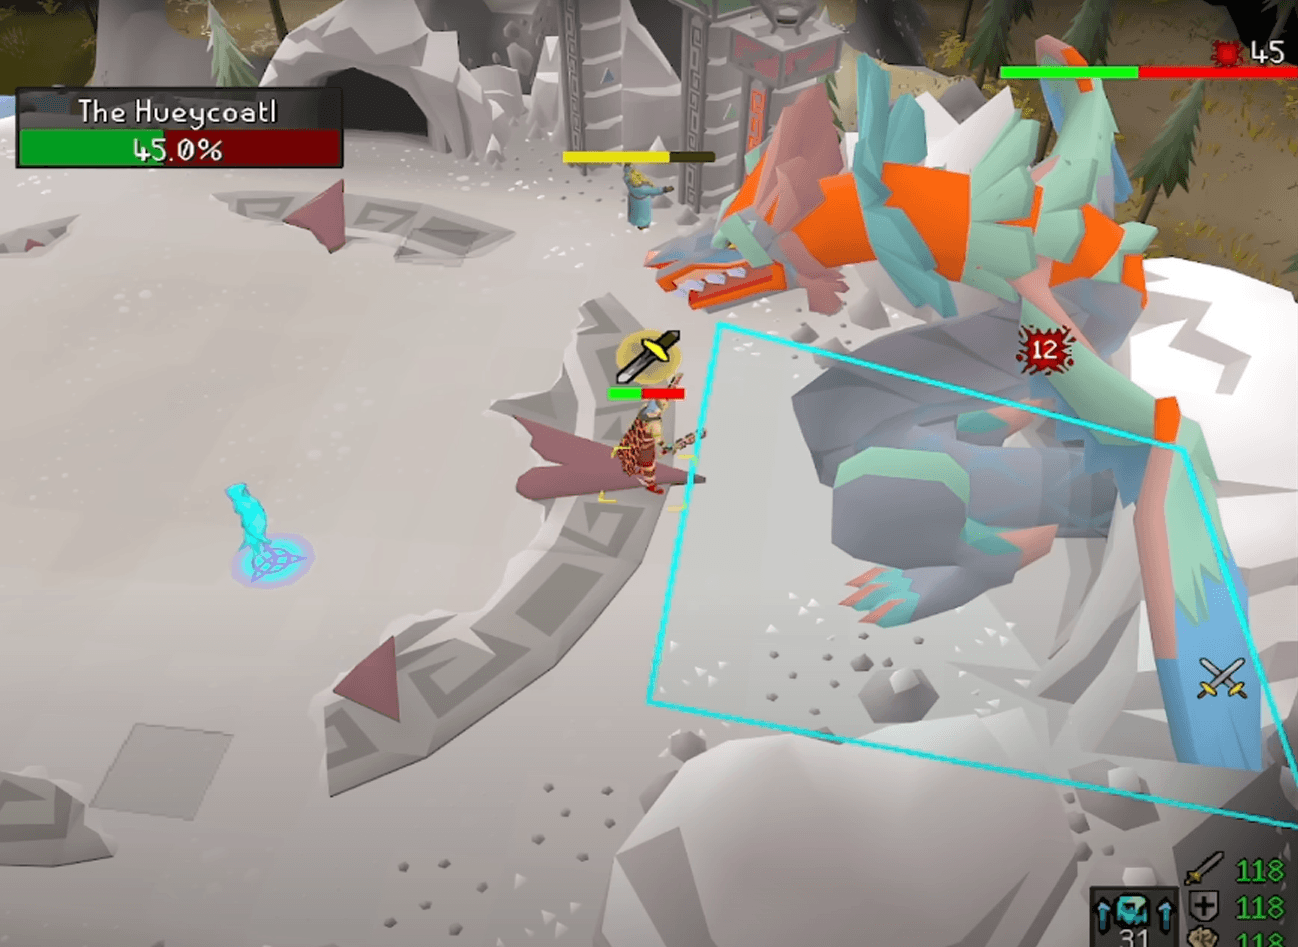
This is the final and the hardest phase. In this phase, Hueycoatl will use every attack it has and in faster intervals. You should stay on your toes and be ready to dodge the attacks as they come your way. The shockwaves will continue to spawn from each of the caves, around every 15 seconds. Keep dodging, praying and hitting until the boss is dead and don’t forget to use your death charge before it dies to restore your special attack!
The most important part of this boss battle is not to panic. Hueycoatl has pretty slow and repetitive attacks, so even if you take damage, just relax and focus on the next attack!
Drop Table
Congratulations! Let’s dive into why farming this boss is a great idea. Not only does it offer three unique rewards with relatively high drop rates compared to other bosses, but it also provides valuable regular loot. These uniques will always have a stable price due to their usefulness. Plus, for all the fashionscape enthusiasts, there’s a chance to snag an exclusive pet drop!
Here is the entire drop table for this boss:
Unique
| Item | Quantity | Rarity | Price |
| Hueycoatl hide | 2–3 | ~1/34.5 | 1.4M |
| Tome of earth (empty) | 1 | ~1/92 | 602K |
| Dragon hunter wand | 1 | ~1/207 | 14.7M |
Weapons and Armour
| Item | Quantity | Rarity | Price |
| Rune mace | 1–26 (noted) | 1/22.67 | 8,206–213,356 |
| Rune scimitar | 1–20 (noted) | 1/22.67 | 14,931–298,620 |
| Adamant platebody | 1–30 (noted) | 1/22.67 | 9,585–287,550 |
| Rune plateskirt | 1–20 (noted) | 1/34 | 38,012–760,240 |
Magic Runes
| Item | Quantity | Rarity | Price |
| Avantoe seed | 1–20 | 1/22.67 | 3,561–71,220 |
| Kwuarm seed | 1–20 | 1/22.67 | 3,609–72,180 |
| Lantadyme seed | 3–60 | 1/34 | 1,296–25,920 |
| Huasca seed | 1–20 | 1/34 | 37,816–756,320 |
| Toadflax seed | 2–40 | 1/34 | 2,490–49,800 |
| Torstol seed | 1–20 | 1/34 | 7,184–143,680 |
| Ranarr seed | 1–20 | 1/34 | 31,147–622,940 |
Other
| Item | Quantity | Rarity | Price |
| Soiled page | 30–80 | 1/13.6 | 151,650–404,400 |
| Adamant bolts (unf) | 15–300 | 1/22.67 | 1,275–25,500 |
| Air orb | 4–80 (noted) | 1/22.67 | 4,976–99,520 |
| Raw shark | 9–180 (noted) | 1/22.67 | 5,724–114,480 |
| Sunfire splinters | 17–350 | 1/22.67 | 10,625–218,750 |
| Sun-kissed bones | 5–100 (noted) | 1/22.67 | - |
| Dragon bones | 2–40 (noted) | 1/22.67 | 8,202–164,040 |
| Cannonball | 60–1,200 | 1/22.67 | 12,180–243,600 |
| Adamantite ore | 6–120 (noted) | 1/34 | 5,634–112,680 |
| Rune dart tip | 6–120 | 1/34 | 6,828–136,560 |
| Limpwurt root | 10–200 (noted) | 1/34 | 6,480–129,600 |
Tertiary
| Item | Quantity | Rarity | Price |
| Clue scroll (hard) | 1 | 1/50 | - |
| Tooth half of key (moon key) | 1 | 1/150 | - |
| Huberte | 1 | 1/400 | - |
Thanks for reading this guide, hope it helped you master this boss and make bank! If you are looking for any other boss guide, you can check out our blog page by clicking here!